
Archiving a Logic Project
Recording, producing and mastering a song is a long arduous process, and involves listening to the tune in excruciating detail about a million times. After finally finishing, it’s all too tempting to just walk away, and never want to hear it again! But it’s a good idea to spend a few minutes to prepare the project for long-term archival storage, exporting midi files and audio stems with and without processing, etc. You never know when you’ll need to revisit this project down the line, possibly in some future where your DAW and plugins no longer work.
You may want to go back and make a remix or an instrumental version, or maybe re-master it. I have many songs from back in the day that were recorded in old versions of Cubase and pre-Apple Logic that can’t be loaded anymore, as those DAWs evolved and changed their file formats. It would have been smart to have exported the data from those projects!
These instructions are for Logic Pro 10.7.9, but similar steps should apply in any DAW.
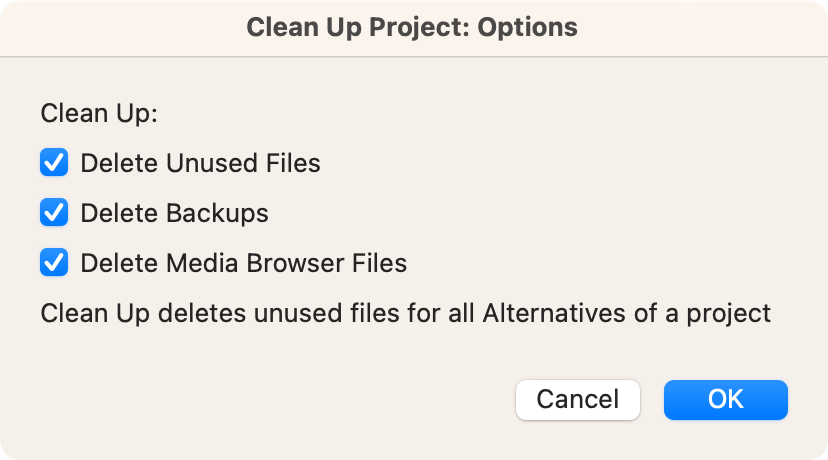
Cleanup
Over the life of the project there will be many audio files for aborted takes, etc- and it’s worth cleaning these up now to free up some disk space. File>Project Management>Cleanup:
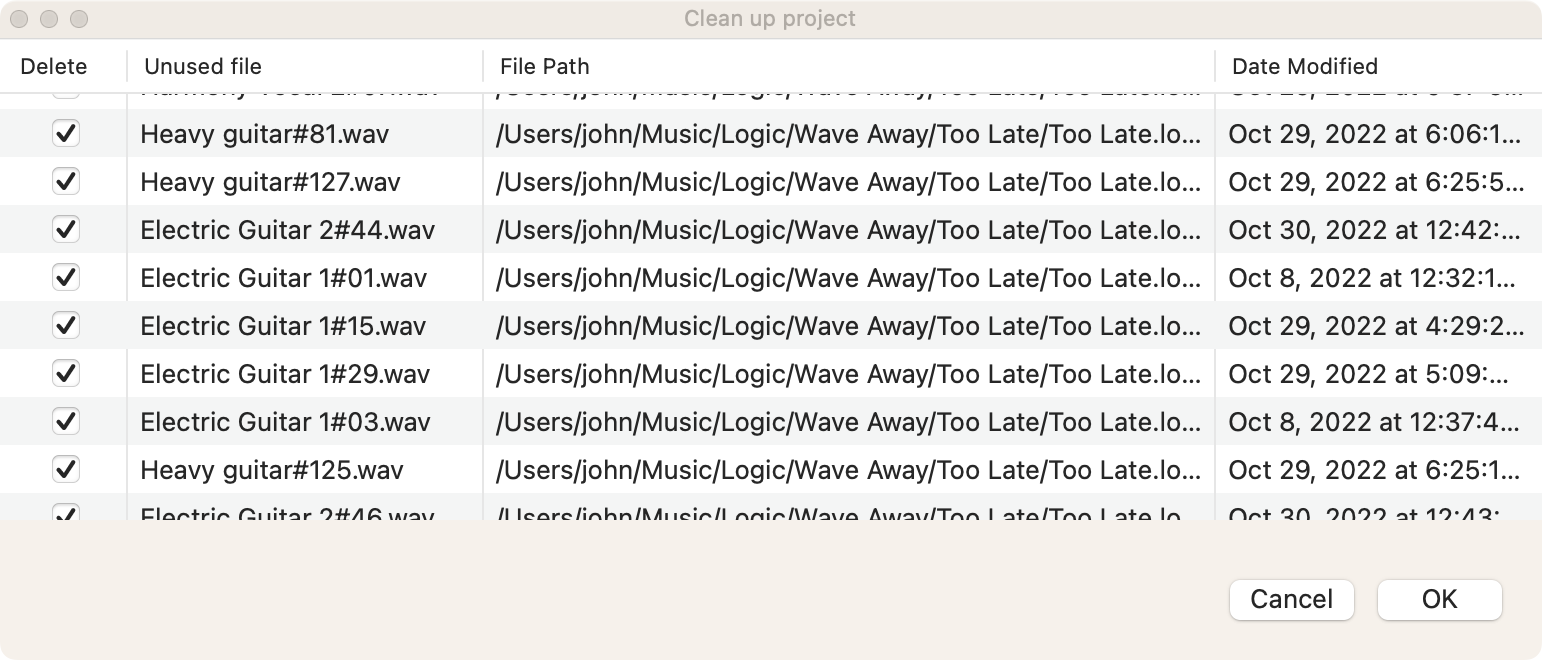
Don’t worry – it will show a list of files it will delete, and ask for confirmation, like so:
Consolidate
Use File>Project Management>Consolidate to collect any resources like external samples, audio files, etc – into the project folder (rather than referencing them wherever else they may be on your disk):

Export MIDI Tracks
Create a new Archive folder next to the project file, and create a “MIDI” folder within it.
- Note- make sure the software instrument tracks are powered on, and not muted. In the next step, those tracks will be bounced in place, and then muted, so need to export MIDI first.
- In Logic, do File>Export>All MIDI Tracks as MIDI File. This will contain all regions on their own named tracks, and embed tempo/time signatures/etc. (Exporting individual tracks doesn’t work well as they lose their relative positioning, unless you bounce/join all the regions first).
- In any plugins that contain their own midi data (like Superior Drummer), export them from with that plugin as separate midi files
Prepare Tracks for Audio Export
Tidy up track names – these will be used as part of the exported track file names, so
- make sure they’re correct and no duplicates.
- add an identifier like “Sum” at the end of summing stacks (this will help to distinguish the the summed wave file from the individual tracks within the summing stack)
Create tracks for all send busses, so reverb/delay/etc will also get exported as tracks.
- Multi-select the busses in the mixer by shift clicking them
- right click and choose Create Track
For each software instrument track, do a bounce in place
- Edit>Bounce and Join>Bounce Regions in Place. Have it create a new track.
- Note, for plugin tracks with embedded song midi data (e.g a drum machine with its own grid editor), you’ll need to pencil in a region the whole length of the song in order for the bounce to contain the full length of drums.
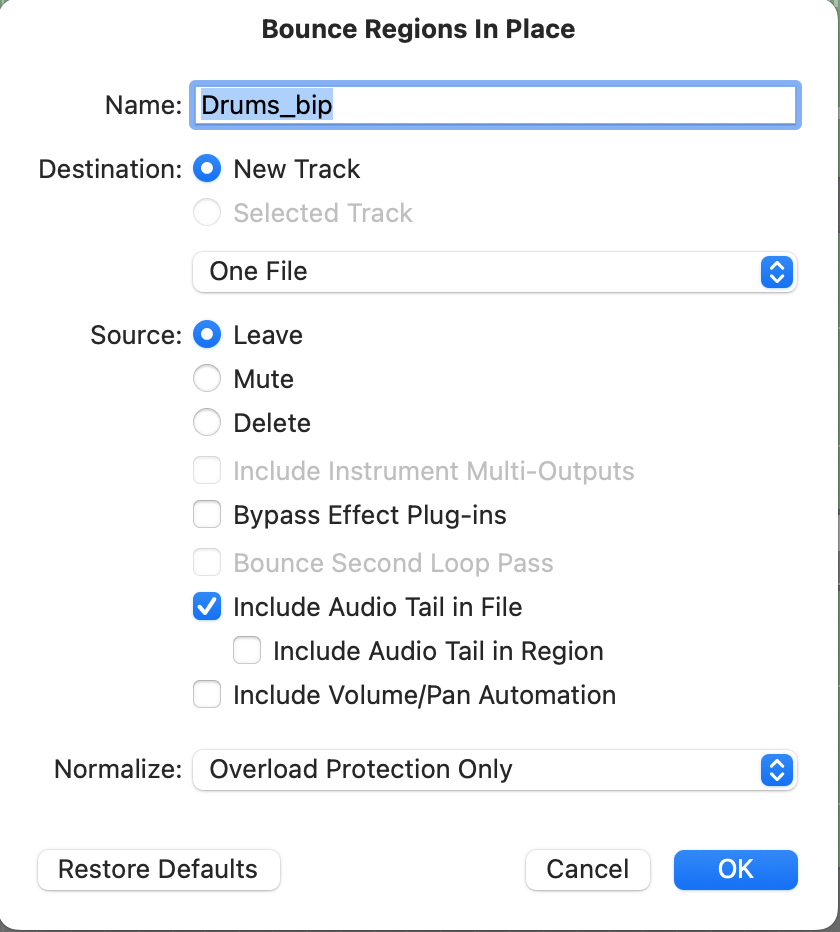
- I set the Source to Leave instead of Mute, since after the bounce, I mute and power-off the original tracks in their entirety, so there’s no point having it individually mute the regions.
- Then, I mute and power down the original track. Be sure you have exported MIDI in the previous step before doing this.
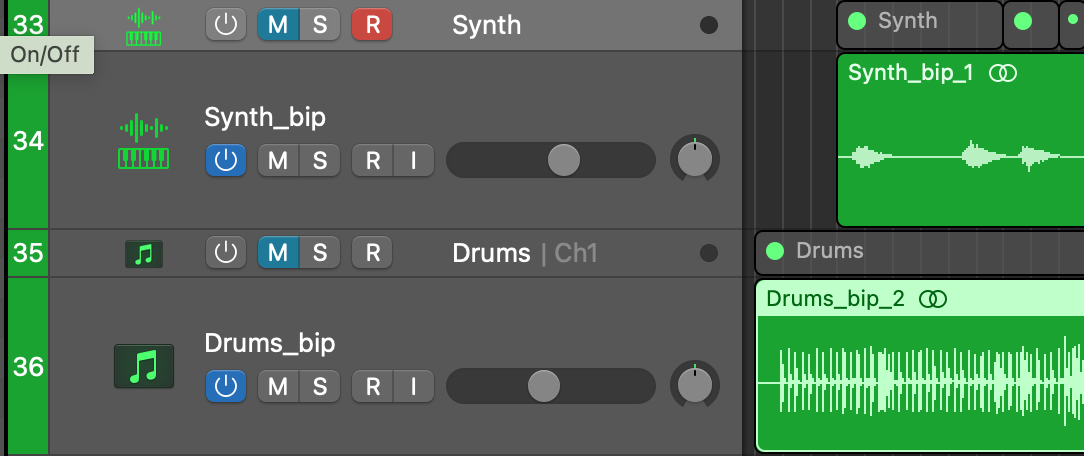
- Shrink the original track size down (by dragging its bottom edge in the track area), so it just looks like a header above the first track:
Export Audio Tracks
Export two sets of all the track audio, one with effects and automation, and one without effects processing. This is in case, some time in the future, plugins stop working, or licenses expire, or a Logic update breaks things.
Create new empty subfolders in the Archive folder: “Tracks – processed” and “Tracks – unprocessed”.
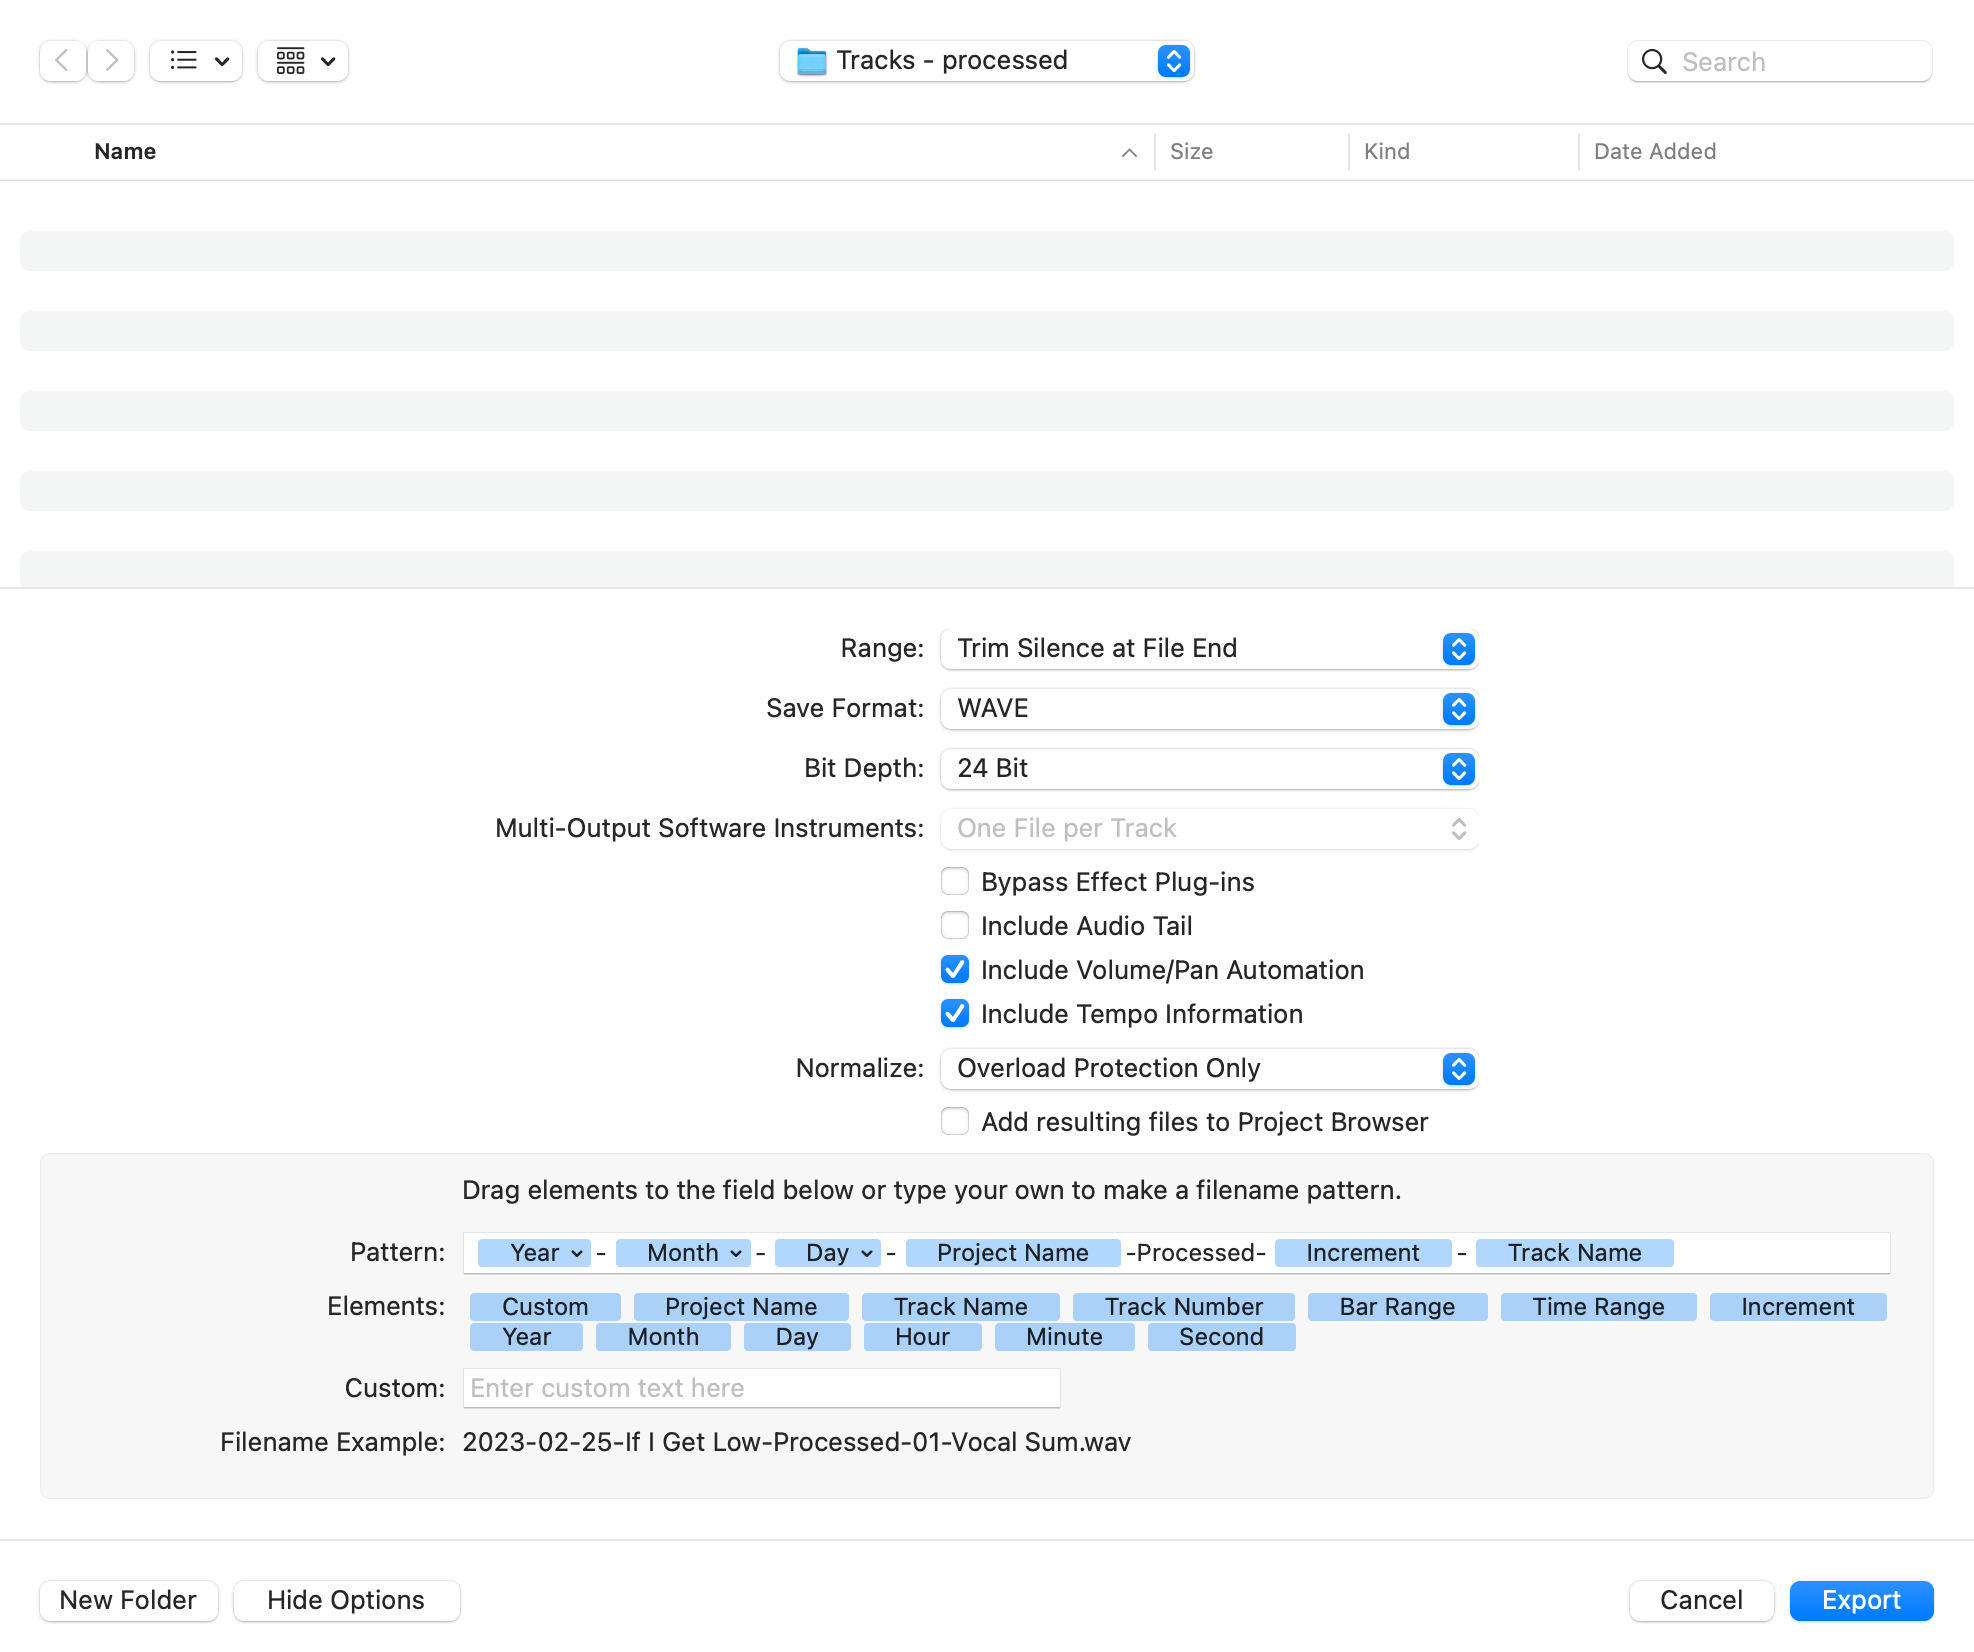
File>Export All Tracks as Audio Files, select the Tracks – processed folder.
- Range: Trim Silence at File End
- Save Format: Wav
- Bit Depth: 24
- Include Volume/Pan Automation
- Normalize: Overload Protection Only
- Naming scheme including date, project name, the word Processed, the track index and name: $Yearyyyy,-,$MonthMM,-,$Daydd,-,$Project Name,-Processed-,$IncrementFileCount,-,$Track Name
The export will take awhile. Note, if you look in the output folder in Finder while it’s exporting, the file names will look wrong. When it’s finished, it will rename the tracks per your naming scheme, and delete any empty files.
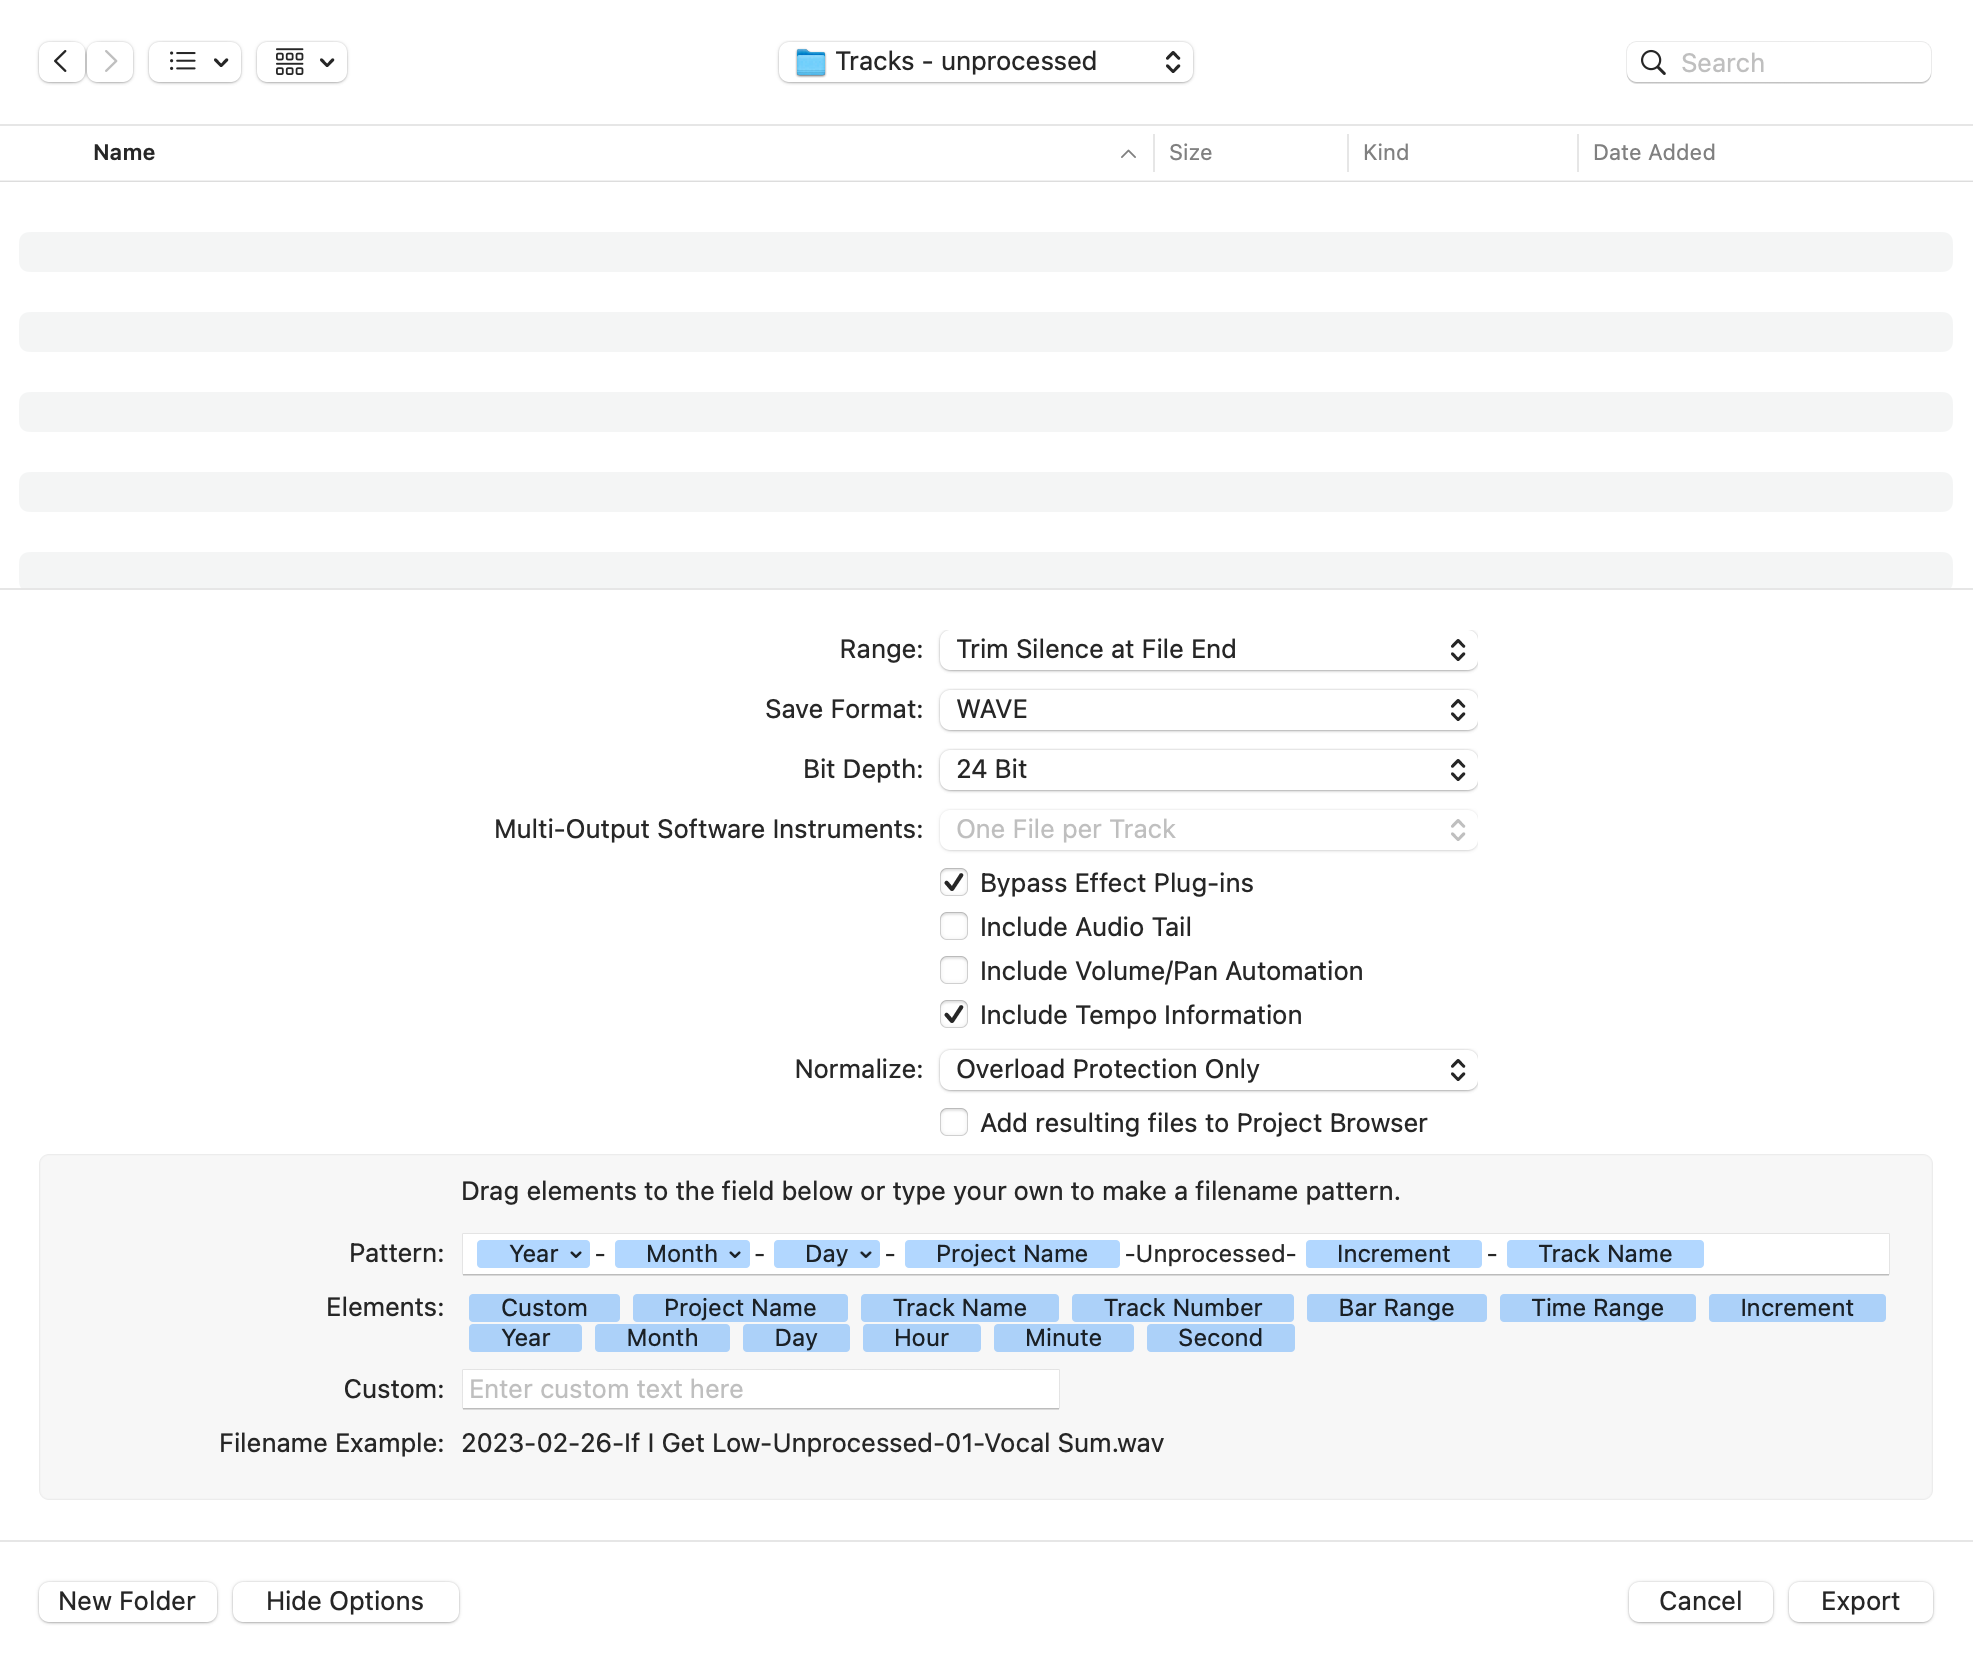
And then do another export, but with “Bypass Effects Plug-ins” turned on, and “Include Volume/Pan Automation” turned off. This will be much faster.
File>Export All Tracks as Audio Files, select the Tracks – unprocessed folder.
- Range: Trim Silence at File End
- Save Format: Wav
- Bit Depth: 24
- Normalize: Overload Protection Only
- Naming scheme including date, project name, the word Unprocessed, the track index and name: $Yearyyyy,-,$MonthMM,-,$Daydd,-,$Project Name,-Unprocessed-,$IncrementFileCount,-,$Track Name
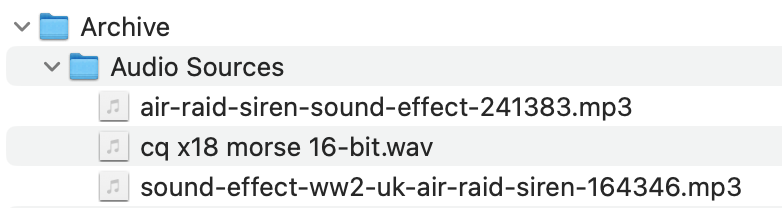
Collect Audio Sources and Samples
If your project makes use of any samples, loops, found audio, etc – it’s a good idea to collect these in the Archive folder.
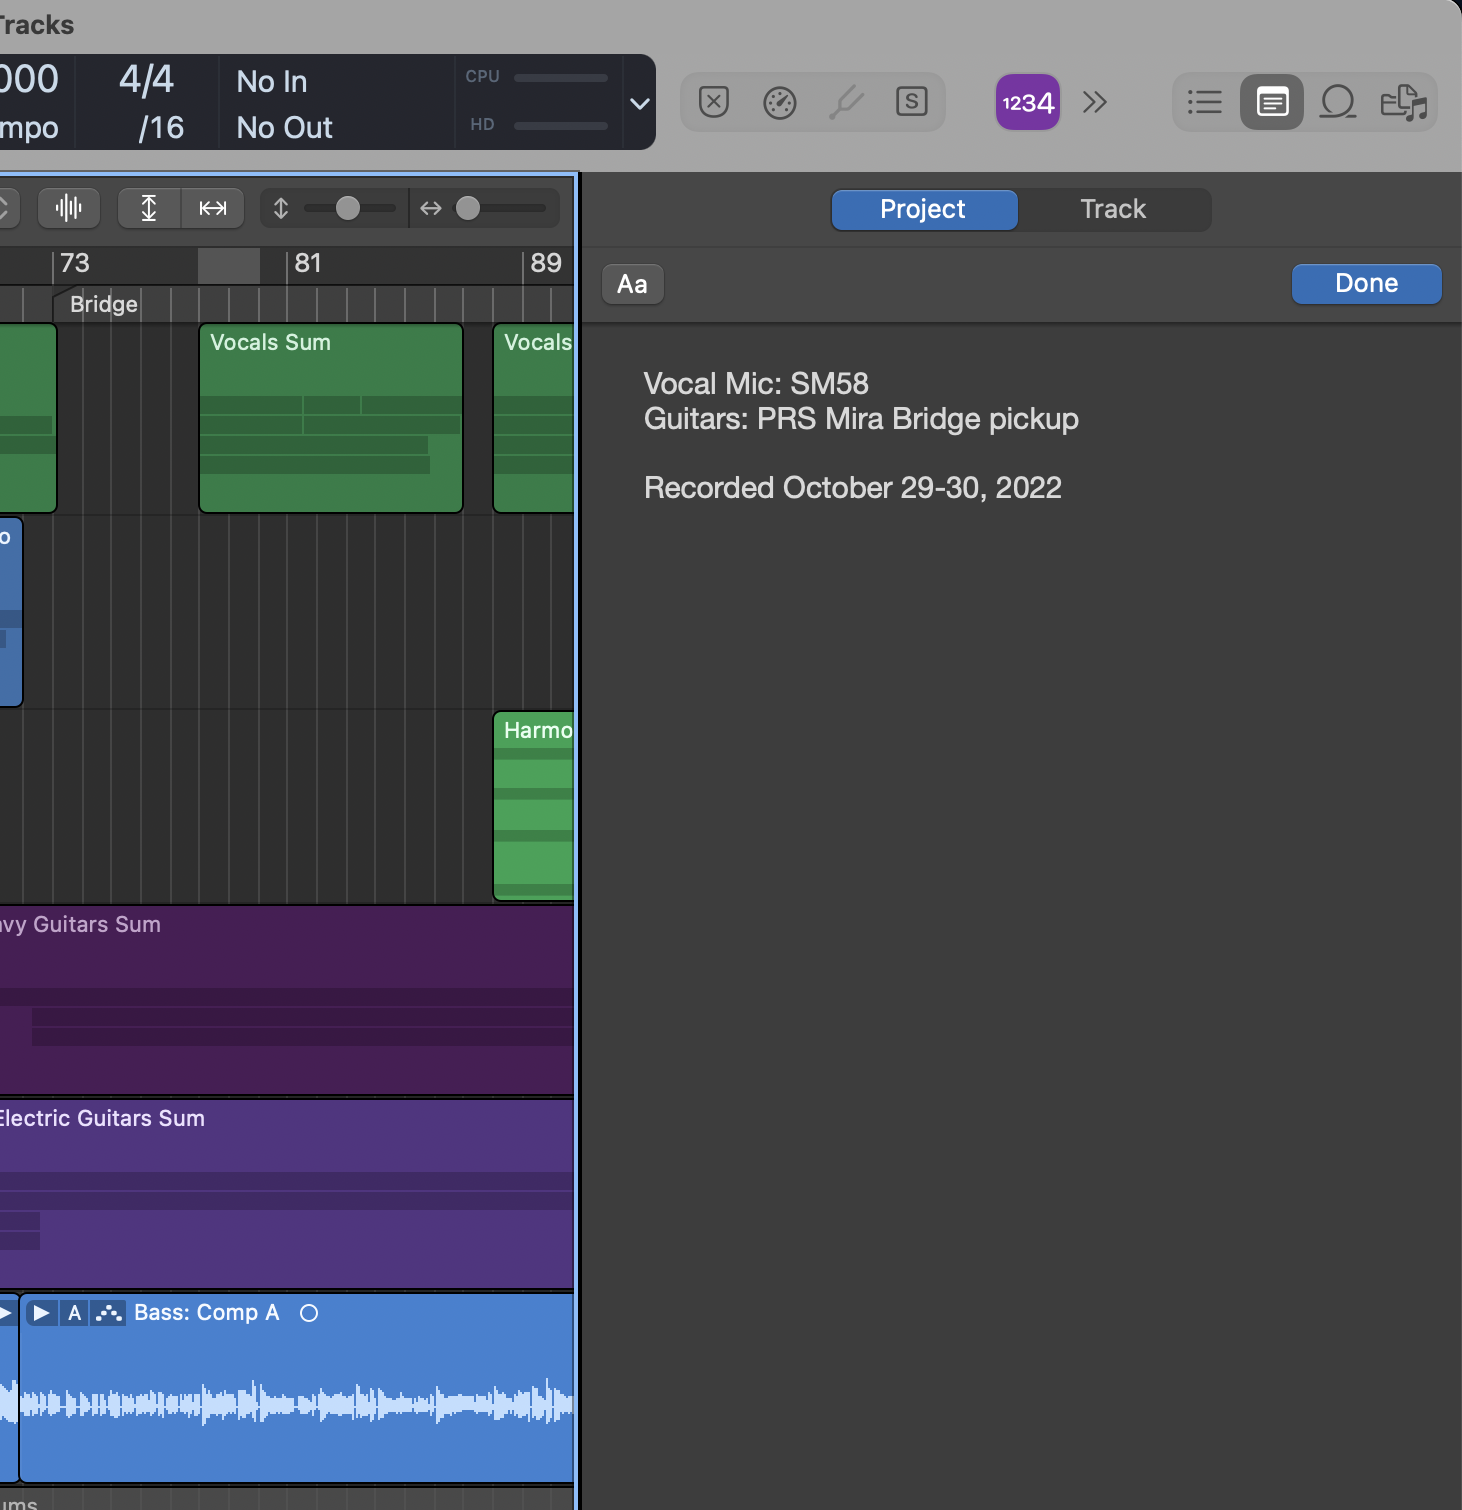
Add Project Notes
Click the notepad in the top right corner of Logic, and add any notes to help remember details – vocal mics, guitars and pickups used, etc, in case ever need to go back and add/match anything.
Leave it neat and tidy
Before the final save of the project, tidy up a bit:
- Close any open Plugin windows.
- Close any open editors.
- Collapse the Global Tracks area (Arrangement/Markers/Signature/Tempo)
- Turn off Flex mode if it’s on.
- Collapse all summing stacks. (Option-click the disclosure caret of one to change them all at once)
- Maybe remove bypassed plugins. (Settings at top of a channel strip, and select “Remove Bypassed Plug-ins”.
Backup and Store Safely
Now, save your archived project and the Archived folder full of exports. But don’t keep all your eggs in one basket. Follow the 3-2-1 backup rule (3 copies of the data, stored on 2 different types of storage media, and one copy should be kept offsite). Copy it to an external disk, send it up to cloud storage, burn it to a DVD, etc.
That’s it!
References
Here are links to a few resources that may be helpful:
https://support.apple.com/en-mt/guide/logicpro/lgcpe2a9f868/mac
https://www.charlescleyn.com/blog/how-to-bounce-stems-in-logic-pro
https://whylogicprorules.com/archiving-projects