11 tips for more productive songwriting and recording at home
It’s been awhile since my last video. As you may have noticed in my blog posts over the last couple years, I’ve been super-busy making new synthesizers and plugins at Korg. And in my limited free time, I’ve been trying to focus more on songwriting and recording, rather than guitar tweaking and tone chasing.

It feels like a lot of years went by there, where I kinda forgot about the joy of creating new music, and was distracted by all the little things.
So in this video, I talk a bit about some changes I’ve made in my office, which doubles as my studio, to make it a more productive creative space. And also some improvements in my approach and workflow that have allowed me to be more efficient and confident in the studio.
And this ties in with an announcement- I’ve been recording a lot of new music in the last year, and I’m excited to share that I’ve finally released my first EP as a solo artist – Wave Away. Please take a listen and let me know what you think! On Spotify, Apple Music, or wherever you like to listen.
The Spark vs Lighting the Fire
I don’t know if you’re like me, but when I have a musical idea or a creative spark, it takes embarrassingly little to get side tracked or lose my momentum. If I have to clear the space, set up a mic stand, choose a mic, get out the pop filter, find a cable, plug in an interface, find its power adapter, open the guitar case, get out the guitar, put on a strap, tune it up, find another cable, set up the amp, find another microphone and another mic stand, and another cable, and set the levels… At some point, what was I even planning to do here?! The spark is gone, and I spent all my energy on the setup.
So anything that can help shorten the path between the spark and lighting the fire is worthwhile. Maybe some of these suggestions will be pretty obvious, but the fact that I’ve gone years without doing them implies that the reminders may be helpful!
01. Get organized and reduce clutter
I’m starting with the least exciting suggestion- but it’s actually quite important. I use the same room as my office and my studio- so there’s a tendency for stuff to pile up- notebooks, cables, parts, boxes with unfinished projects. So when I finally get some free time to record, I don’t want to just be faced with all my work stuff.
So, tidying up the space and getting organized is a good start. Get a bit minimalist, and add whatever little touches might help you get into a creative head space.
02. Make sure your instruments are always ready
I used to always keep my Taylor acoustic in its case, because it was expensive! I didn’t want it to get dinged, and they kind of put the fear in you about humidity changes damaging your guitar. But seriously, it’s ridiculous, it’s not a Stradivarius in a museum! I love this guitar and I want to play it. I don’t want it tucked away in its case in the corner. And as stupid as it sounds, having to go open up the case, get out the guitar, find a strap – it’s all just enough of a psychological barrier to prevent me from playing sometimes. I guess maybe I’m just lazy, but I know I’m not alone in this.
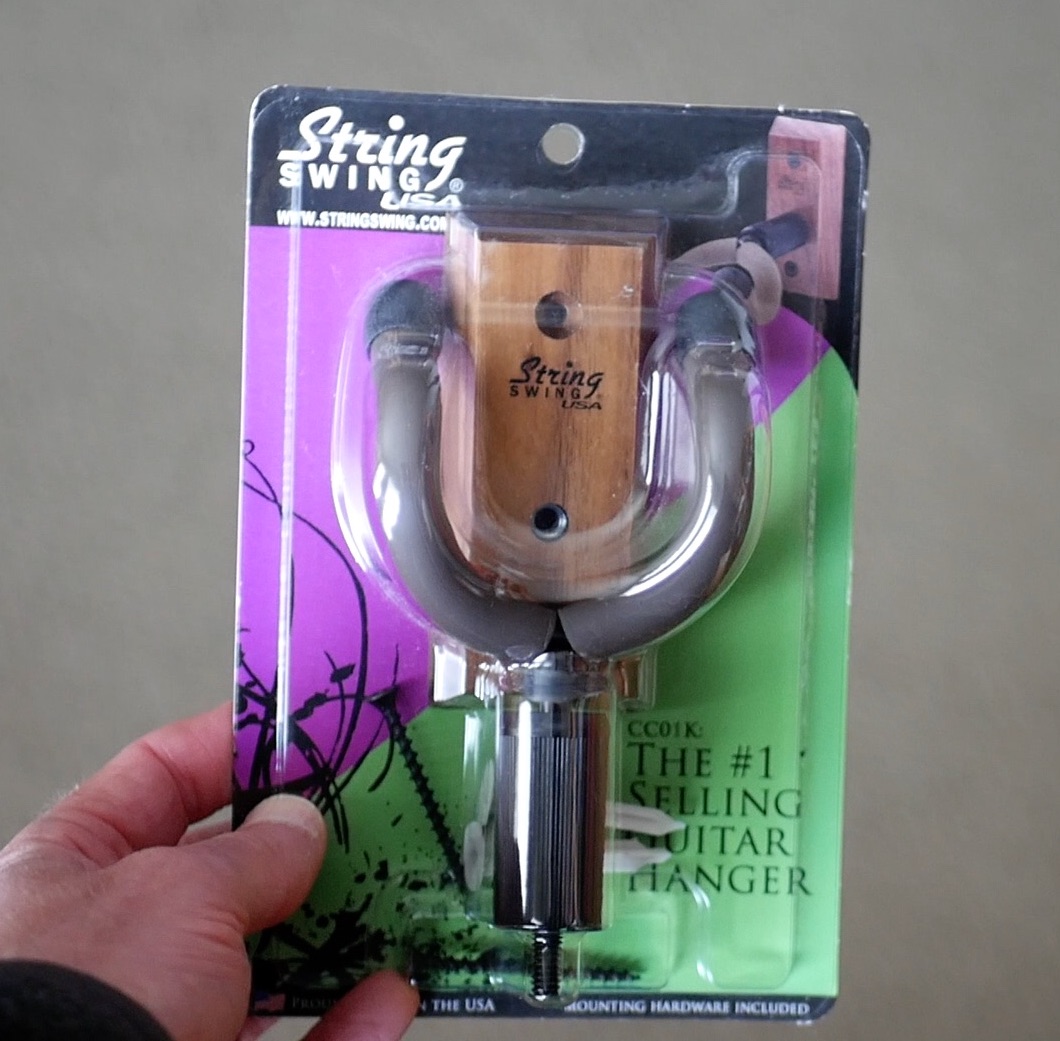
Same for my electric guitars and bass. I bought some of String Swing guitar hangers, and I always keep my favorite guitars hanging up within reach, tuned up and ready to go. I find the wall hangers better than having guitar stands on the floor – since my space isn’t very large and floor space is at a premium.
Of course, all this applies to other instruments too! Keep your synths plugged in and ready to go, keep your harmonica out on the shelf… you get the point! Maybe keep the Stradivarius in its case tho?!
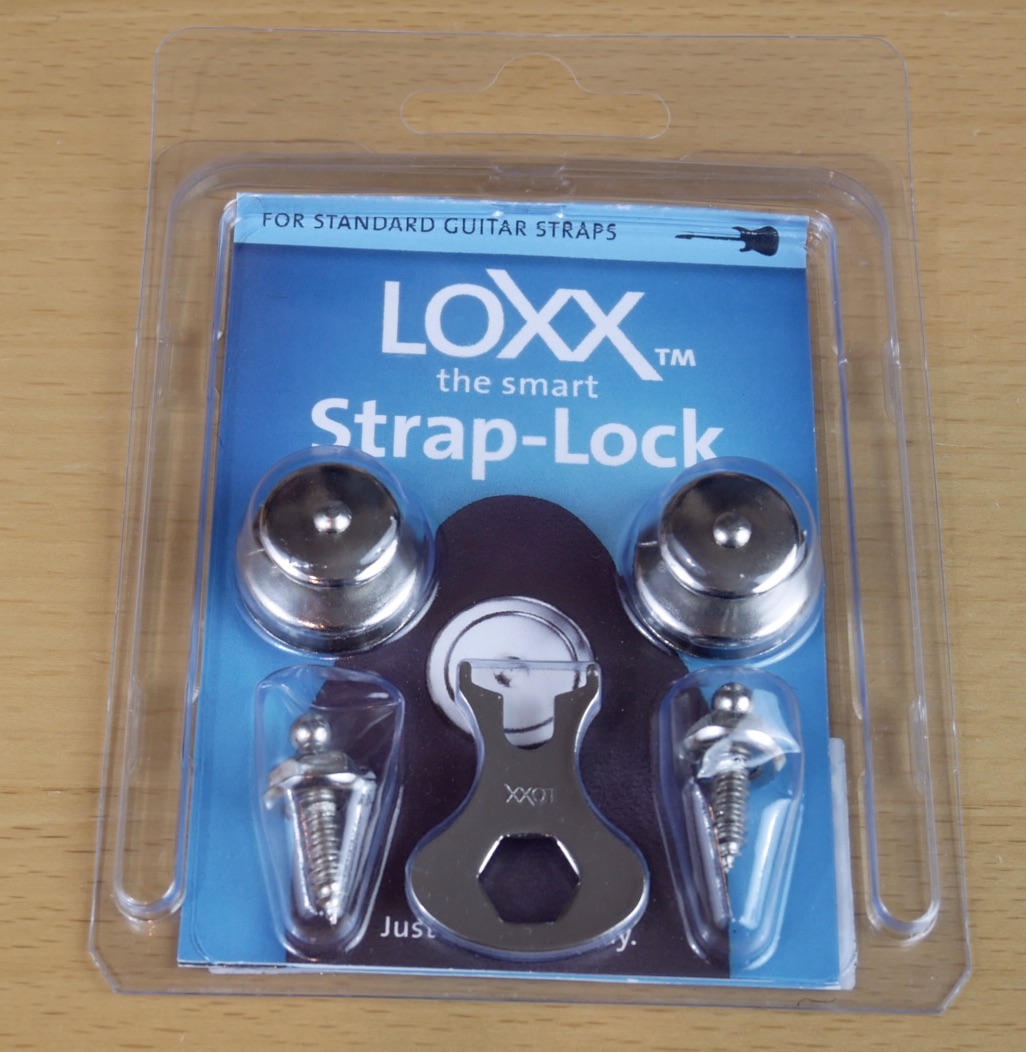
Also, I try to use just one strap for all the electrics and share it around. I use these LOXX strap locks – I bought one set to attach to the strap, and also a 5 pack of fasteners to attach to the various guitars.
Another quick tip – when you have an open acoustic guitar in the room, it can often resonate when you’re talking, singing, or playing another instrument. So I put a damper between the strings and the fret board when I’m not using it- my daughter crocheted a little thing that I shove in there, but you could just stick a little piece of rubber in there or something.
03. Always have a microphone set up and ready
Having to set up up a mic to record is the biggest time sink!
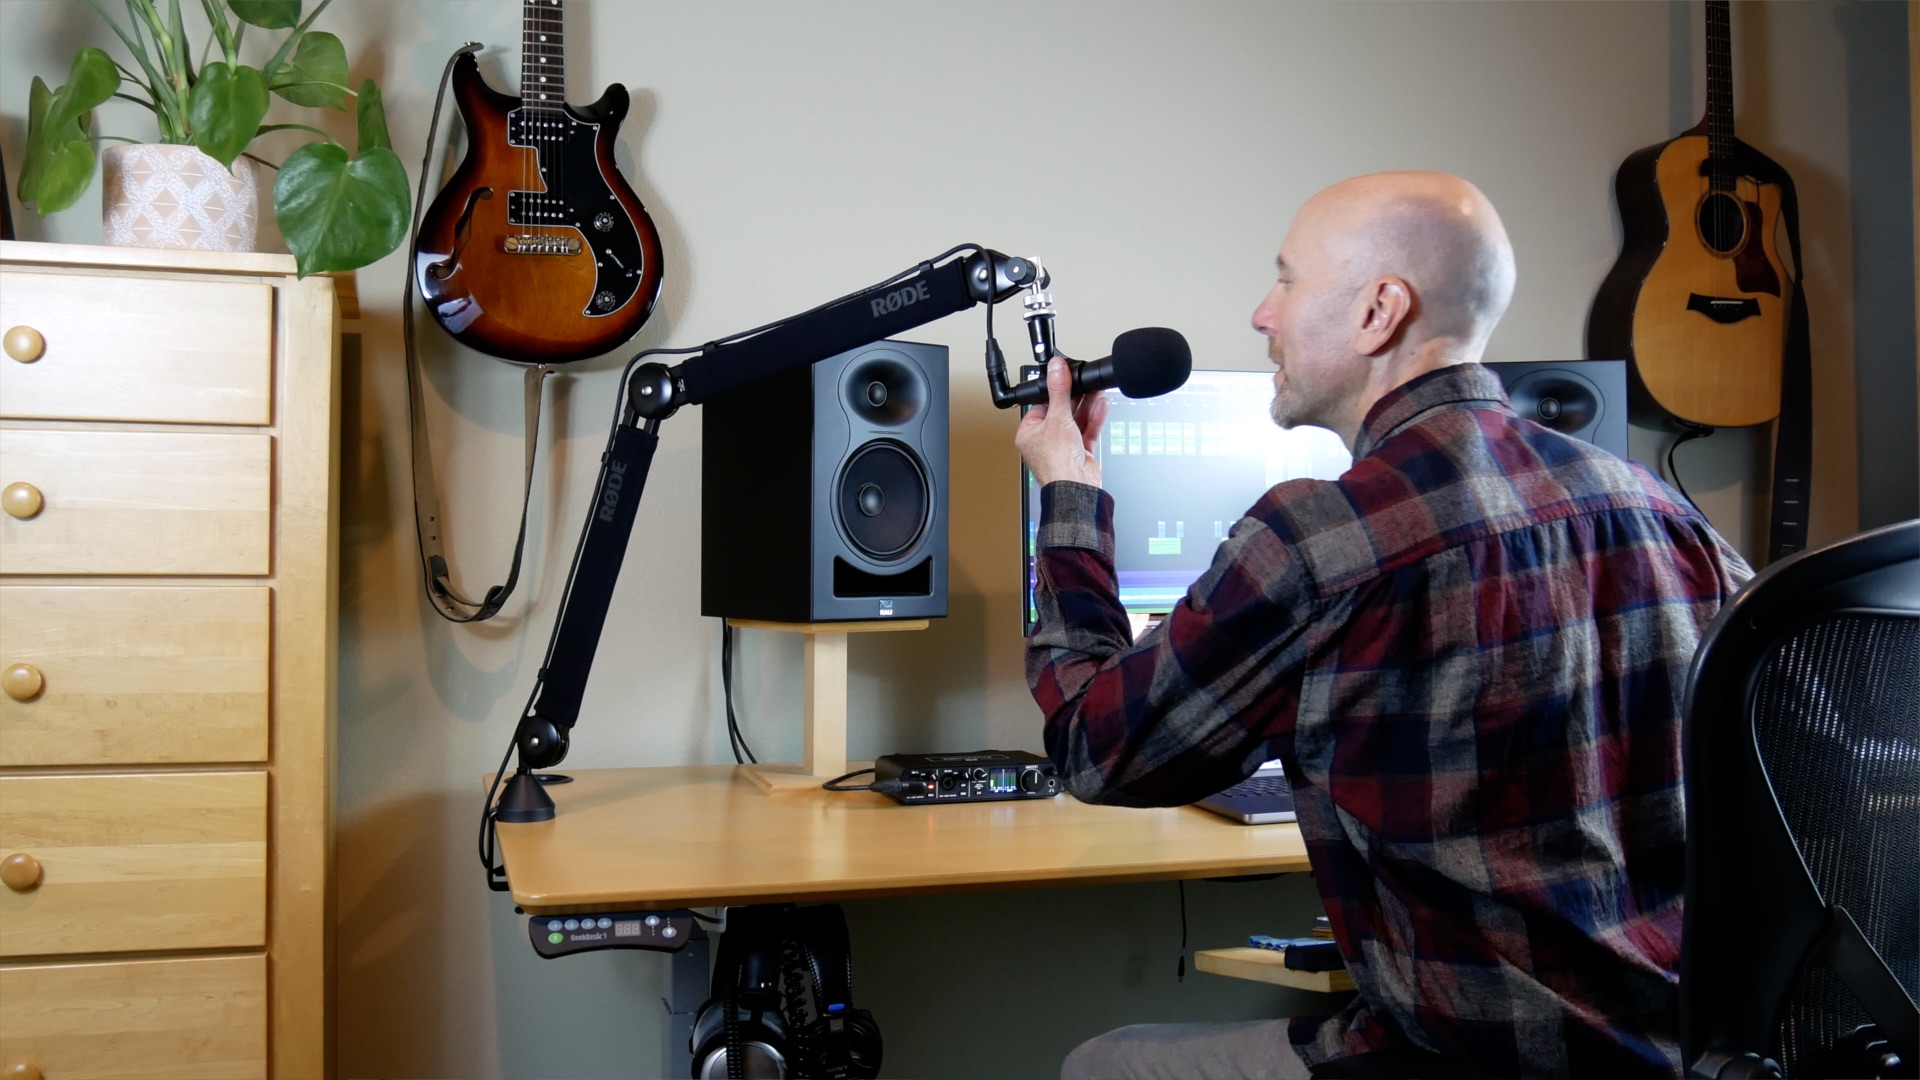
For vocals, I decided to buy a nice desk boom and keep a mic permanently set up, ready to go. I chose the RODE PSA1+ boom stand – it moves silently, holds its position perfectly, and looks pretty nice, except for the huge bright white RODE logos on it! I made a stencil and spray painted the logos black!
I like to stand when I sing. I use a sit/stand desk so it’s easy to raise the desk when singing. But even in the seated position, the boom stand can extend up pretty high without any issues.
Also, to avoid the clutter of coils of extra cable, I bought some right angle Neutrik XLR connectors (male and female) and cut my mic cable to exactly the right length – it required a bit of soldering, but was definitely worth it. Looks very clean on the desk this way!
Since I’m going to leave this mic set up here all the time, I didn’t want anything delicate, or sensitive to humidity. Nor did I want elaborate suspension mounts to deal with any noise from bumping the table, etc. And I didn’t want to have to use pop filter – those things always just seem to be in the way! So, I ruled out my big condenser and ribbon mics.
What comes to mind you think of a dynamic mic, with good resistance to handling noise, and a good built in pop filter? The Shure SM58 is the classic workhorse, and that’s what I’ve got set up here now. And if unscrew the ball-end, it’s basically an SM57. The thing is basically indestructible and sounds good. You often think of the SM58 as a stage mic, but the SM58 and 57 were used in recordings by John Lennon, Billy Idol, Rod Stewart, and countless others, so no need to overthink it. That said, there’s plenty of other mics that could suit these requirements above – just don’t choose something that you’ll have to worry about leaving it out all the time! And maybe save the condensers and ribbons for more special case recording.
Of course, if you need or want to, it’s easy to swap in another mic on the same boom stand! But it’s really nice to leave a mic always set up for the general vocal-recording case, with the preamp level always set and ready to go.
I recorded all the vocals for my EP on this SM58. It was super handy when I was in the middle of mixing, and realized I wanted to re-record a part, or change a lyric, I just reached for the mic, pulled it over and hit record, and the results would be pretty much consistent with what I recorded previously (as long as my voice with cooperating that day). It was really nice to not have to go and redo the entire mic set up and try to match everything.
04. Hang up the headphones within reach
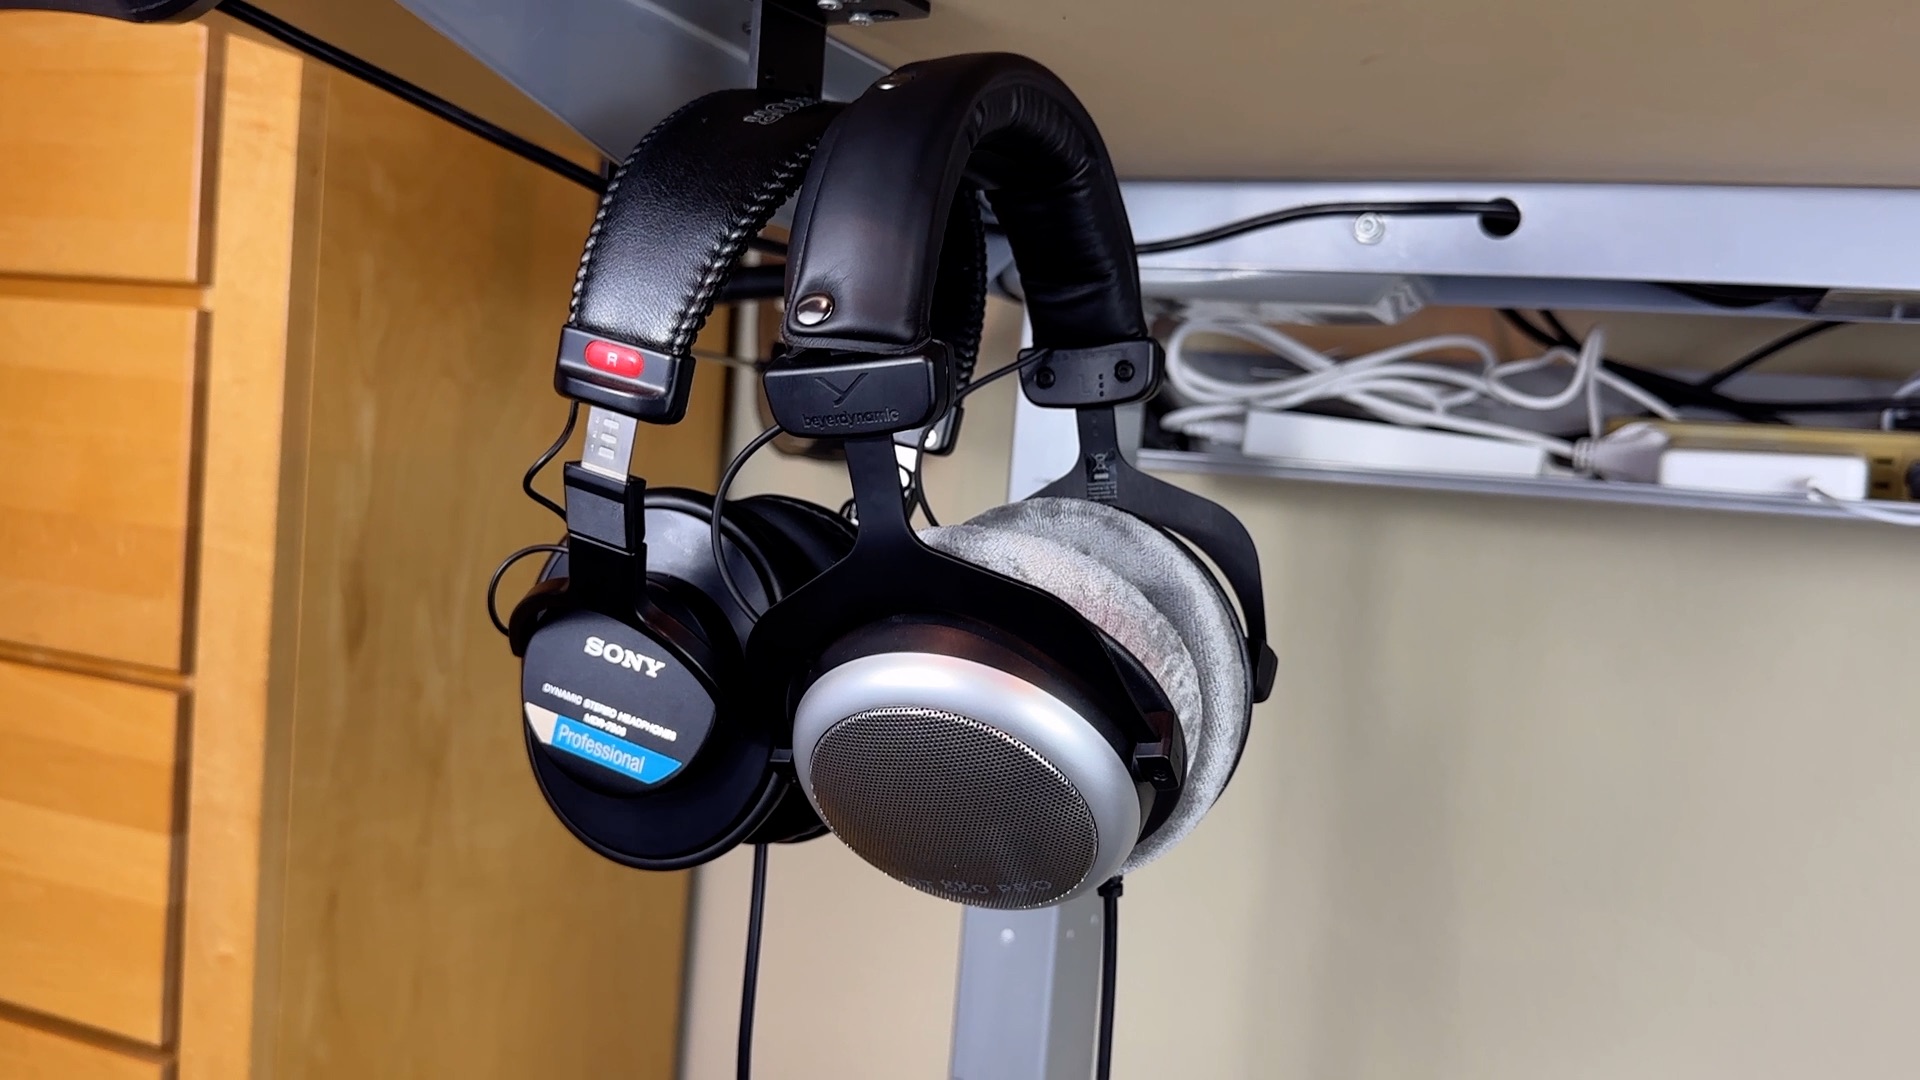
I have a couple pair of headphones here- and I keep them within reach by hanging them under the desk with an L shaped hanger. This keeps them off the desk when I’m not using them, but easy to grab when I need them.
I use a pair of closed back Sony MDR-7506 headphones for recording on the mic, to avoid bleed through. And I also have a semi open backed pair of Beyerdynamic DT 880 Pros which are more comfortable and accurate for mixing and producing sessions.
Importantly, I chose both these headphones because they are supported by the Sonarworks headphone calibration system, which brings us to the next tip…
05. Calibrate the headphones and monitors for mixing and mastering
I’ve always been told that you have to acoustically treat your studio walls with corner bass traps and foam insulation panels, etc. And if you don’t, you’ll never be able to trust the validity of your mixes and masters. My office has bookshelves along the walls, so mostly uneven surfaces which is a good thing. But I was never quite sure how bad a problem I might have with room resonances and dead zones and what not.
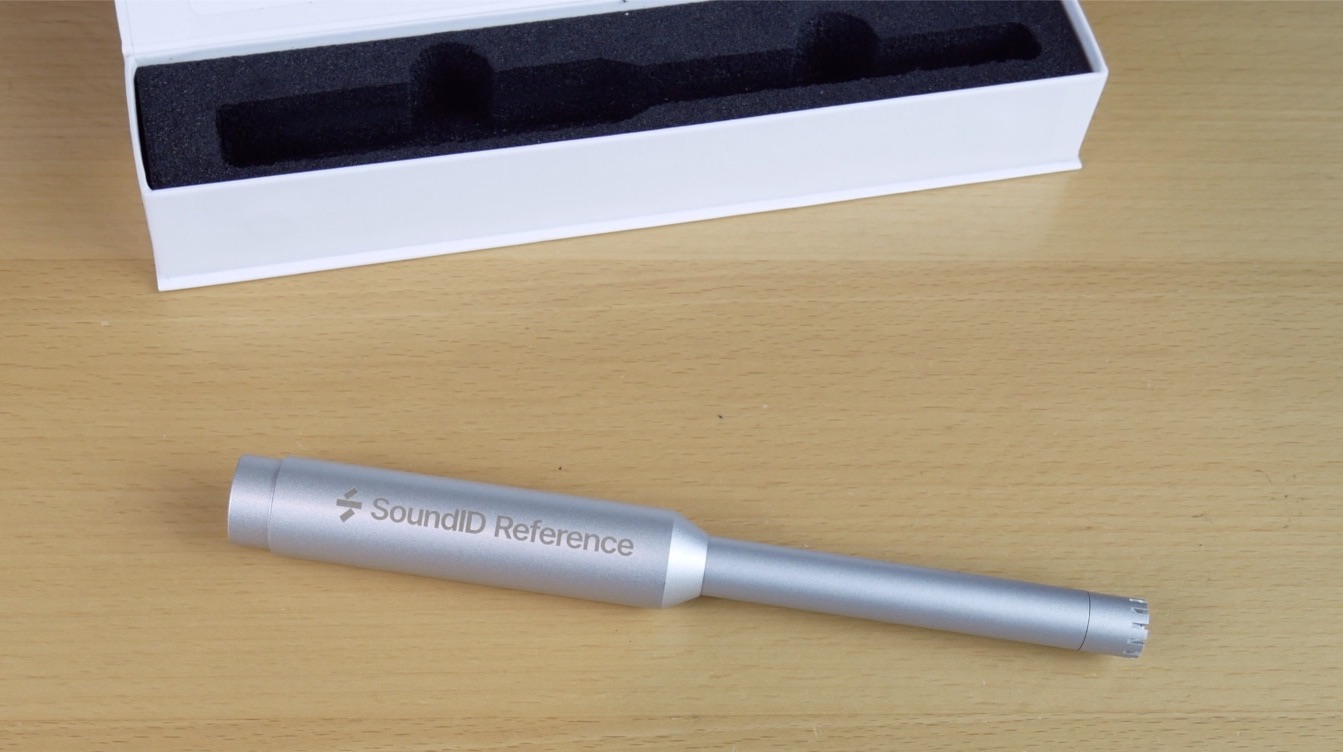
Then I discovered the SoundID reference system from Sonarworks, which uses an individually calibrated microphone to analyze your studio and apply corrective EQ to your monitors. It’s a bit spendy, but it goes on sale from time to time, and it’s totally worth it for the peace of mind.
It walks you through an analysis process, playing a series of bleeps and bloops through your monitor speakers, while you hold the mic at like 40 different locations in the room.
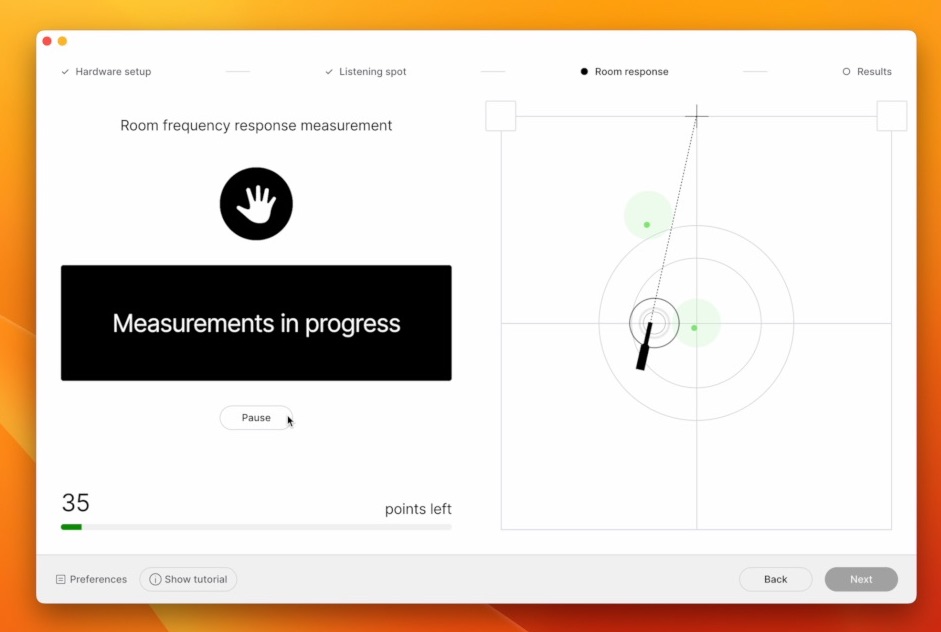
Then it generates an EQ curve opposite to whatever bumps or valleys exist in your room response, resulting in a flat response that you can trust. Then when you’re doing any critical mixing or mastering on the monitors, you leave SoundID running with the EQ curve applied, and it just gives you the confidence that your mix is legit and will translate well to other systems.
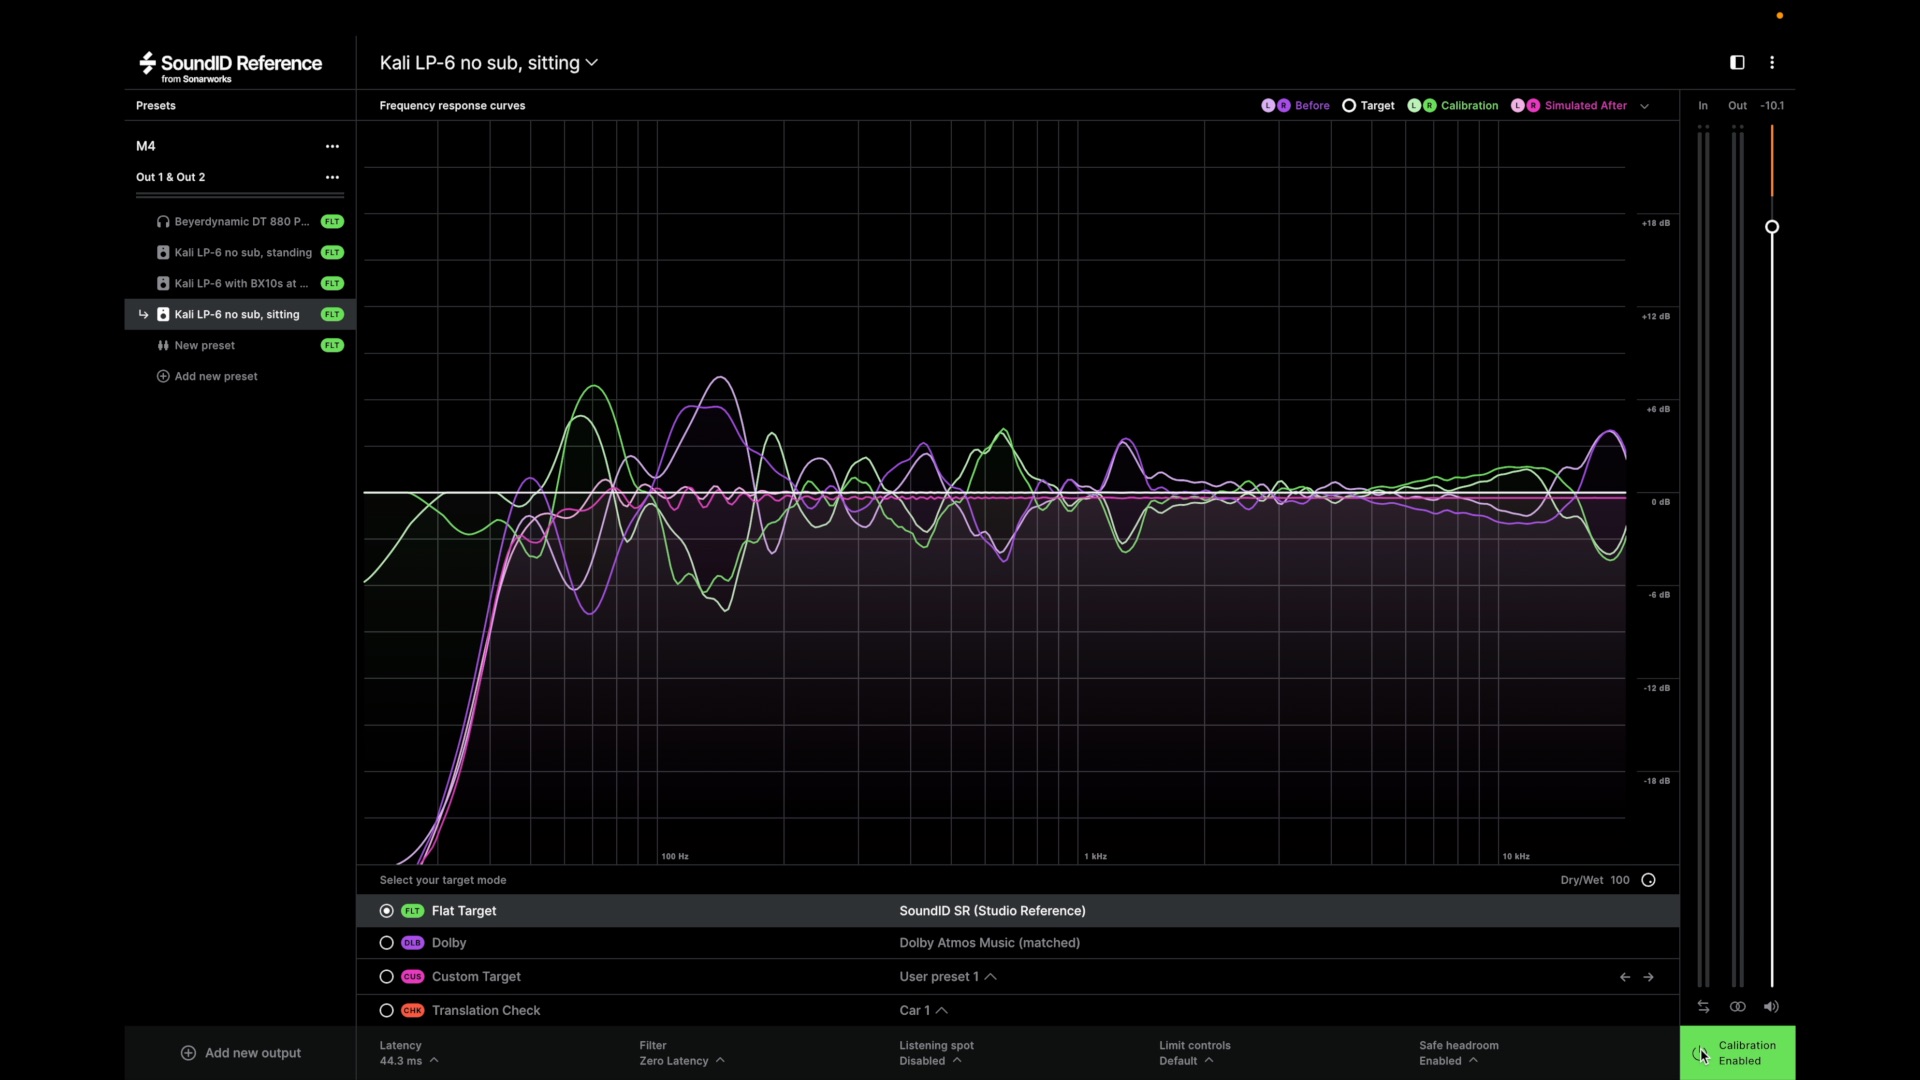
I’m using a pair of Kali LP-6 V2 monitors which are amazing, and quite inexpensive. They’re very flat, even before the corrective EQ, and they have plenty of low end for the size of my room. I also have a sub, but basically leave it bypassed all the time, unless I’m just doing a quick check to make sure I’m not missing anything way down low. But more often, for a low-end check, I put on my DT 880 Pros.
SoundID Reference also has built in profiles for many common sets of headphones. Including both my Sonys and my Beyerdynamics. With the Beyerdynamic DT 880 Pros , and the SoundID correction applied, it’s an excellent reference that I can be confident in.
06. Choose the right audio interface
I keep my audio interface always plugged in and ready to go.
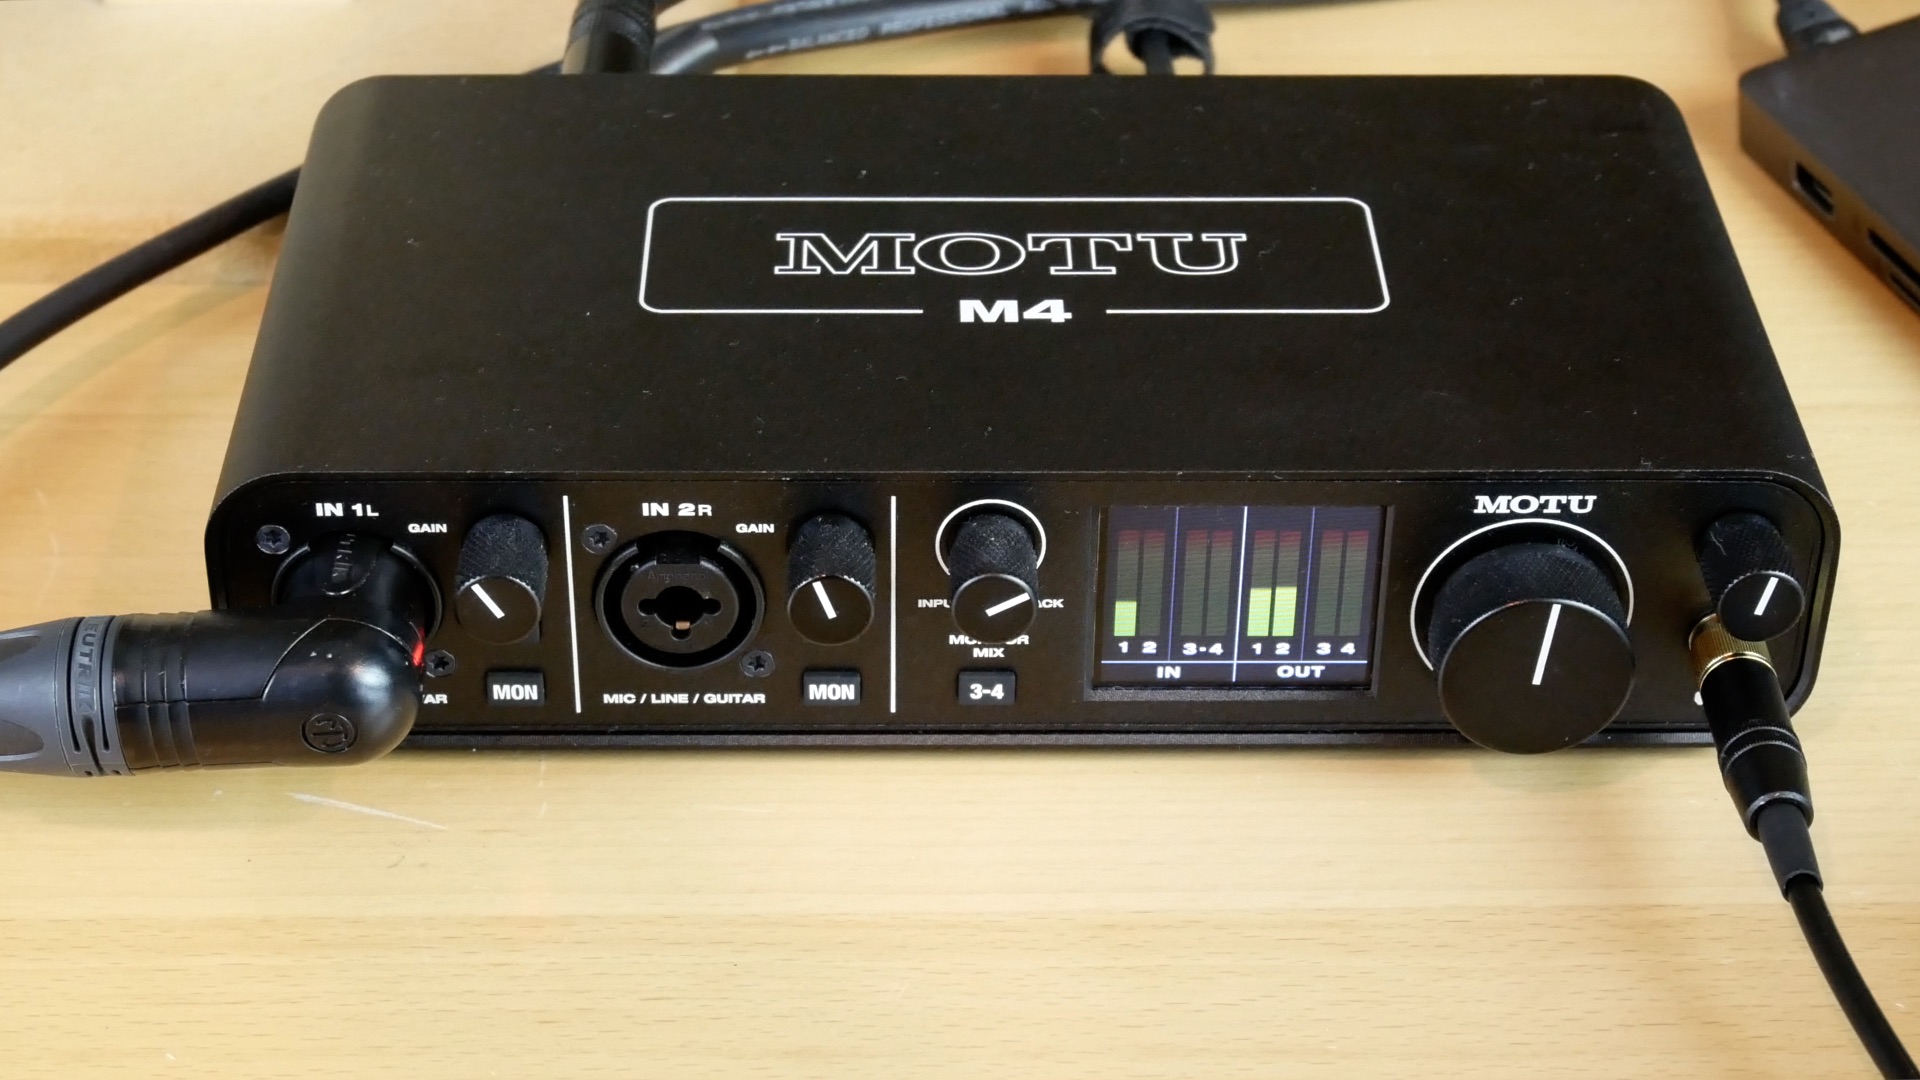
I chose the MOTU M4 for a few reasons. It has nice level meter displays so you can sanity check recording levels outside the box before looking at the meters in the DAW. It has separate volume controls for monitor speakers and headphones, which is handy when recording in headphones, then switching to listen to the mix in monitors. It’s bus powered – that’s one less power adapter to worry about. And it has a power switch which I really like, because I keep it plugged in all the time, but I’m not always using it. I prefer to turn it off using the power switch, rather than just yanking out the USB cable.
Its headphone amp is powerful enough to drive the 250ohm impedance of my DT 880 Pros without any issues.
Also, and probably most importantly, but kinda goes without saying: it records cleanly and the mic preamps are quiet.
I’m a solo artist so I don’t need a lot of channels- I’m usually recording one thing at a time. So I dedicate one of the front inputs for the microphone, and use the other for recording guitar, bass, etc. Sometimes I’ll use both mic preamps at once to record a double-mic’d acoustic guitar. And it has two more inputs round back, plus two sets of monitors outputs, in case i ever need them.
07. Stay in the box for flexibility
Back in the day, I needed a room full of gear to record and produce a song. I had a massive mixer, a couple of racks full of outboard effects like compression, EQ, reverb, synths, guitar processors, digital tape recorders, miles of cable snakes, etc. It’s almost embarrassing looking at this picture:
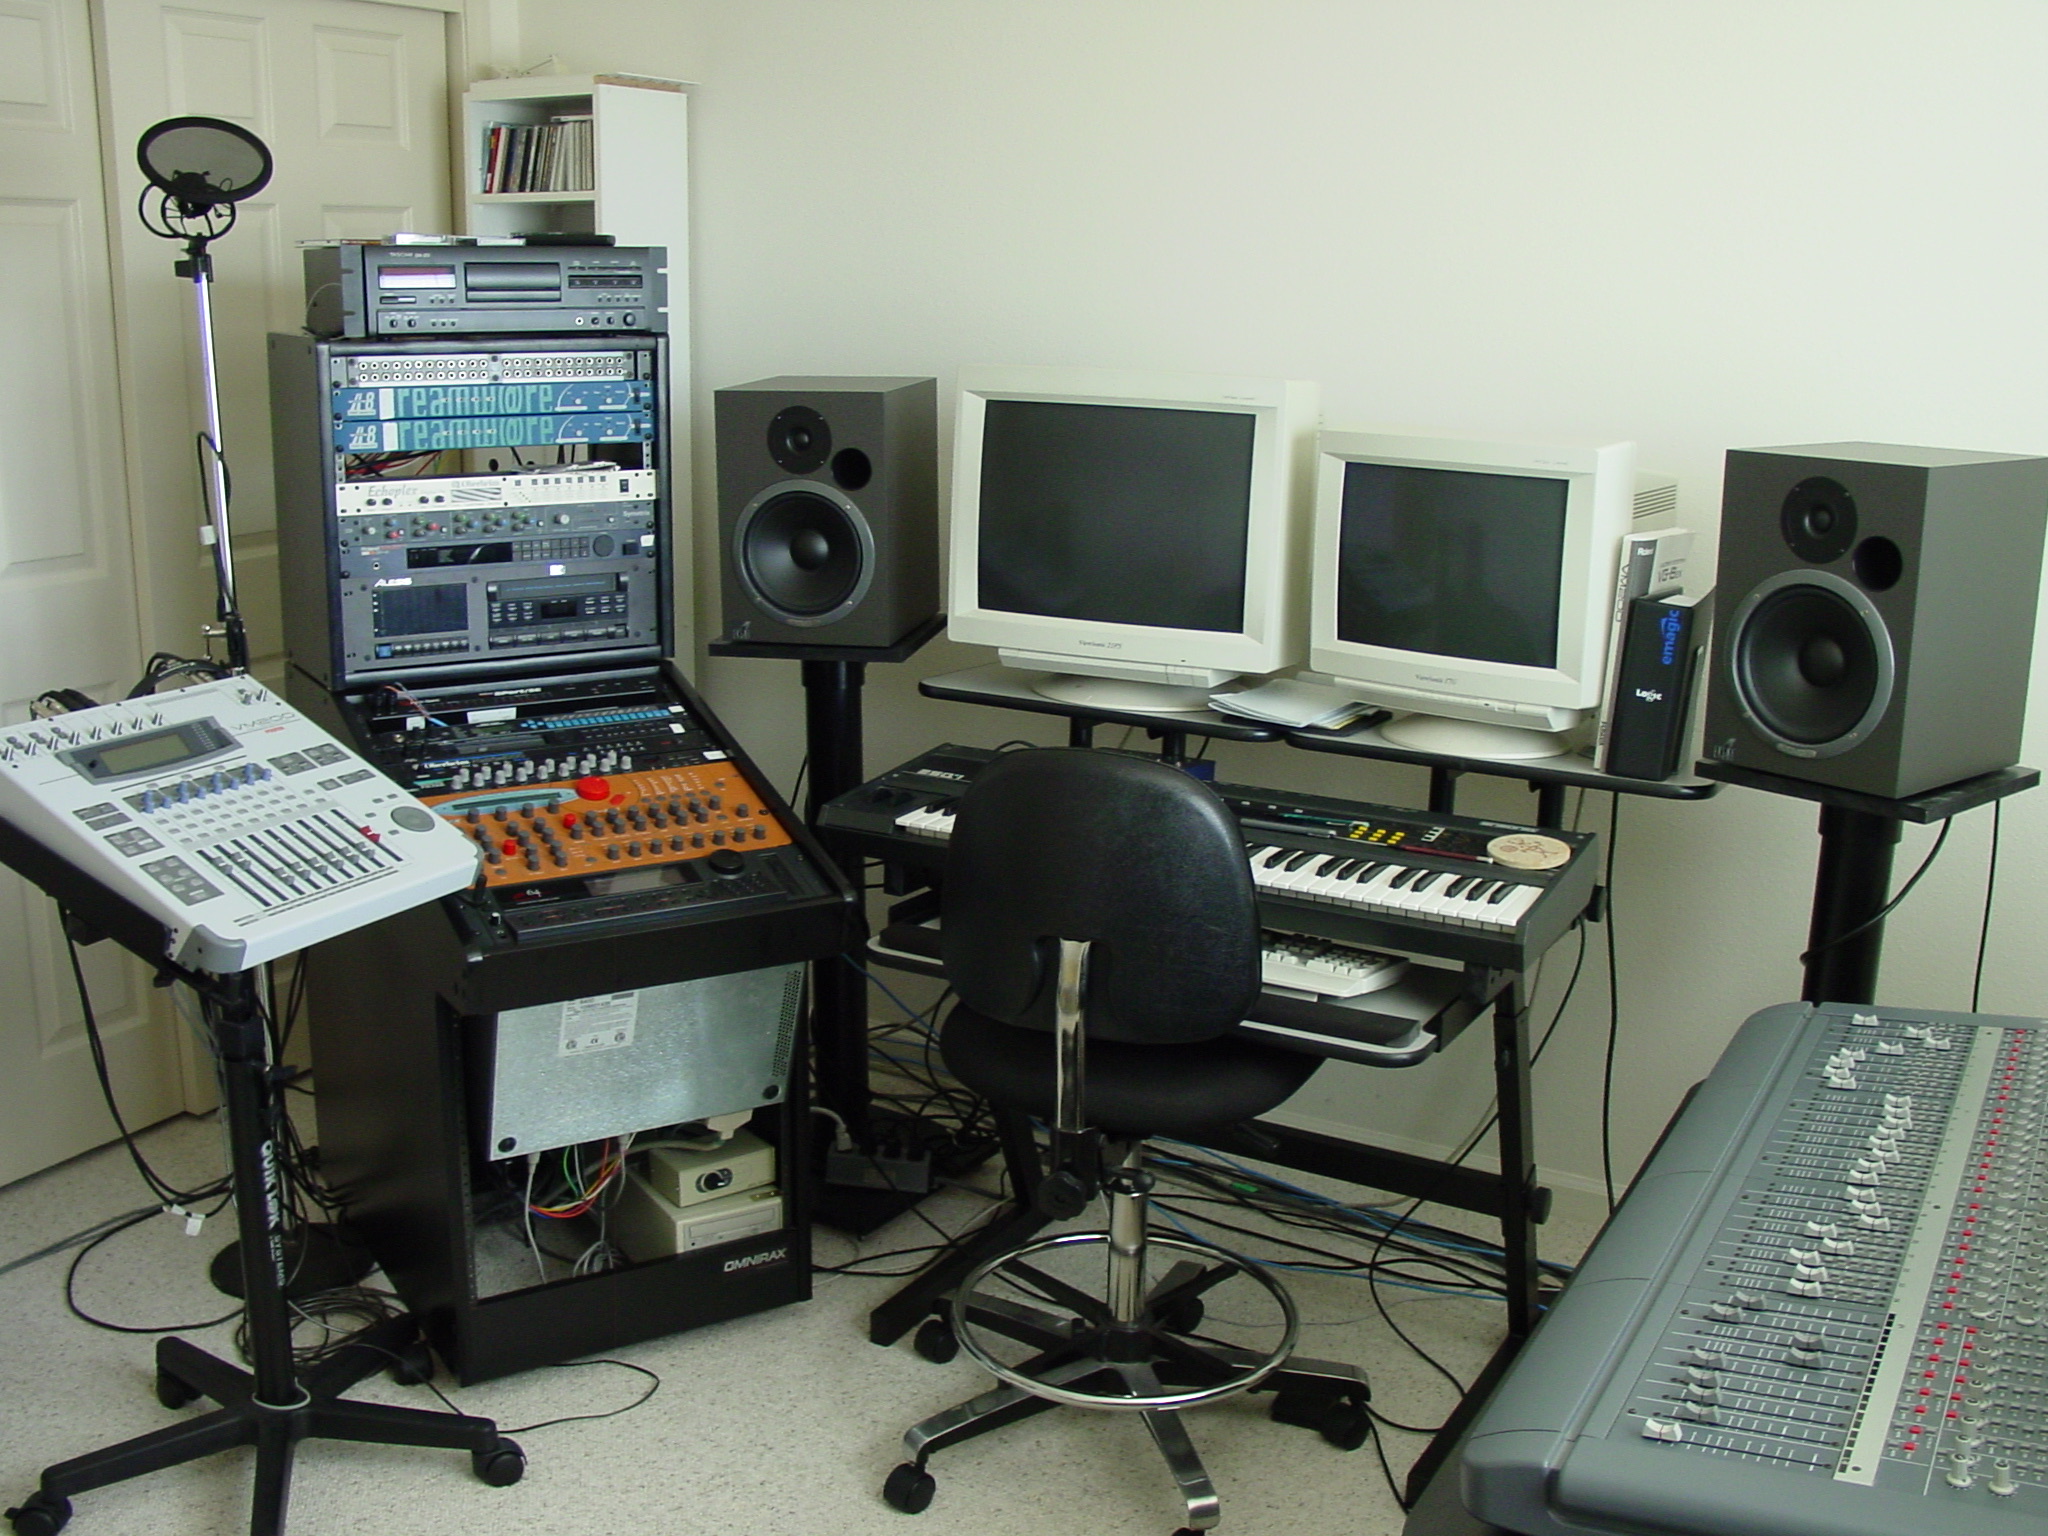
Over the years, I basically sold it all, as I kept downsizing my studio space.
But now, I really try to avoid depending on outboard gear. For example, all the guitar and bass tracks on my EP were recorded direct, and processed with the Line 6 Helix Native plugin.
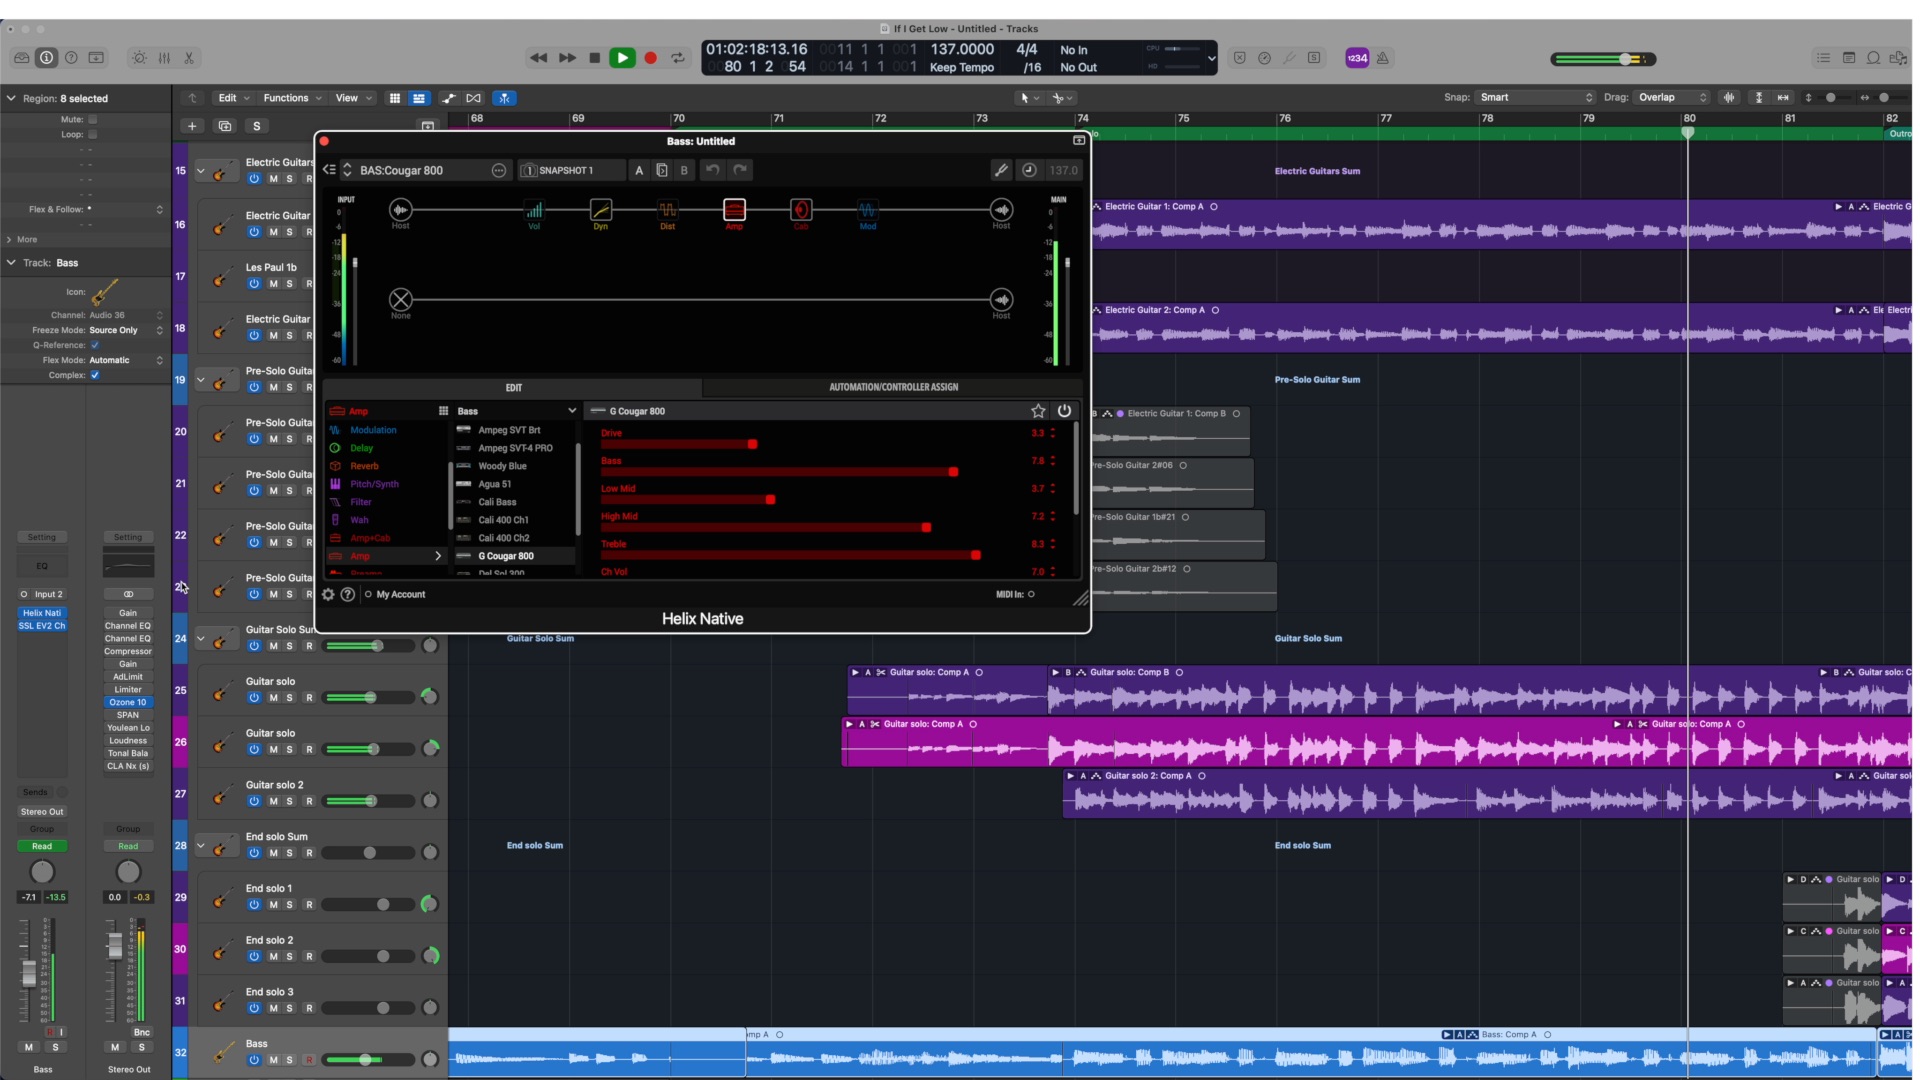
Even though I have the Helix Floor processor, and the VOX AC15 amp, it’s just so much simpler, and more flexible to use the plugin. And the plugin literally sounds identical to the hardware unit.
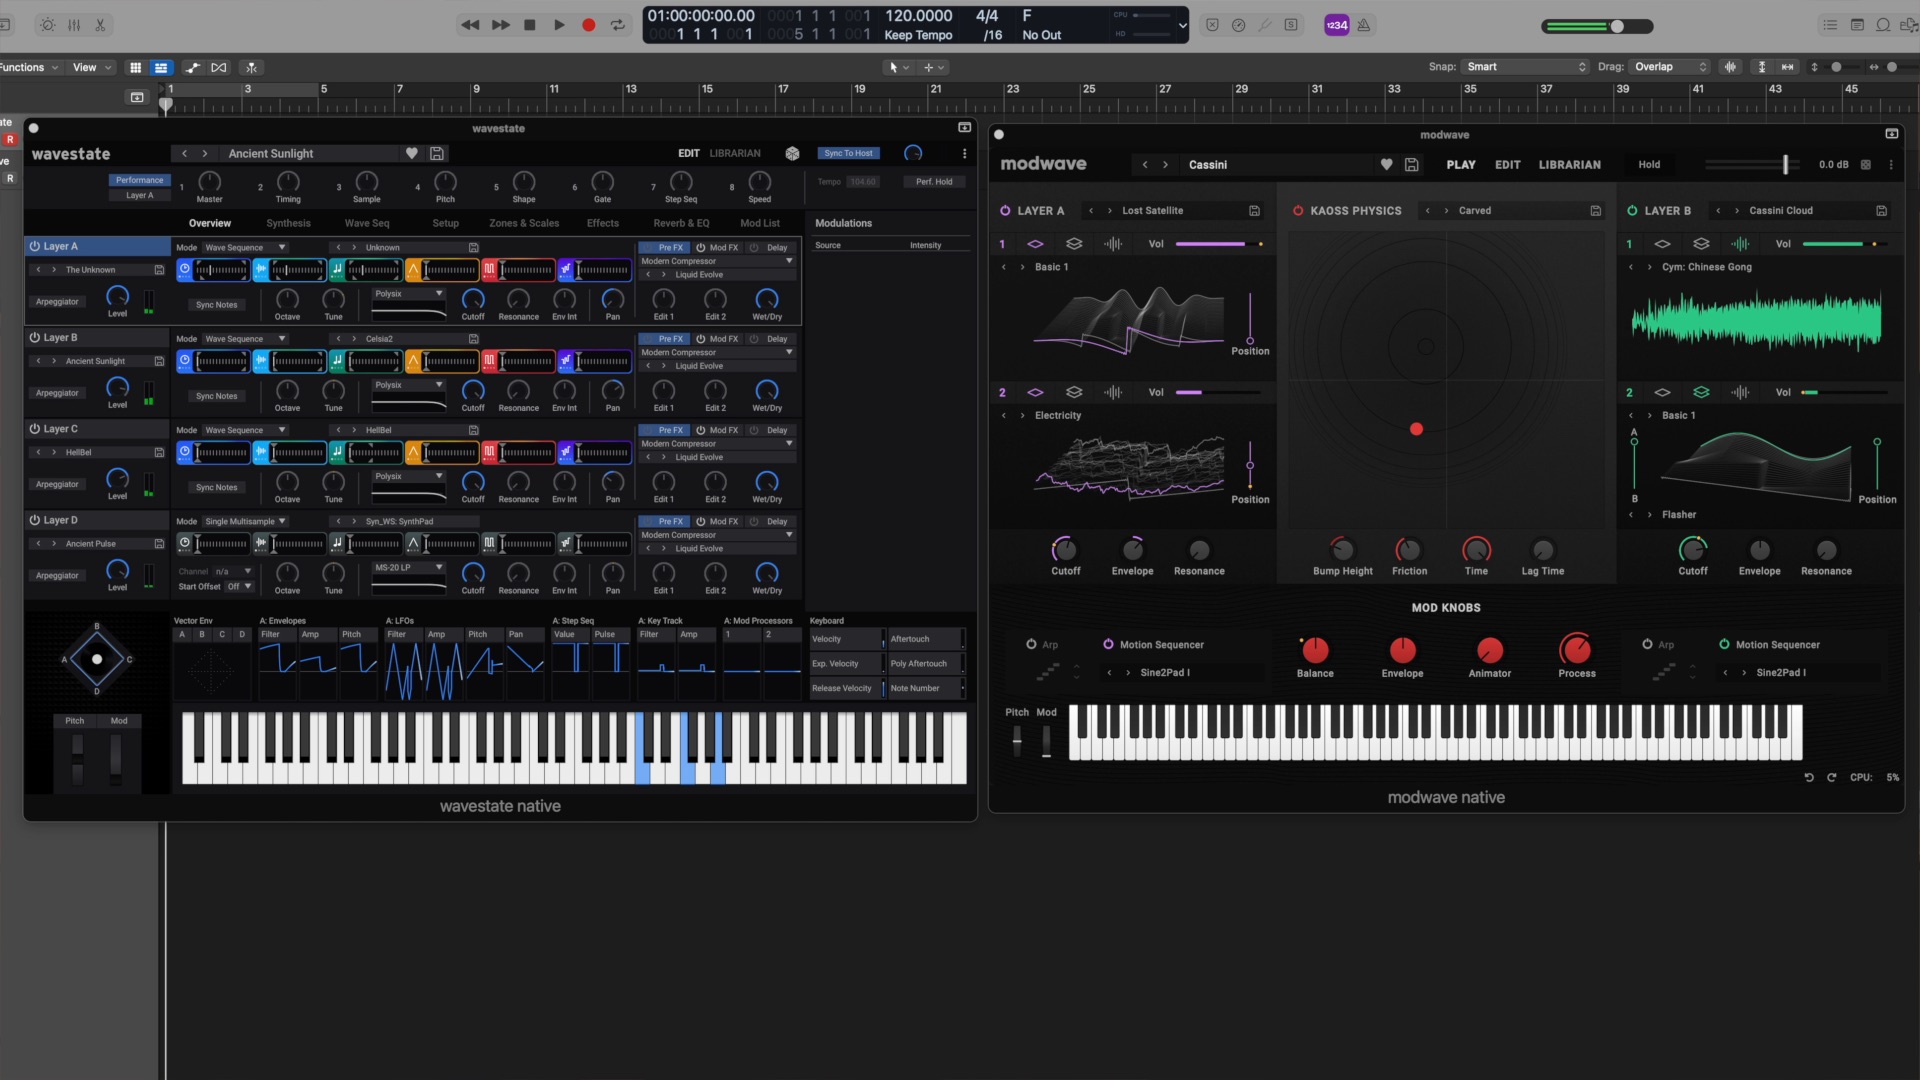
Similarly, I have the Korg modwave and wavestate hardware synths, but I usually just prefer to use the native plugins in my recording projects to keep it all the box. Full disclosure: I work at Korg R&D, and work on these products- I proud to be able to use them in my own music!
It’s really amazing how far we’ve come that we can accomplish the same thing as my old room full of gear, with far more flexibility and better quality, all with a single computer and interface.
I’ve been really impressed with new Apple silicon machines. I have a MacBook Pro M1 Max. But you can get a relatively inexpensive Mac mini, and it’s more than capable of running an entire studio worth of gear in the box, with tons of tracks, and it runs silent. While the laptops are more expensive, they give you the flexibility and portability if you like to take your mix on the road or to a cafe, etc.
08. Learn the tools well enough so you know at least the basics
Following up on the previous point. If you’re spending all your time in the box, you gotta learn the tools! It doesn’t really matter whether you use Logic, Cubase, Ableton, FL studio, Reaper, etc- they’re all pretty amazing these days and come with an impressive array of plugins and tools.
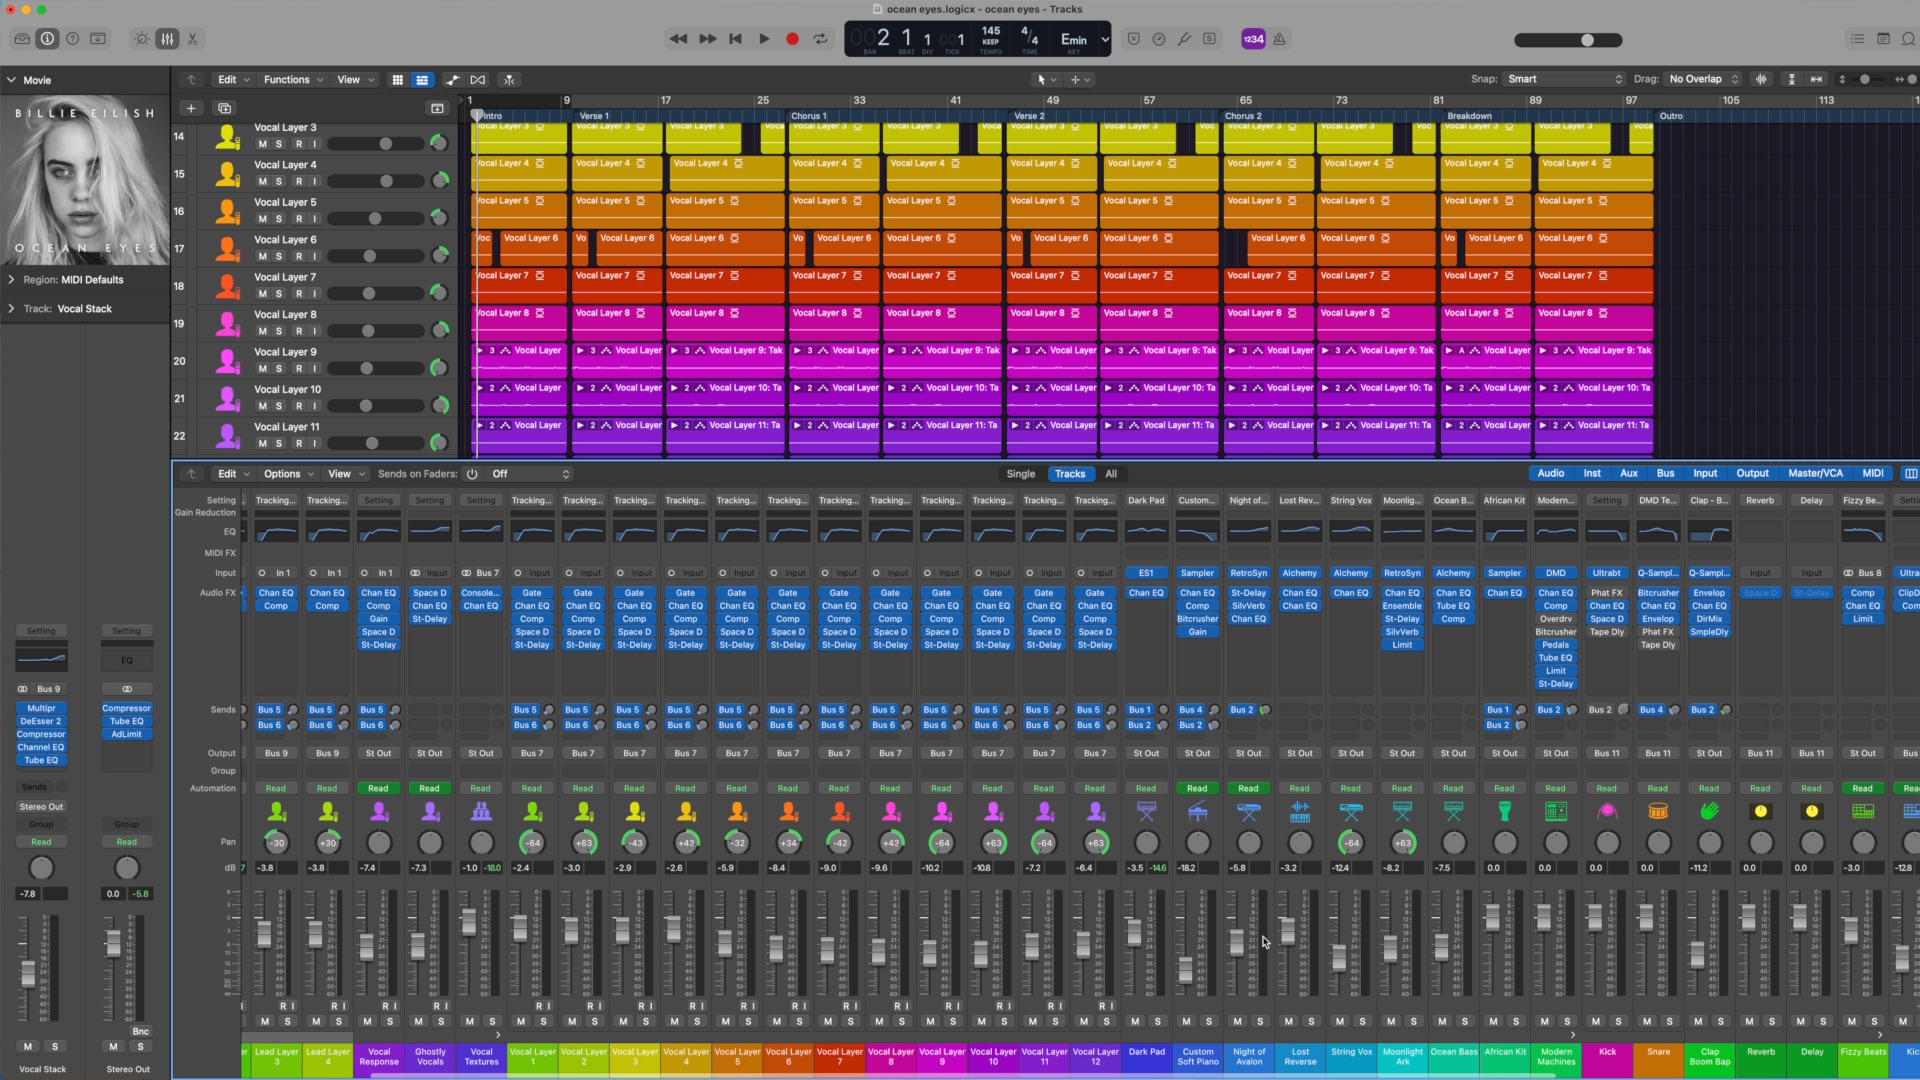
You should learn them well enough that you don’t need to be pause in the moment of creating, to research how to use the thing,. I use Logic and it comes with some complete projects from Billy Eilish’s and Lil Nas X. It’s interesting to go in and just see how they achieved those sounds within the box in logic
But these tools are pretty complex. It’s impossible to memorize the whole thing. You’re gonna be googling for answers periodically no matter what. But make sure you at least have the basics sorted. And maybe keep some notes about some of the more tricky things you’ve figured out.
09. Use templates and presets
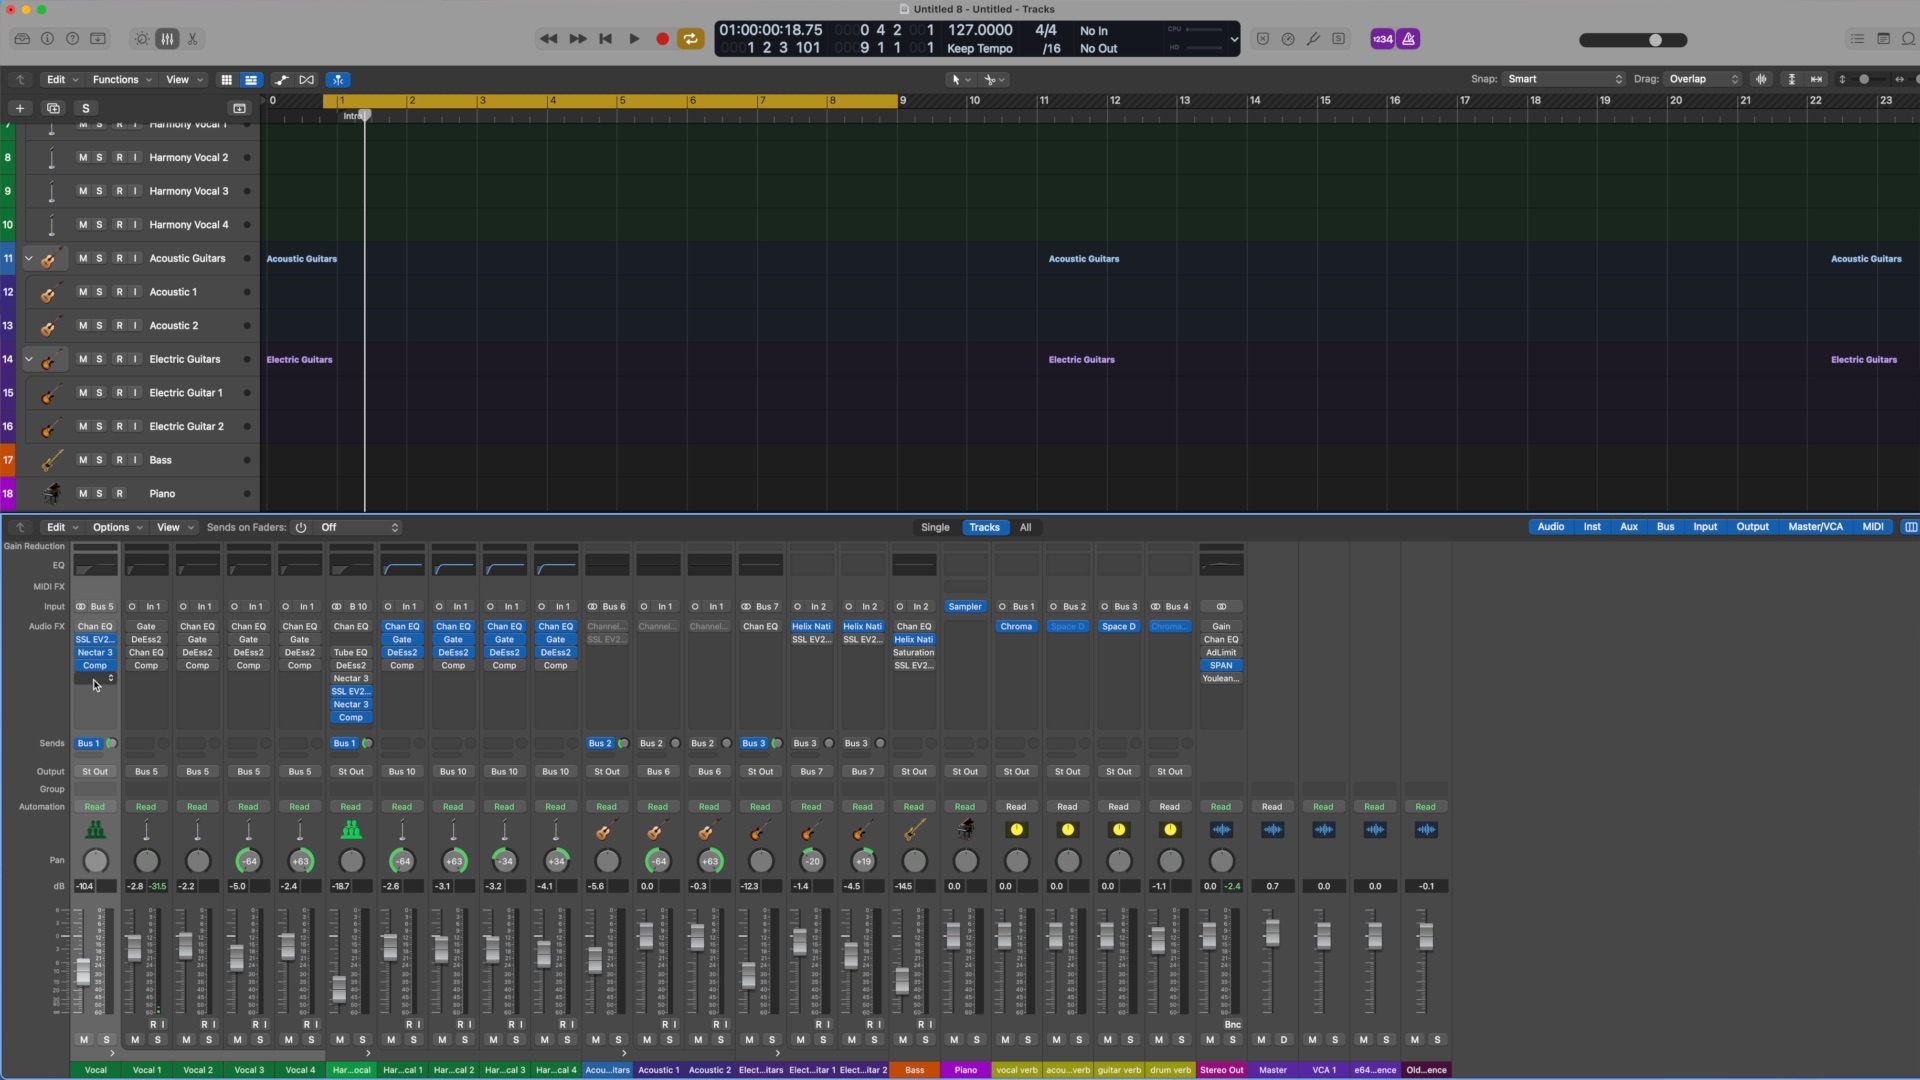
I have a Logic project template for my Wave Away songs. So when I want to start a new song, I just load up the template and it already has tracks laid out for my main vocals, harmony vocals, guitars, bass, etc. The tracks are color coded and organized in the order I’m used to. And they channels already have the plugins on them with settings that worked for me previously, as starting points.
And I have my metering and analysis plugins on the master channels ready to go.
As I’m working on my songs, when I figure out a nice setup that works well for my voice or guitar or whatever, I can save the channel setup back into my starter template, or save the presets into the plugins.
It doesn’t mean I will always have to do exactly what I did before, but it means when I want to get started on something quickly, I have a good starting point, ready to go.
10. Resist GAS – Gear Acquisition Syndrom
This may be the most important one here. G.A.S. – it’s a distraction! It’s addictive!
And once you have the basics, you really don’t need a continuous supply of new stuff to be creative.
Yes, sometimes a new piece of gear or new plugin can fuel a creative spark. But it’s all too easy to waste hours obsessing over a potential new piece of kit, when really the time would be better spent getting more proficient with the tools you already have.
Similarly, avoid the temptation to buy too many plugins. Each one is another thing to learn, another thing to maintain, and keep up-to-date, etc. Often, you already have what you need in the DAW!
11. Use your phone as a recorder to save sketches
I can’t tell you how times over the years I’ve come up with a cool riff or melody while practicing, that I eventually just forgot, lost to the sands of time.
Even after tuning up my creative space, and optimizing my process- sometimes even turning on the computer and firing up the DAW to start recording is just too much. But I do always this amazing little recorder with me— it’s really easy to just bust out the phone and start it recording. I just want to be able to remember the riff or chord progression- the quality doesn’t really matter.
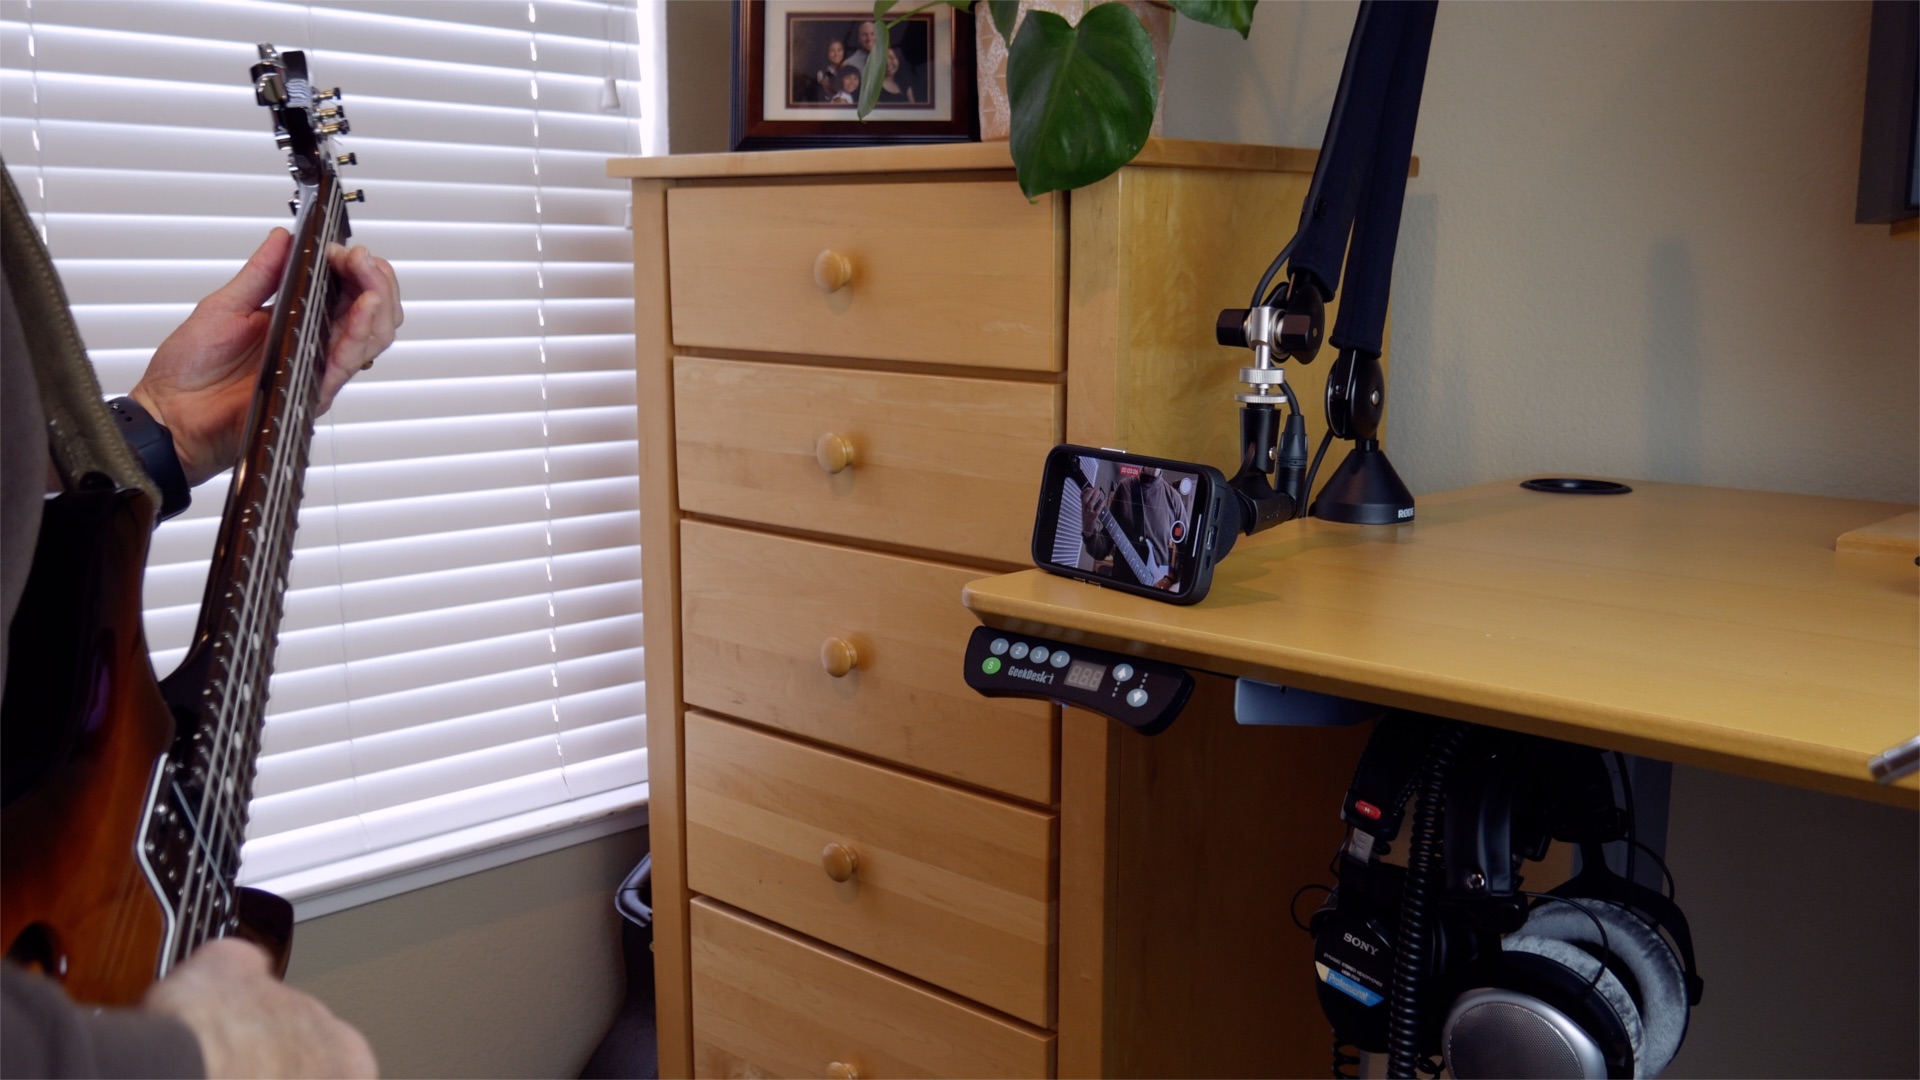
If I’m playing guitar or keyboards, I prefer to use the video recorder instead of the audio recorder, so I can also see my hands on the fret board or keyboard, to remember how I was playing it. Then I keep those videos in an album, to refer back to later. If I’m ever hitting some writer’s block, I can browse back through the recordings and remember what’s possible. This has allowed me to be so much more productive!
Well I hope these ideas have been helpful! Please share in the comments what works for you to make you more productive in your songwriting and recording?
And if you have a chance, please do take a listen to my new Wave Away EP, and let me know what you think!