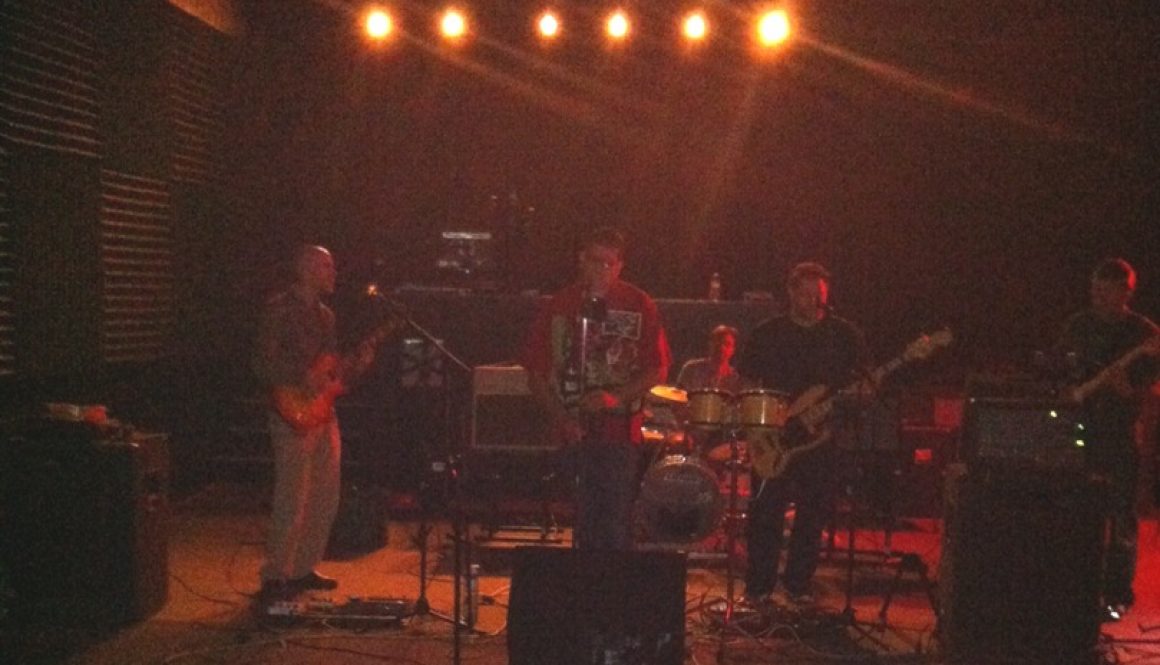
After a bit of trial and error, it was clear that my ancient SKB PS-25 pedalboard power supply had finally keeled over. I never use batteries, but fortunately a couple of the pedals had old 9V batteries still in them, so it was enough to scrape by for the rehearsal.
The following morning, just a few hours before the gig, I went through my box of old guitar gear to try to find a replacement 9V DC negative-tip power supply.
Hey, here’s the power supply for my Digitech Jamman Delay which I’m not currently using in my live rig. It says 9V, 1.3A. Strange, it doesn’t show a polarity, but it’s a power supply for a guitar pedal, and the plug barrel fits, so it must be good, right? What could possibly go wrong?
These Rotomatics are different from typical locking tuners, like the Sperzel’s or Grover’s own Roto-Grips, where you lock and unlock the string using a thumbscrew around back.
On the Rotomatics, you just insert the string, and give it a wind, and an inner-cam rotates, locking the string into place under the string’s own tension. I always feel a little uncertain when changing strings on these because the process is a bit different from other tuners. Here are the instructions from Grover:
1. Turn tip of string post until it clicks into place. This aligns string post holes.
2. Note string hole is off center. Turn knob to rotate post until string hole is positioned away from knob. Thread string up through bottom of hole and pull firmly. See drawing.
3. Turn to begin tuning. At first, only inner “Locking Cam” is turning, securely locking the string. Once the string is locked, outer post will turn.
4. Bring string to pitch.
A carpenter once showed me a great trick with a toothpick. One of our doors was sagging, because the screws in the hinges were loose, and couldn’t be tightened. With a glint in his eye, he pulled out a handful of toothpicks from his pocket, saying “my secret weapon”. After removing the loose screws for the hinge, he stuffed a few toothpicks in each hole, cut them off flush, and then re-tightened the screws in the holes. Presto chango- it was all nice and tight. Sometimes the simplest solutions are the best!
In this video, I apply this simple trick to the tuners on my Epiphone Riviera P93. Some of these screws have been loose since day one – the kind of loose where no matter how much you try to tighten the screw, it just spins freely in the hole. The wood fibers in the hole are stripped out and no longer gripping the screw threads. One simple toothpick, inserted in each hole and cut off flush, just like that carpenter had shown me- and now the screws go in nice and tight. The soft wood of the toothpick makes the perfect filler. No glue necessary.
That same carpenter also shared these fine words of wisdom: “Caulk and paint are what a painter ain’t”, but that’s a story for another day
“Until it’s recognized that the amplifier is AT LEAST 50% of the sound of the electric guitar, its full potential cannot be realized” -Leo Fender
I couldn’t verify whether that quote is truly attributable to Leo Fender, but it’s a good point.
We tinkerers spend all this time tweaking our electric guitars’ pots, caps, pickups, etc- when really the biggest factors in how your guitar sounds are the amp and pedals you play through. Your guitar may be puttin out the most beautifully kickin tone in the world, but if you’re playing it through a crappy amp, you’re gonna hear crap.
I found this interesting collection of FAQ’s about amps, tubes, etc (along with a ton of other tips) by Steve McKinley at Atlanta Tube Amp. Check it out:
In this article, Pete Biltoft at Vintage Vibe Guitars gives an in-depth explanation of pickup coil wiring options. Note this information is provided in the context of humbuckers, but applies just as well to a pair of single coil pickups that are RWRP relative to each other. You may also find my earlier posts useful: Humbucker Wiring and Coil Splitting, and Pete’s previous article on Coil Splitting/Tapping.
Thanks again to Pete for the permission to post this here!
January 2013
Howdy!
In this Tech Tips newsletter I would like to discuss the wiring options possible with a single humbucking pickup which has a four conductor output cable with an independent ground lead.
The following information applies not only to conventional humbucking pickups with side by side coils, but also to stacked humbuckers and humbuckers in other size formats or configurations.
In this newsletter I do not plan to cover the details of wiring one or more switches to accomplish the possible coil configurations described below. A great deal of useful information on this topic is provided on the Stewart MacDonald website, the Guitar Nuts website and on www.deaf-eddie.net
In this article, Pete Biltoft at Vintage Vibe Guitars gives an in-depth explanation of humbucker coil splitting and tapping. You may also find my earlier posts useful: Humbucker Wiring and Coil Splitting.
Thanks again to Pete for the permission to post this here!
October 2012
Howdy!
The topic for this tech tips newsletter will be Coil Splitting and Coil Tapping.
Coil Splitting and Coil Tapping are two methods which can be used to extend the range of tones on can get from a magnetic pickup.
First, a few definitions:
Coil splitting refers to disabling one of the two coils of a humbucking pickup by shunting that coil’s output to electrical ground.
Coil tapping is most often used to describe a single coil pickup which has a coil start and more than one coil end (output tap).
Because I intend to devote most of this article to Coil Tapping, let me start with Coil Splitting.
Dead air. Not good! As I was nearing completion of my epically long video for part 2 in my guitar pedal building series, one of the big items left on my to-do list was to find some appropriate thematic music for the section interludes. Each of the 5 tutorial sections has a table of contents image that sits on the screen for about 16 seconds. At that point in the project, each of these brief interludes was dead-silent.
I had this vague idea that I would compose some short piece of music, and then make five increasingly complex variations to play for each of the five increasingly advanced sections of the tutorial. 16 seconds is not very long- not long enough for a big composition, but maybe long enough for a short melody. This idea lurked in the back of my mind for a few weeks. A couple of aborted attempts just didn’t seem to fit the tone of the video- too perky, too funky, etc.
Inspiration arrived, as it sometimes does, with a new piece of gear. So with brand new Les Paul in hand, and Jamman Delay looper and Vox Ice 9 under foot, I recorded the following series of melodies. Each loop starts with a copy of a previous variation, and adds a little something.
I’m particularly fond of that last clip, even though it ended up on the cutting room floor. It’s got this crazy riff in it – which may be just a little too complex.
My new Epi Les Paul Tribute Plus arrived yesterday for my birthday, and it’s a beauty! These things are hard to find- none of the local stores have inventory, and every online retailer is backordered. I managed to get Guitar Center’s last one in the country(!) – from the store in Tonawanda, New York. The store manager there was great- sent me some pics, played it for me to confirm it was all good, gave me a great July 4th discount, and shipped it over for free. Thanks Chip!
Cosmetically, it’s really nice. Clean, well-defined flamed maple top and cream bindings. The cherryburst finish looks near-perfect- with rich warm coloring- not the bright overexposed yellow in the pictures at Guitar Center’s website. The Grover locking tuners feel fantastically smooth, and the switch, knobs and jack all seem good. And after some quick adjustments, it plays pretty well (but still needs some fine tuning).
The ’57 Classic pickups sound really dynamic, rich and beautiful – they’re warm when played gently, and crank when spanked. Love em. There’s quite a range of sounds with the push/pull series/parallel switching on the tone knobs. When a tone knob is pulled, the humbucker’s two coils are wired in parallel giving a lighter, brighter, thinner sound, somewhat reminiscent of a single coil (though different). It’s completely different from the ultra-thick and heavy series-humbucker sound (knob pushed in). This is a really versatile setup: a total of 8 different sounds using the 3 switches, not to mention the variations you can get by adjusting the volume knobs in the middle switch position.