
Repairing Yamaha THR10 Switch
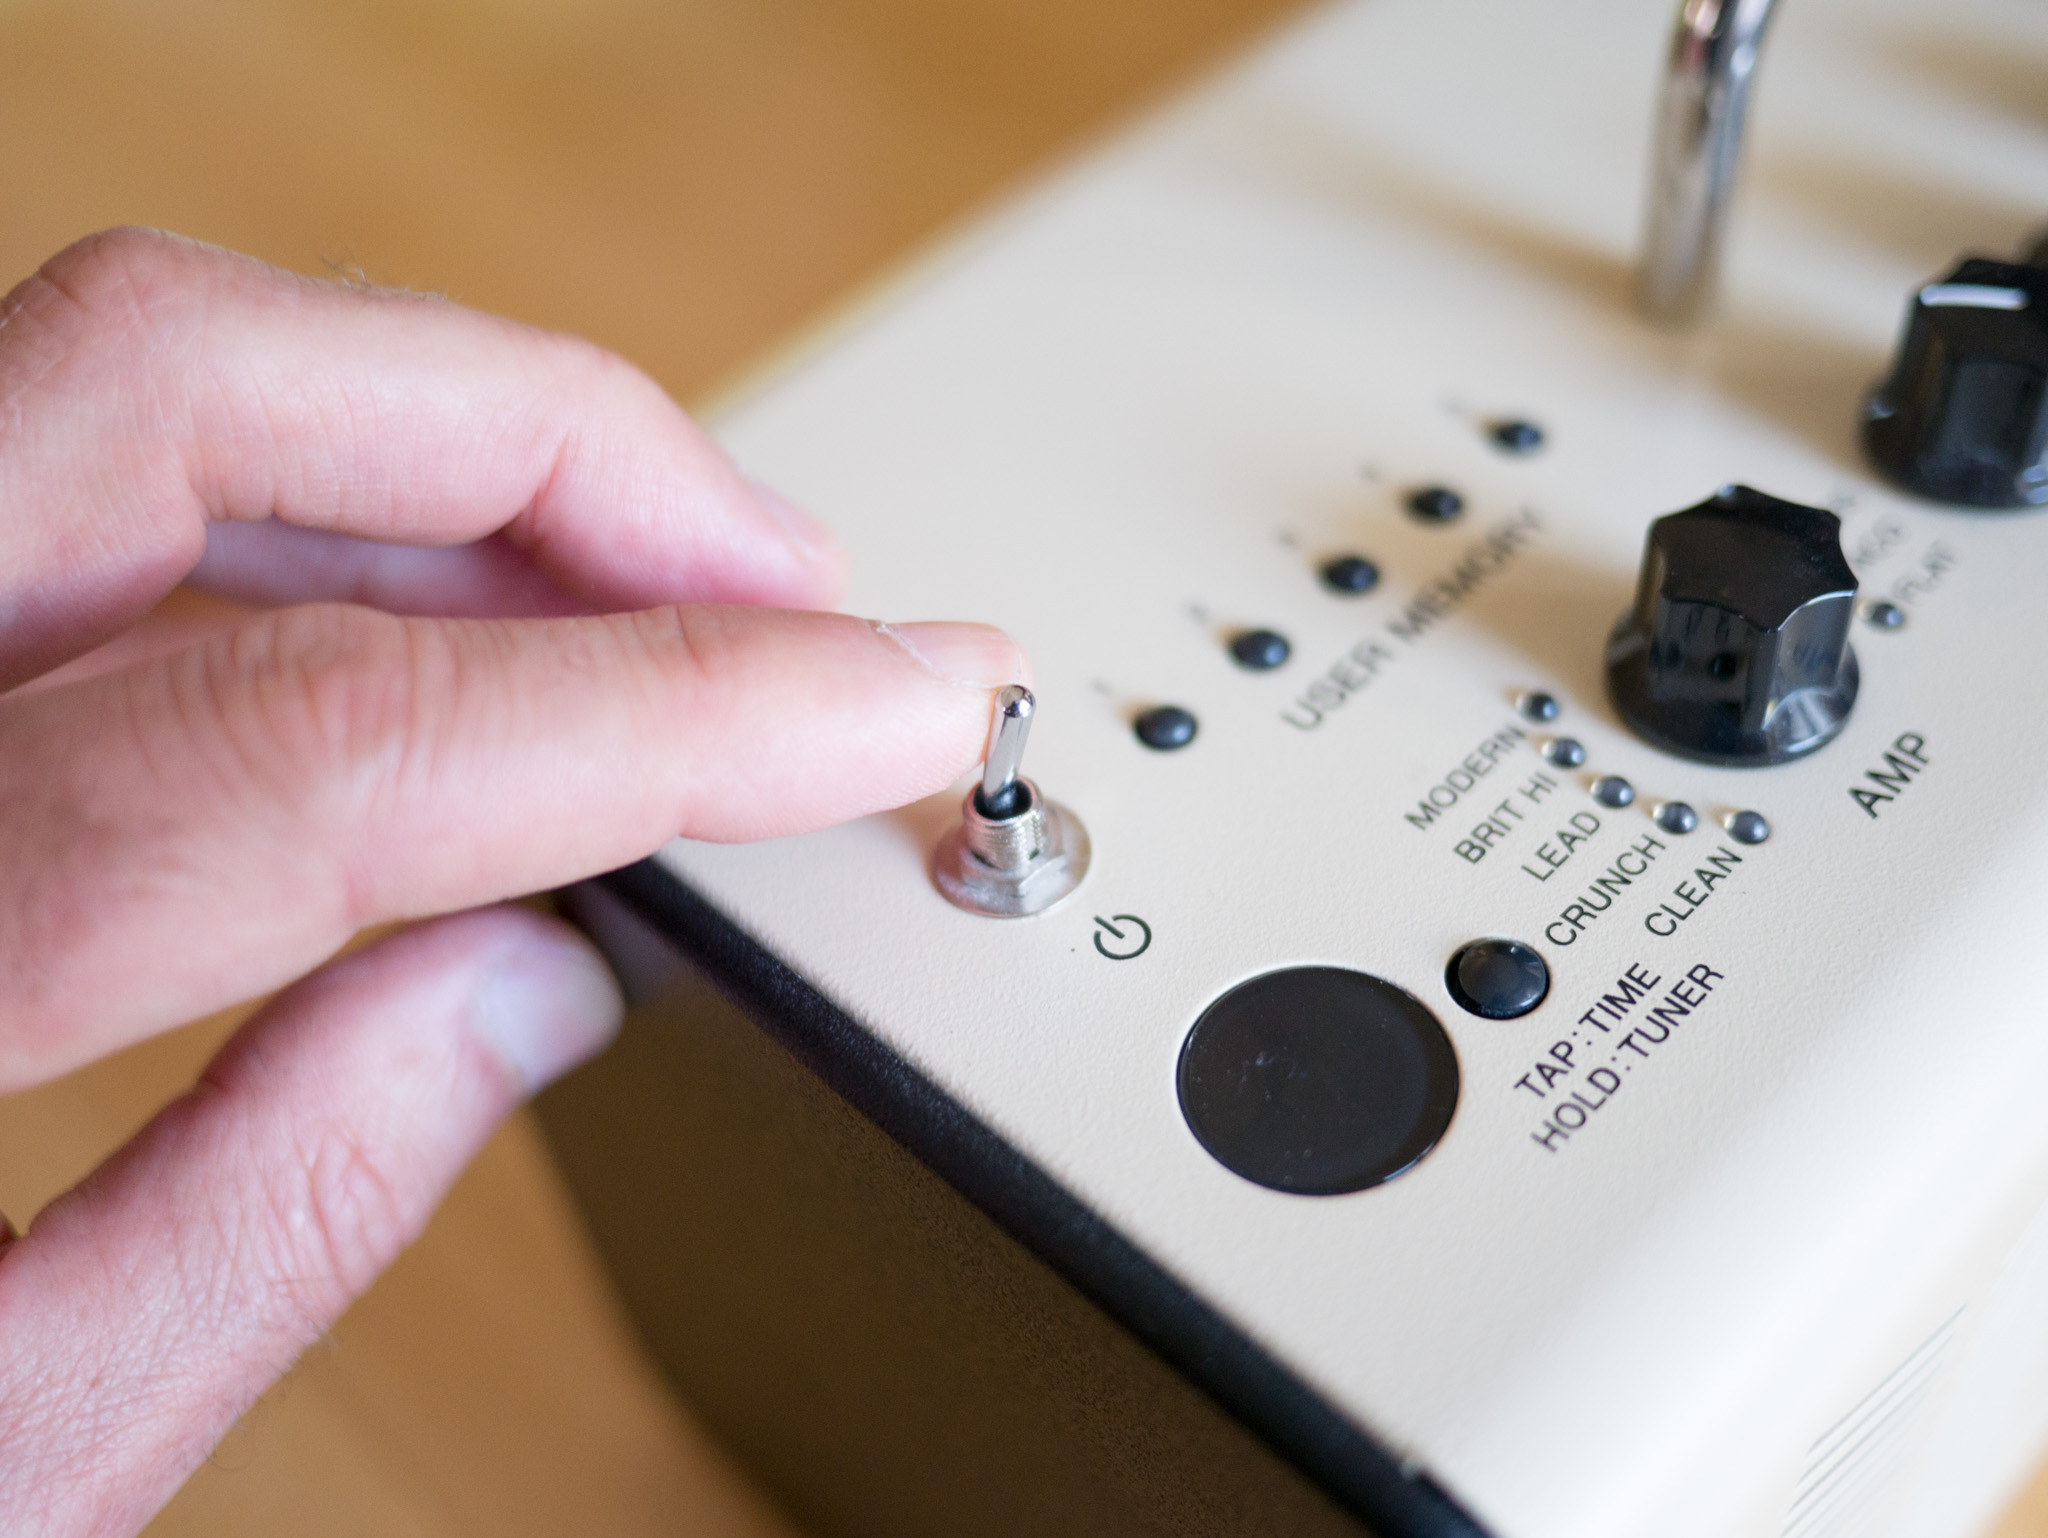
The Yamaha THR10 is a fun little practice amp which sounds surprisingly good (and loud!) for its size. It weighs just a few pounds and can run on batteries, so it’s easy to toss in the car for a travel amp. Unfortunately, it is just as easily tossed out of the car, as I learned when my THR10 stage-dived from the car onto the pavement. Ouch! It survived mostly unscathed, except for the power switch. It still works, sort of… but it’s bent and hard to use. I’ve procrastinated on this because it’s not a trivial repair, but am finally getting around to it.
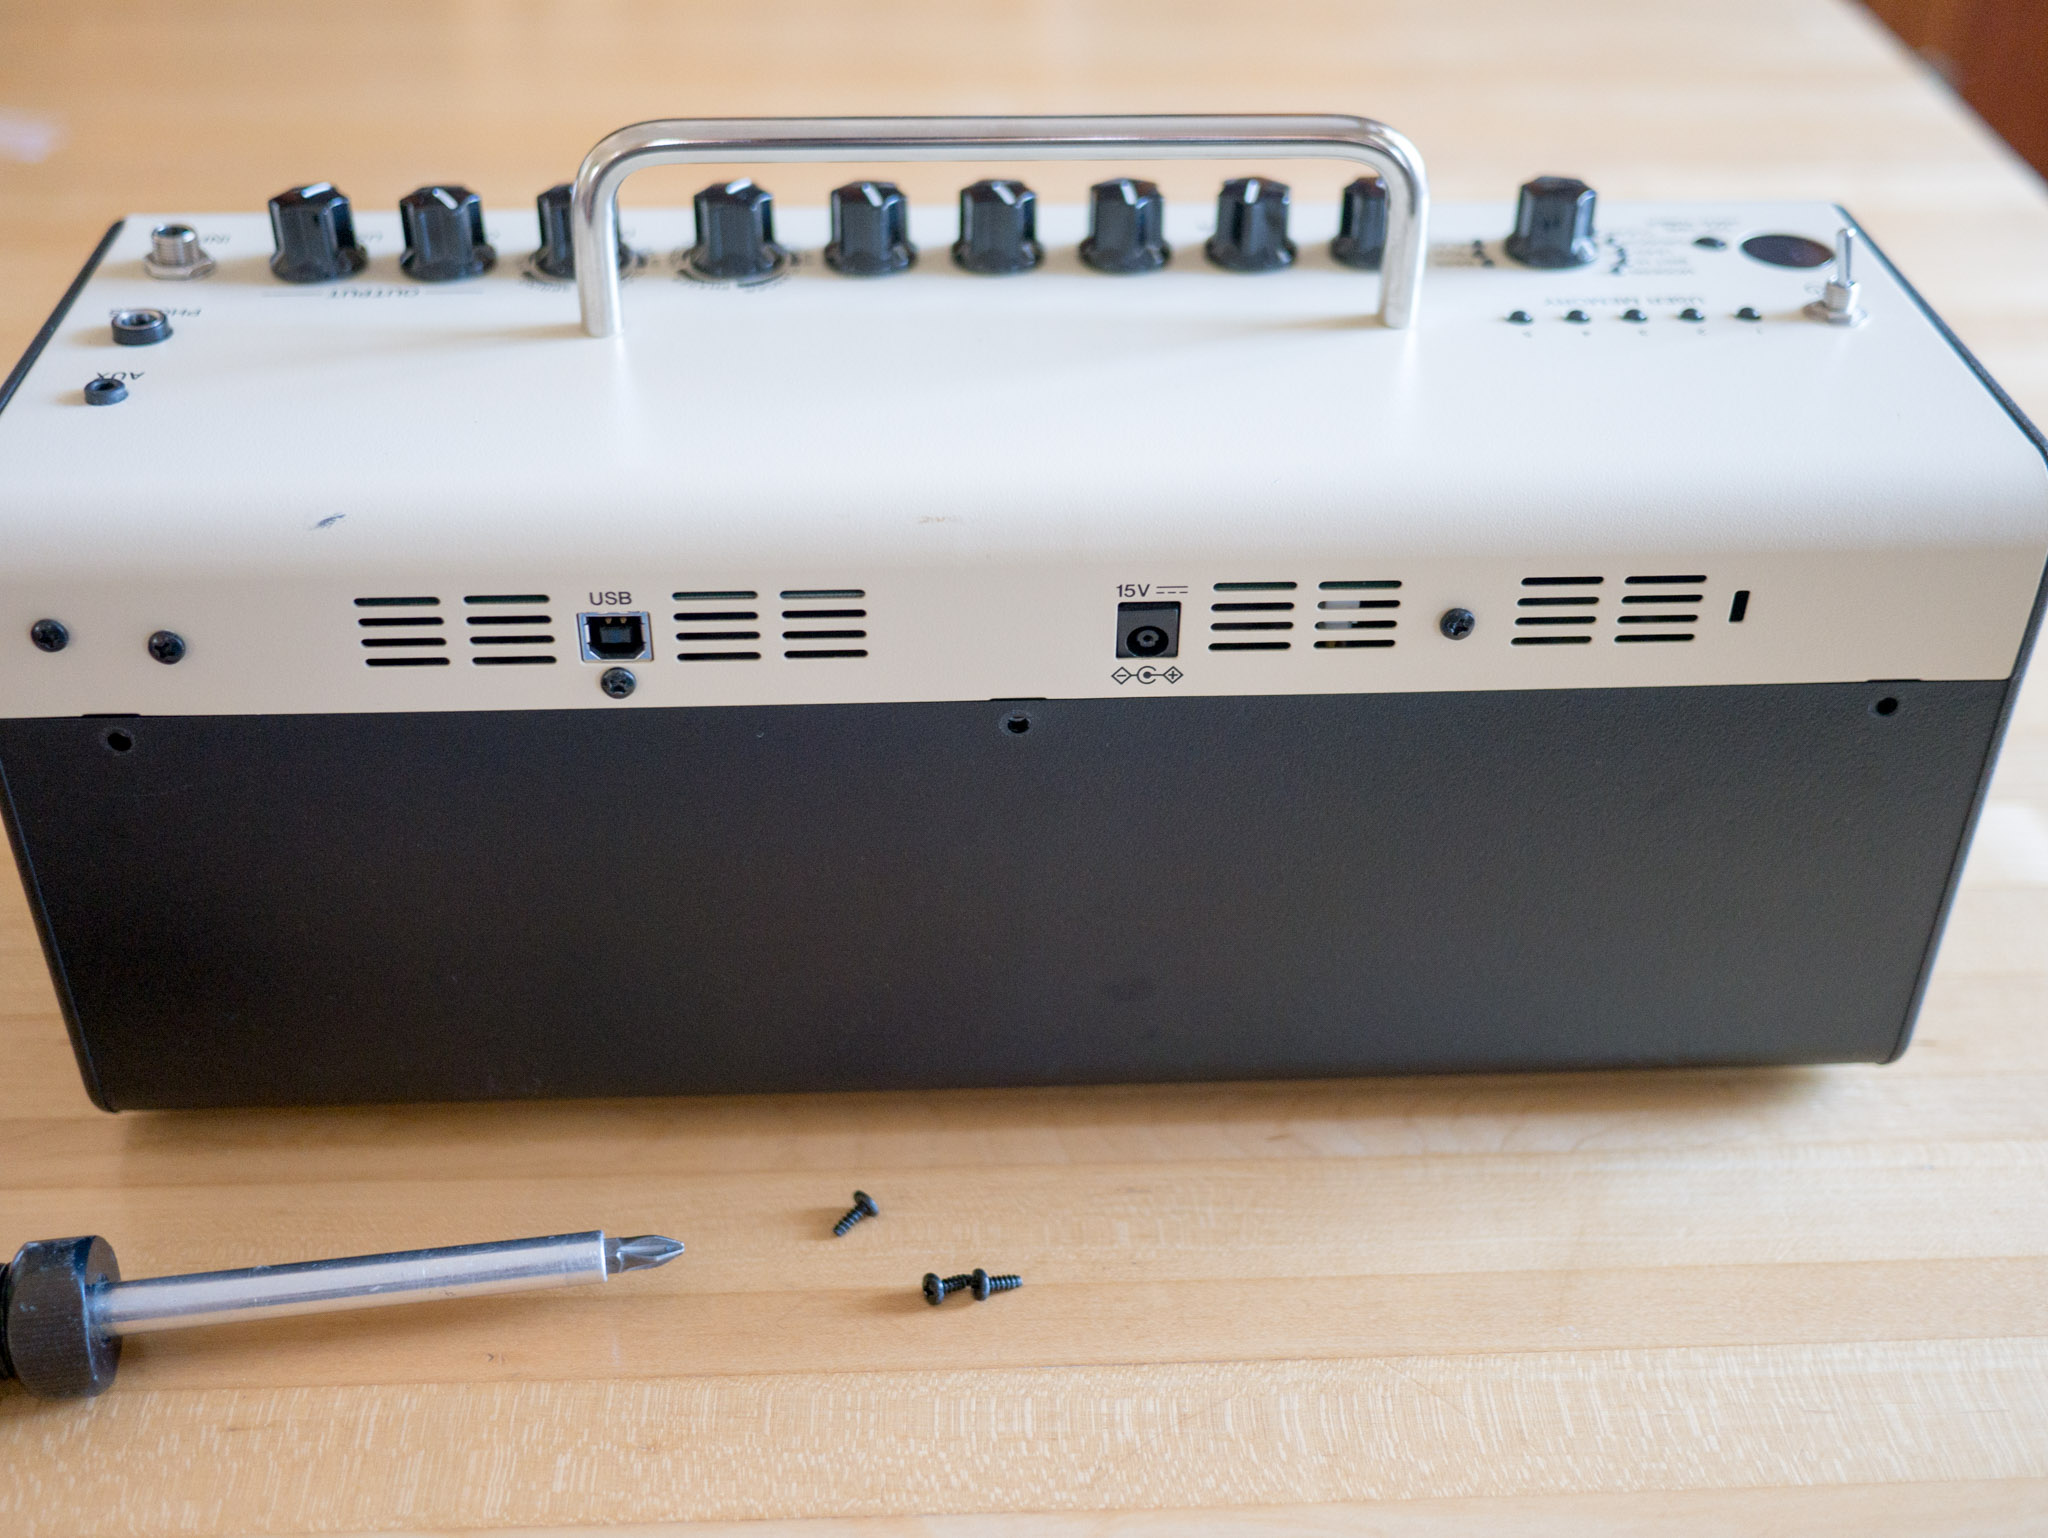
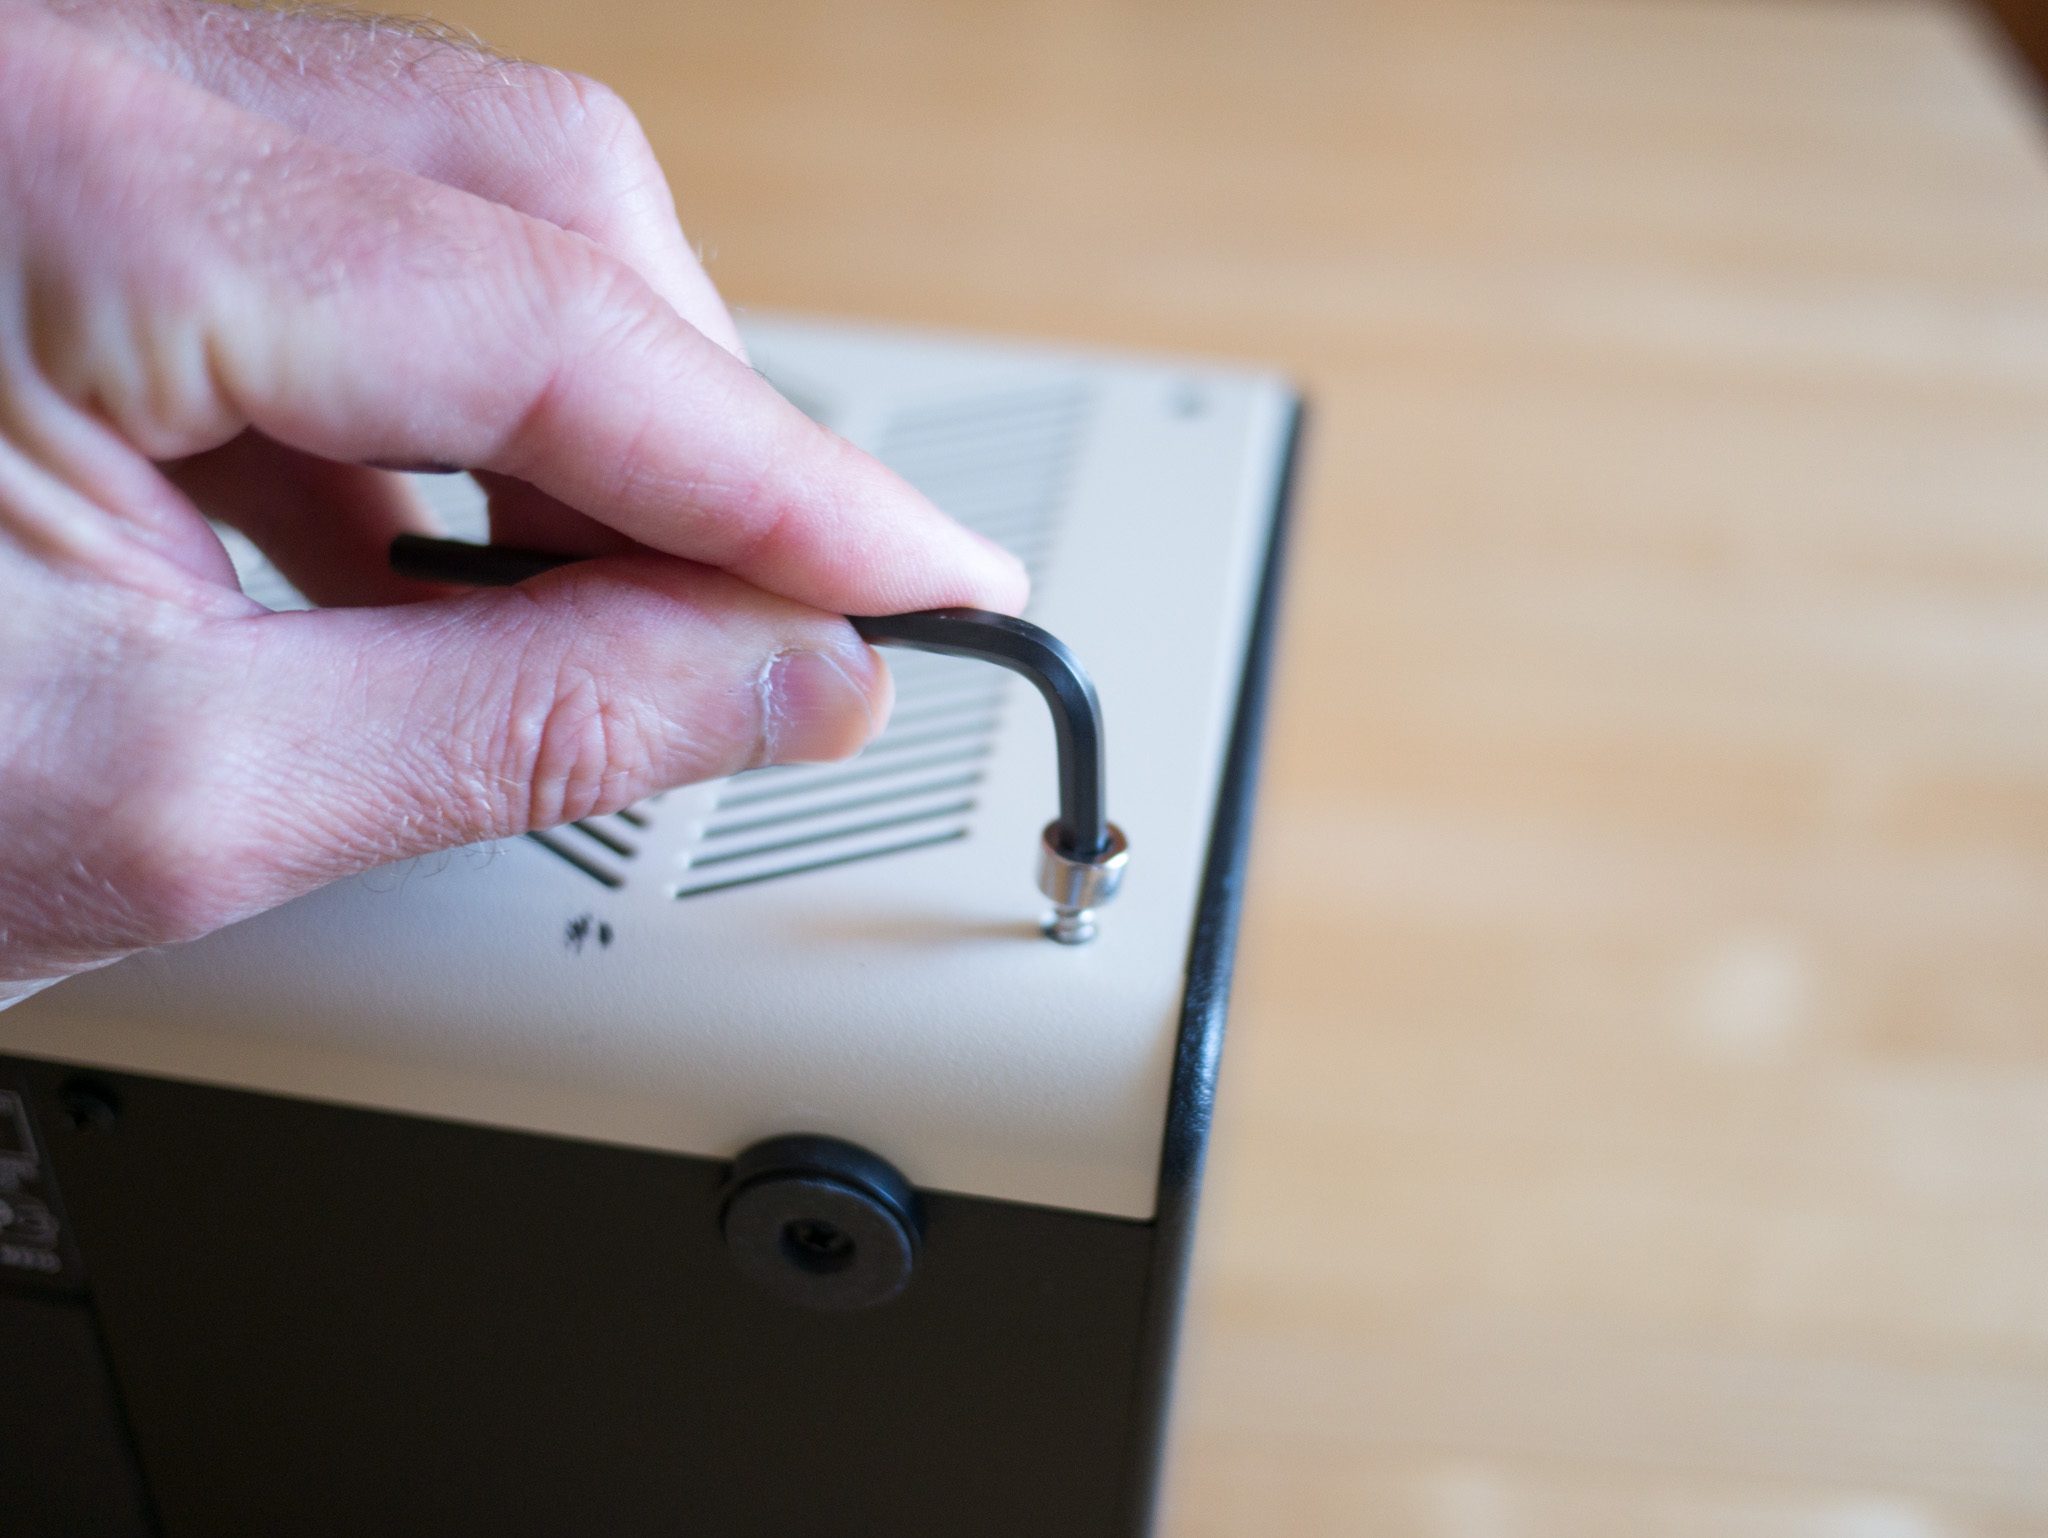
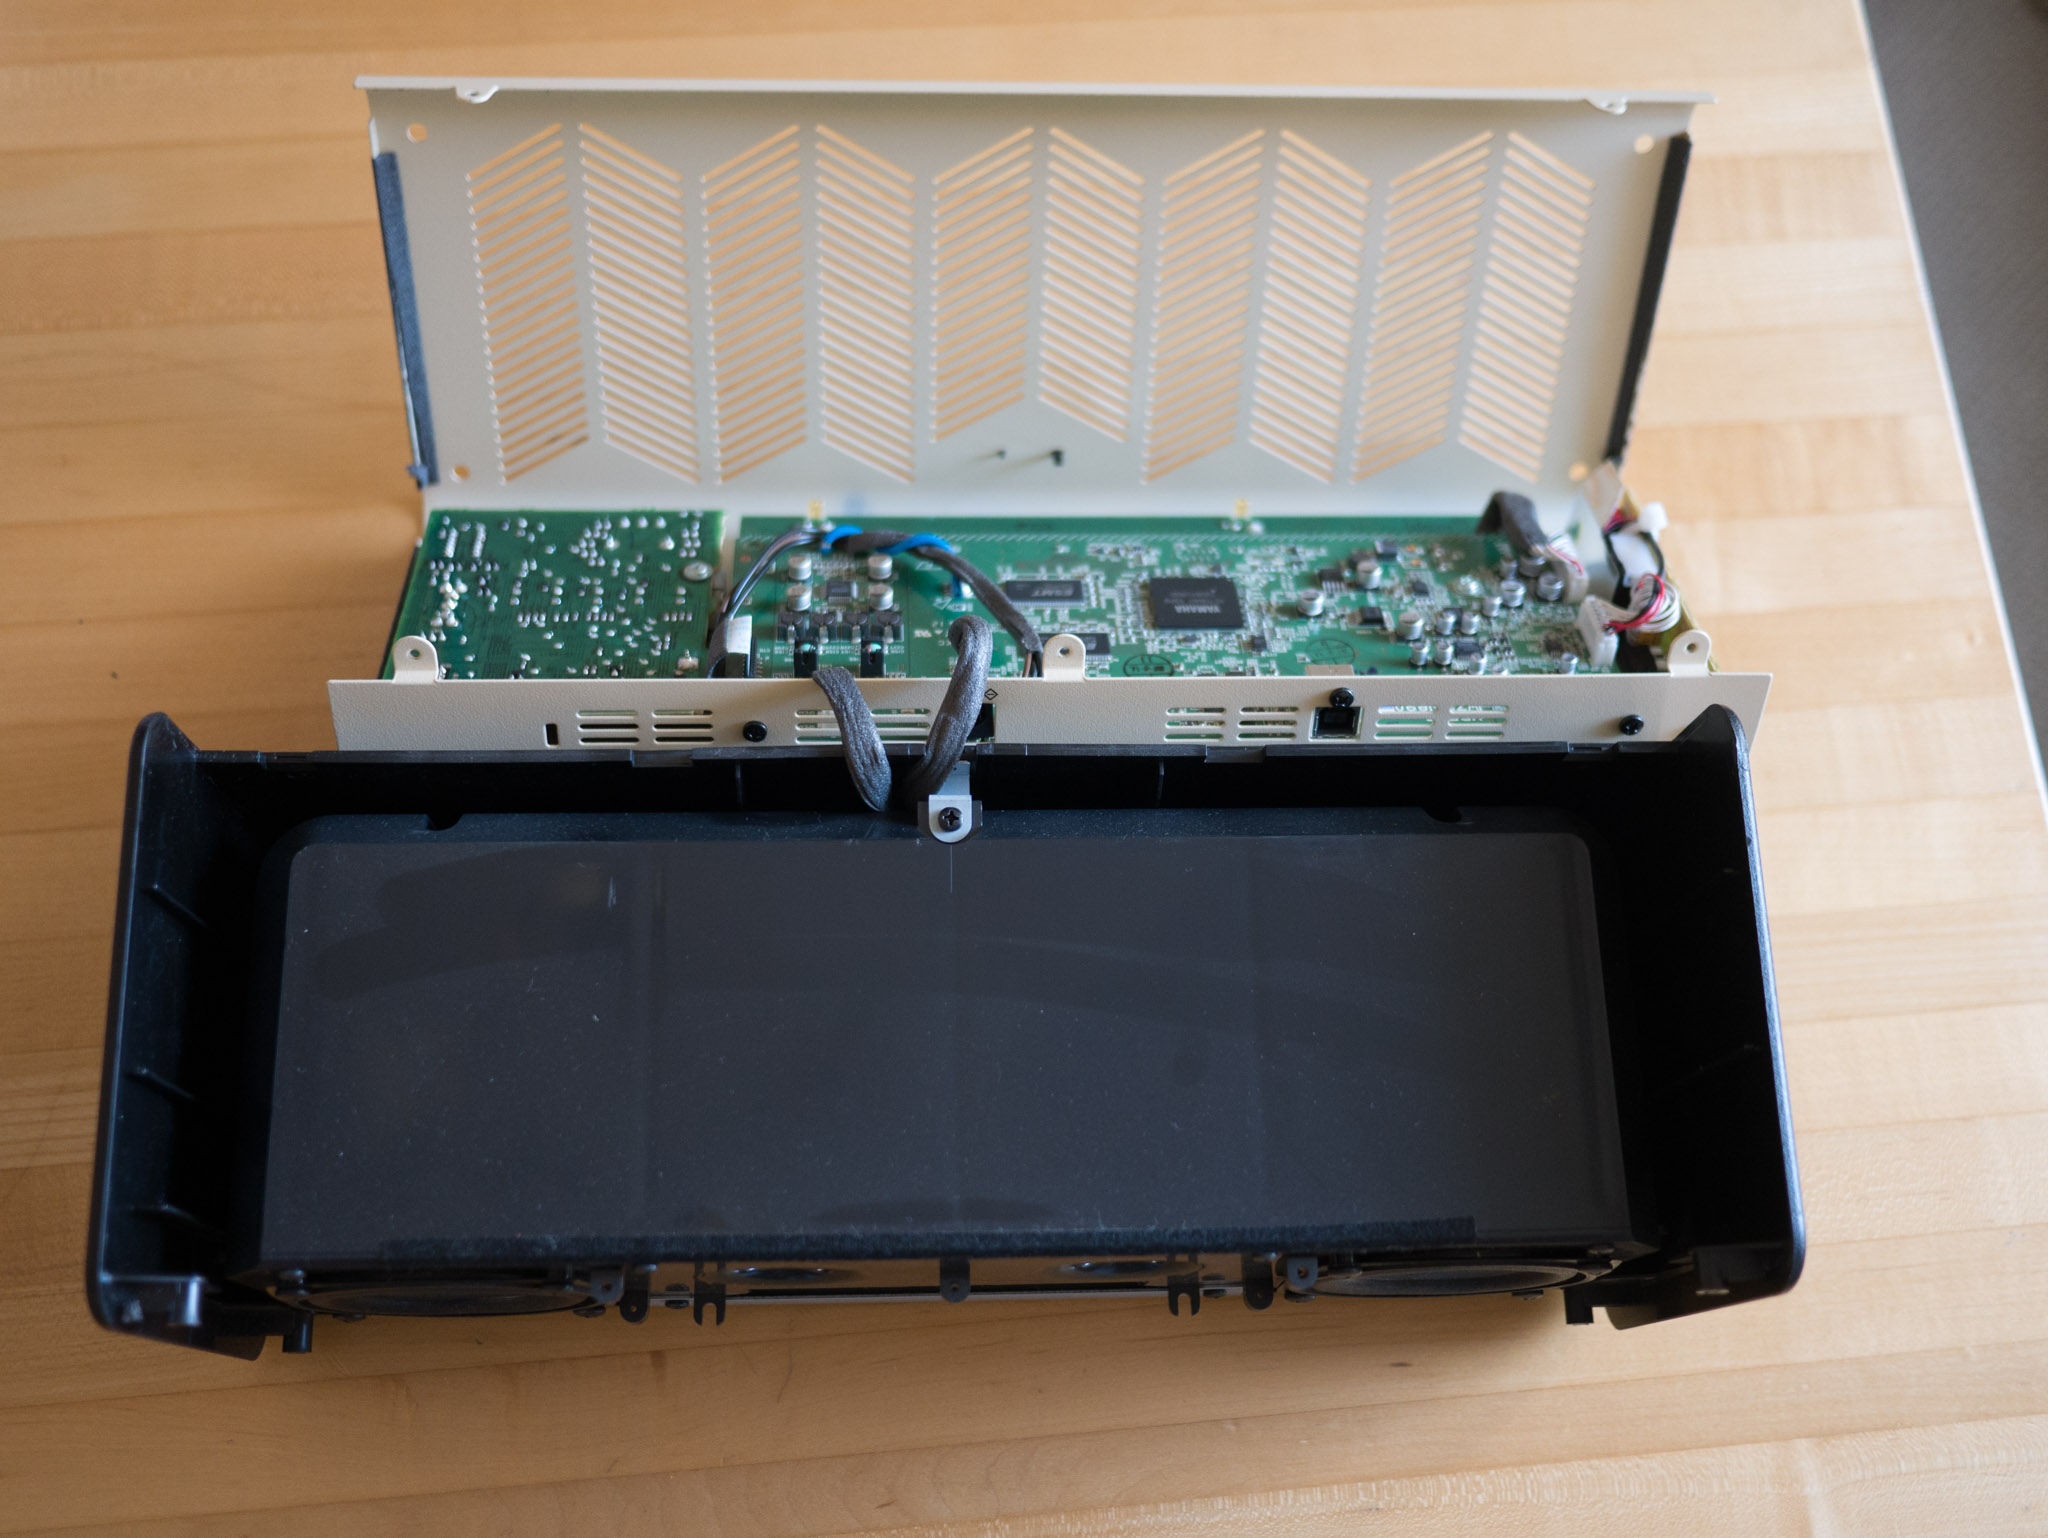
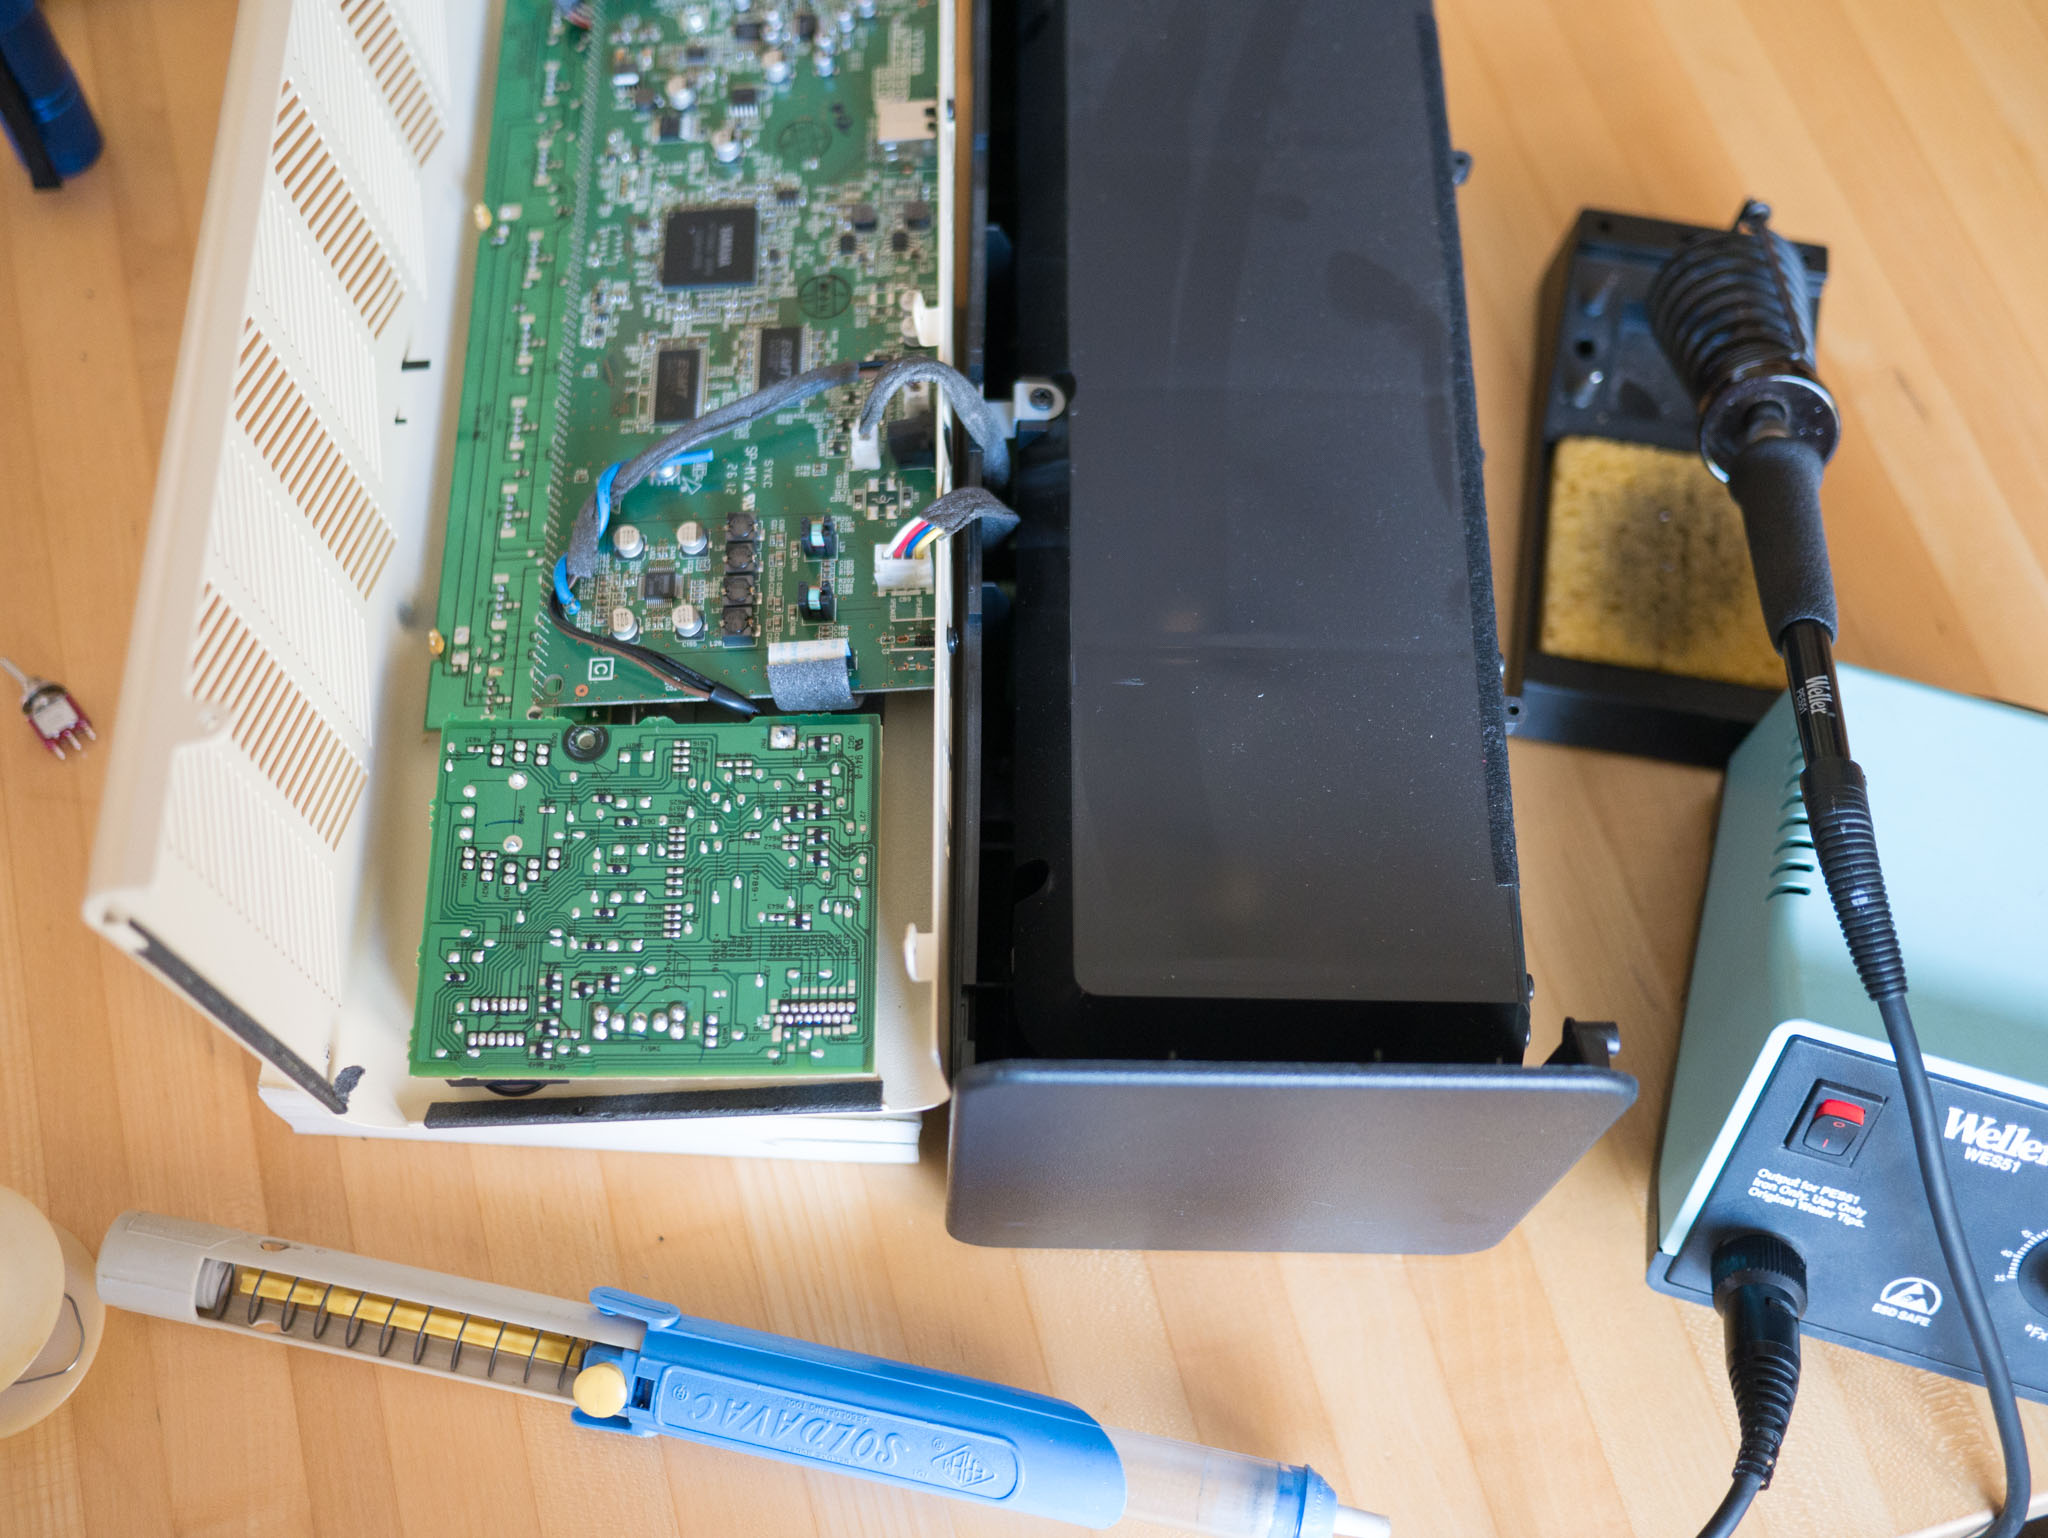
Before I could order a replacement part, I needed to open it up and examine the current switch. First, I removed the three screws on the back and two screws on the front feet with a phillips screwdriver. Then I removed the 4 bolts on front with an allen wrench.
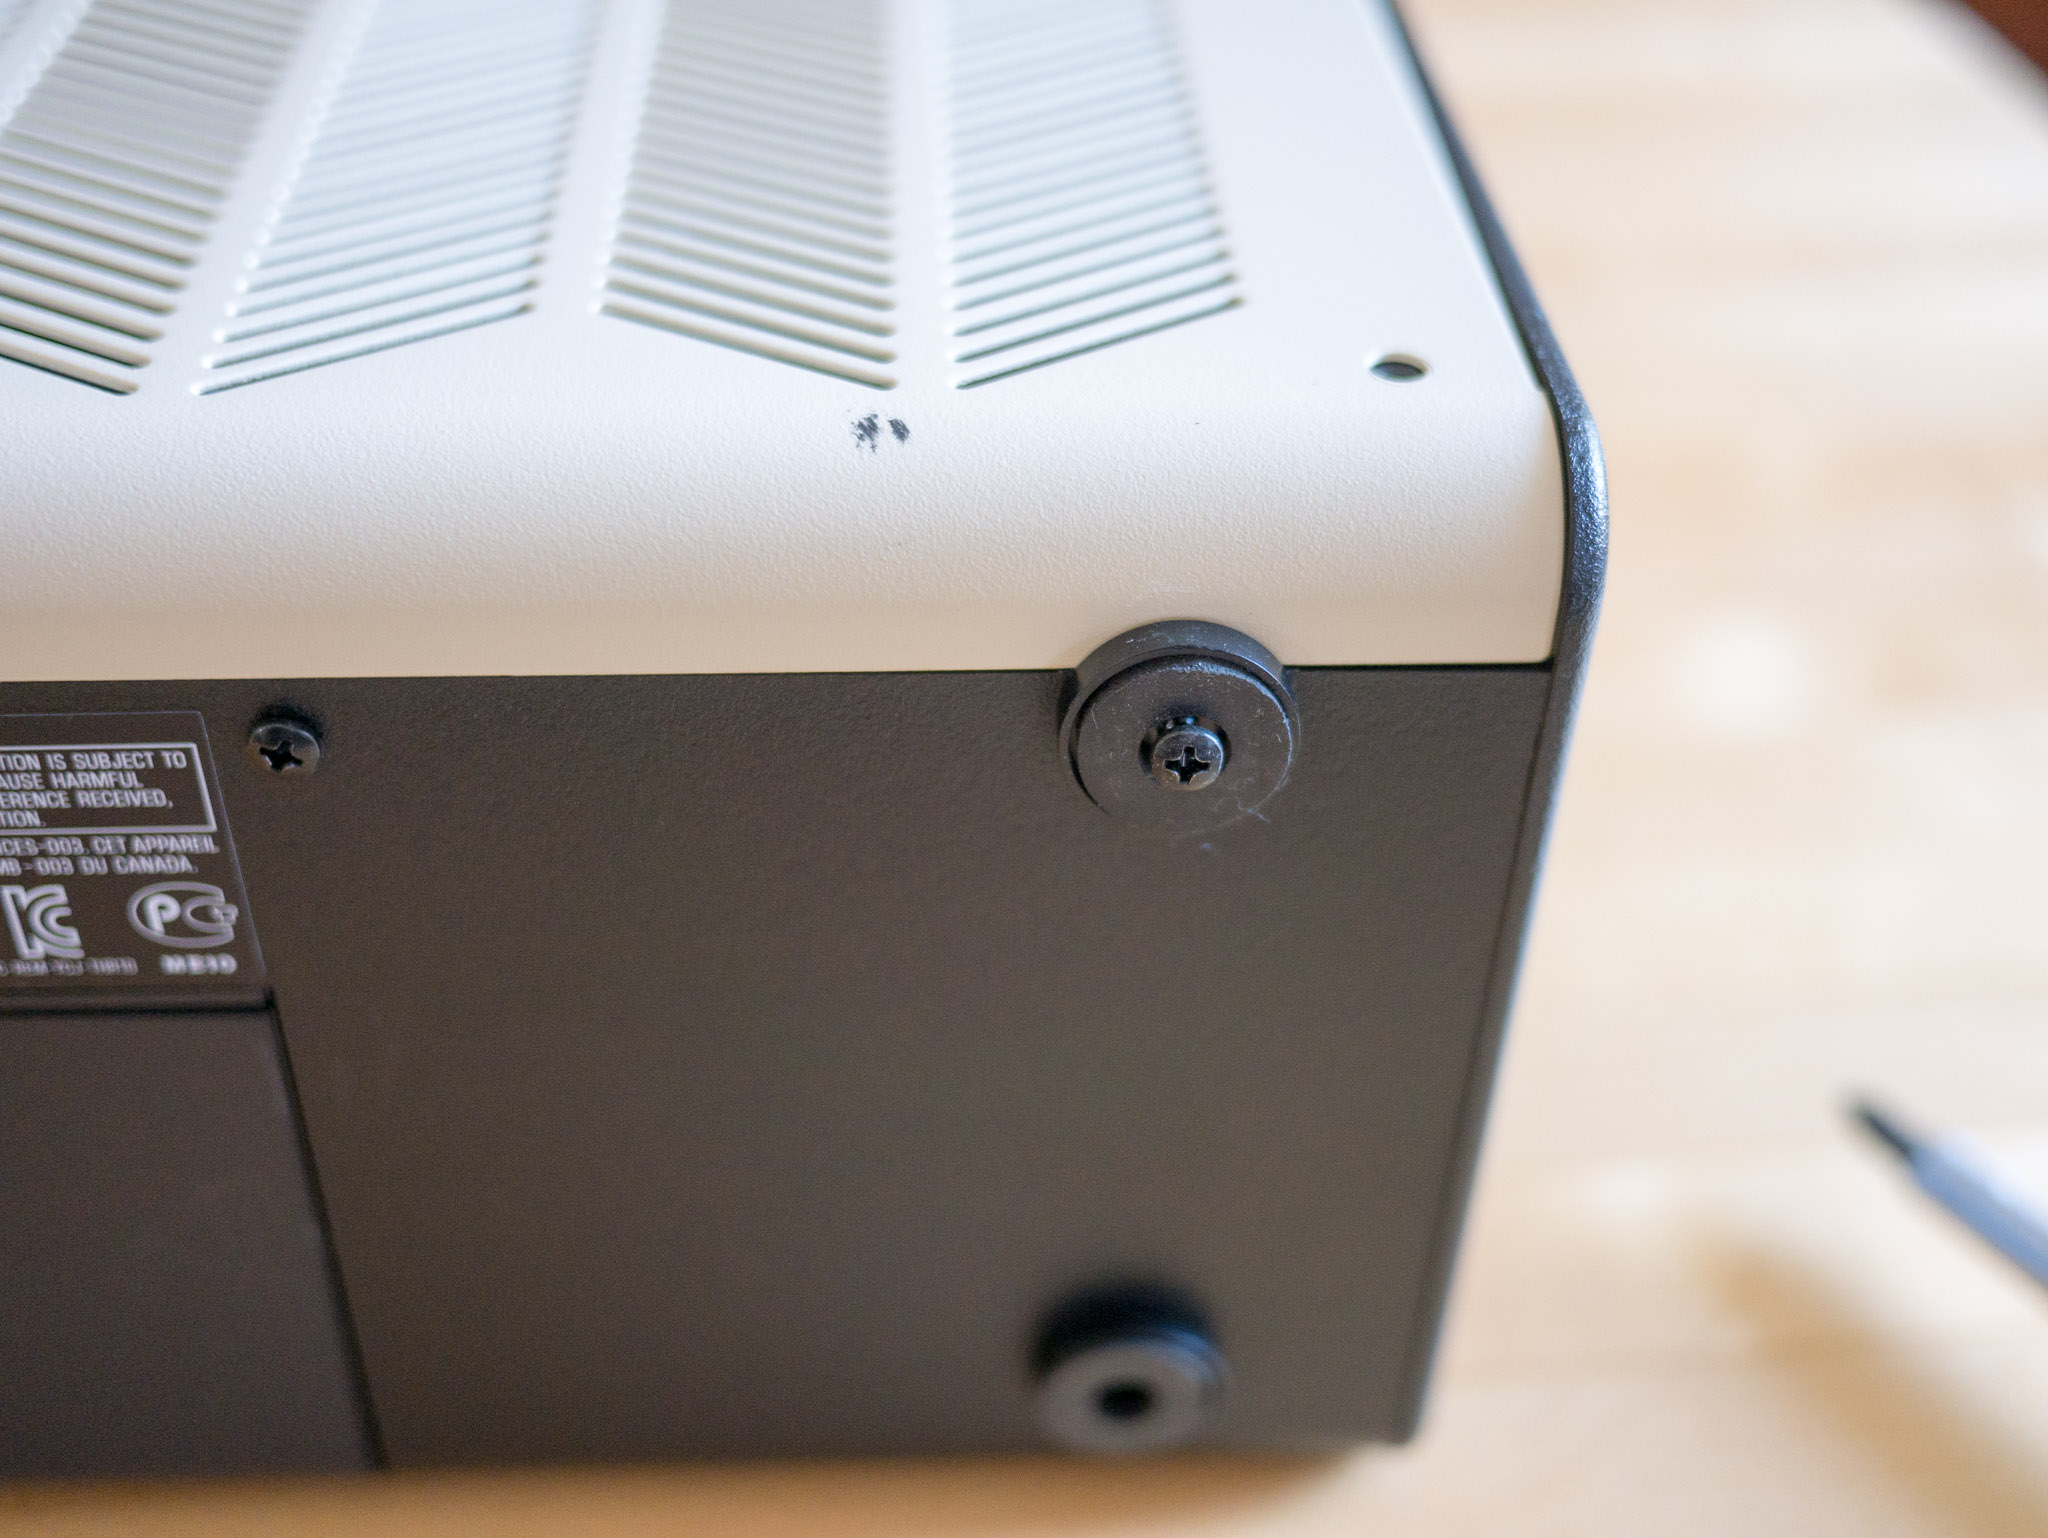
Then, I was able to separate the metal top/front from the black plastic back/side. It was a bit fidgety and required some wrangling to get the chassis open.
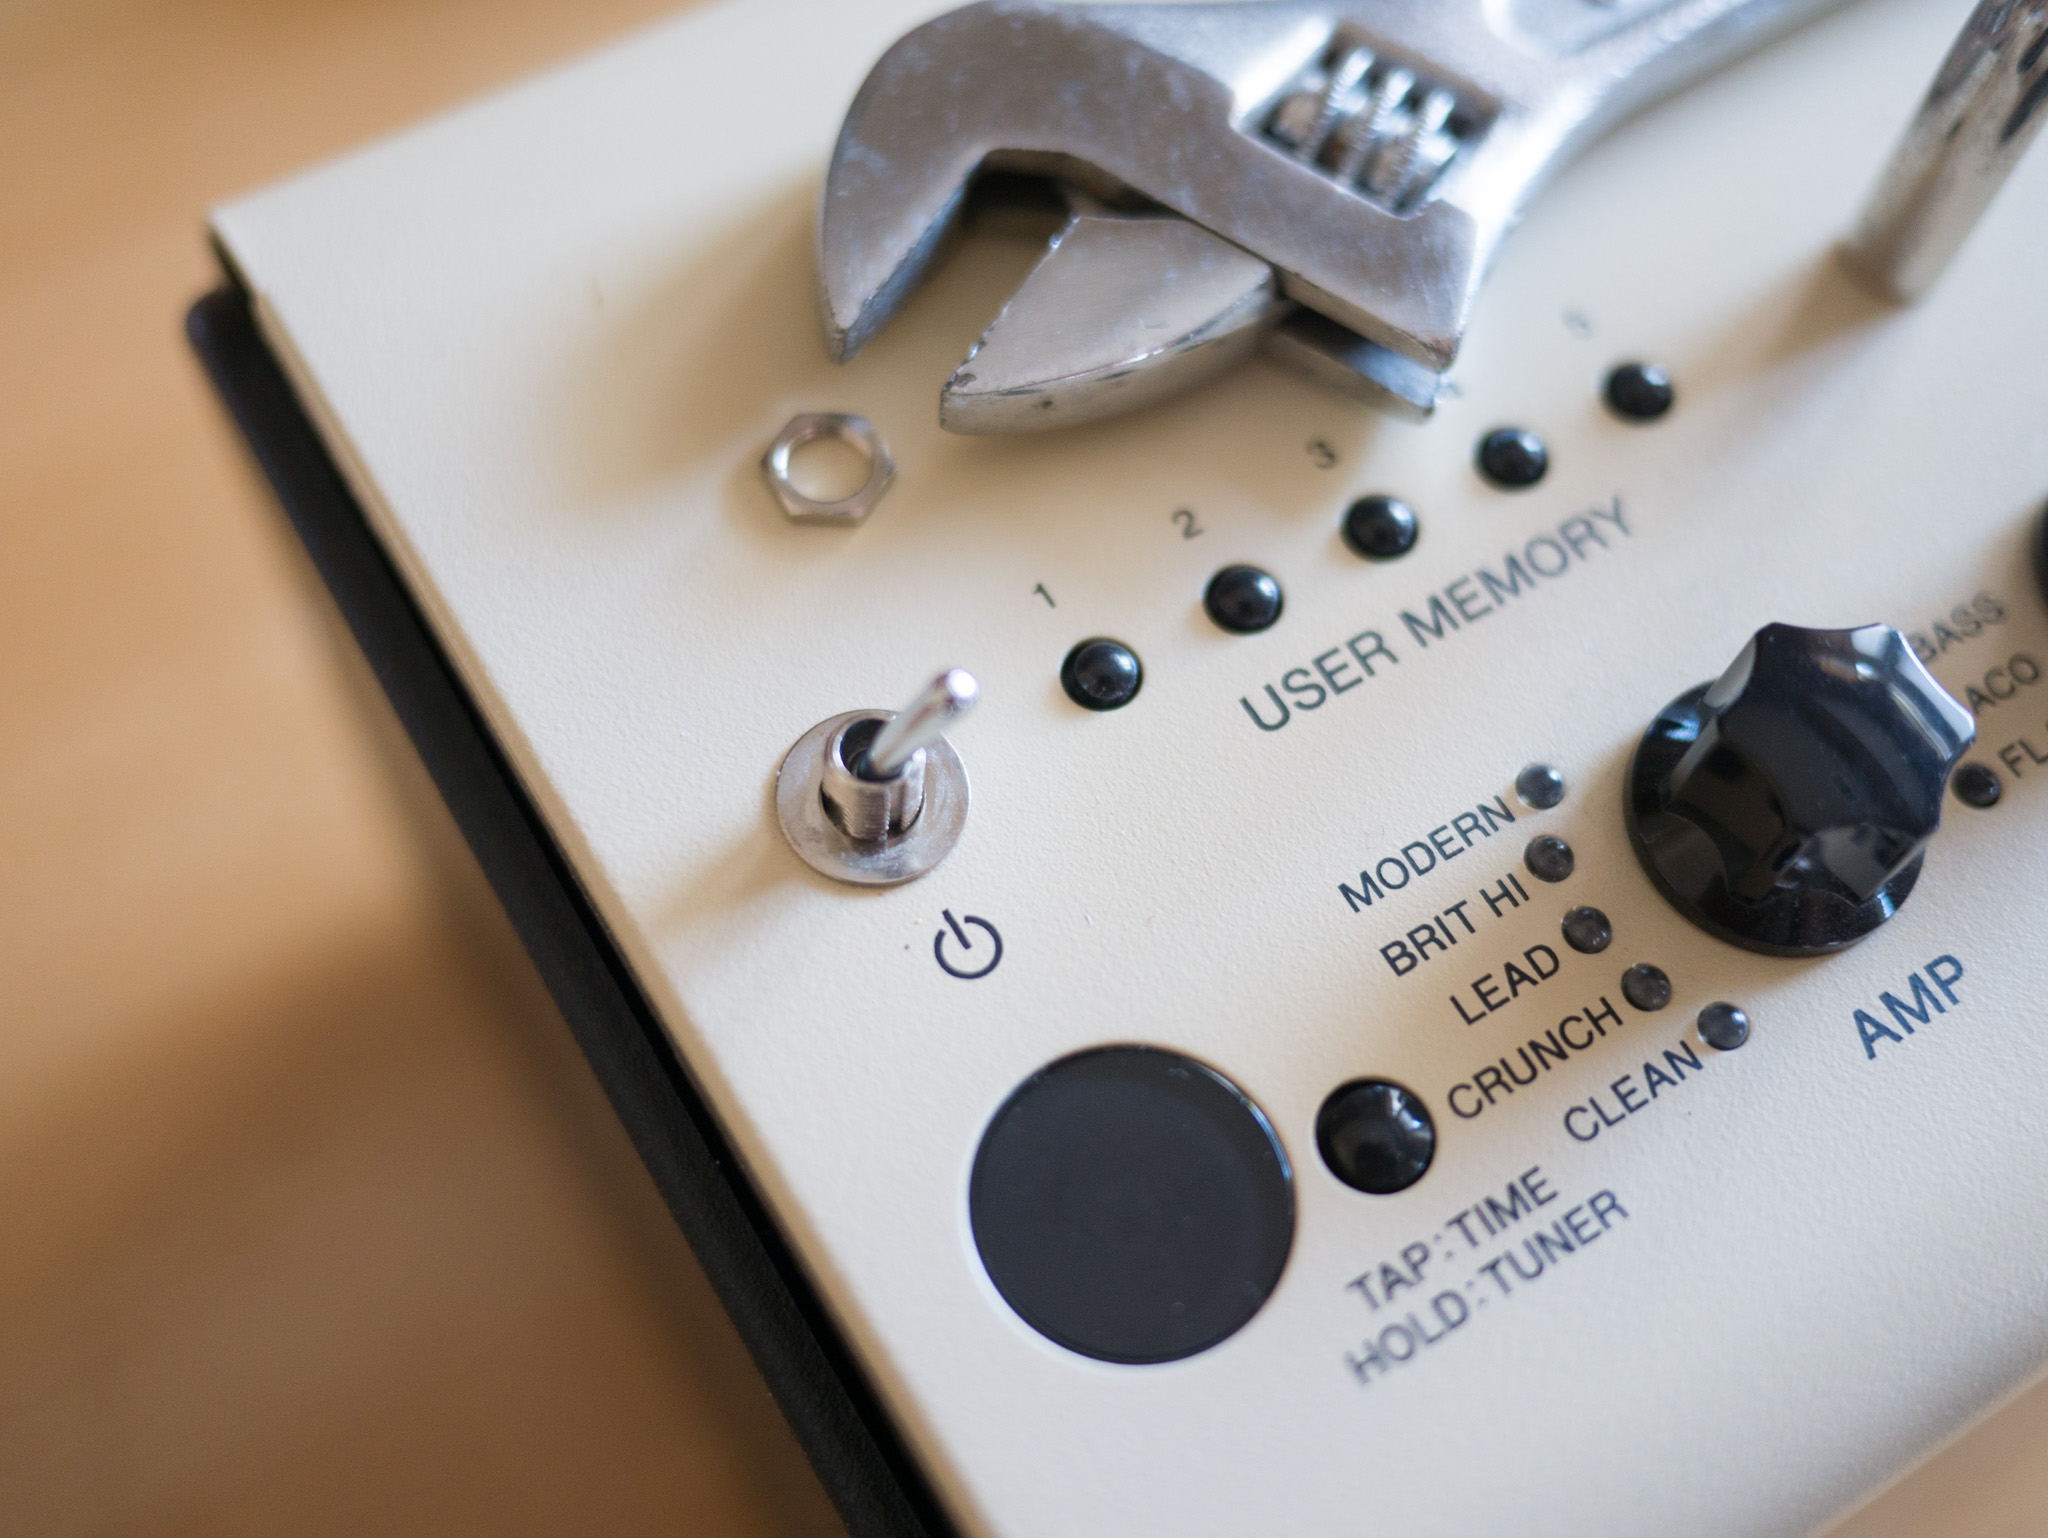
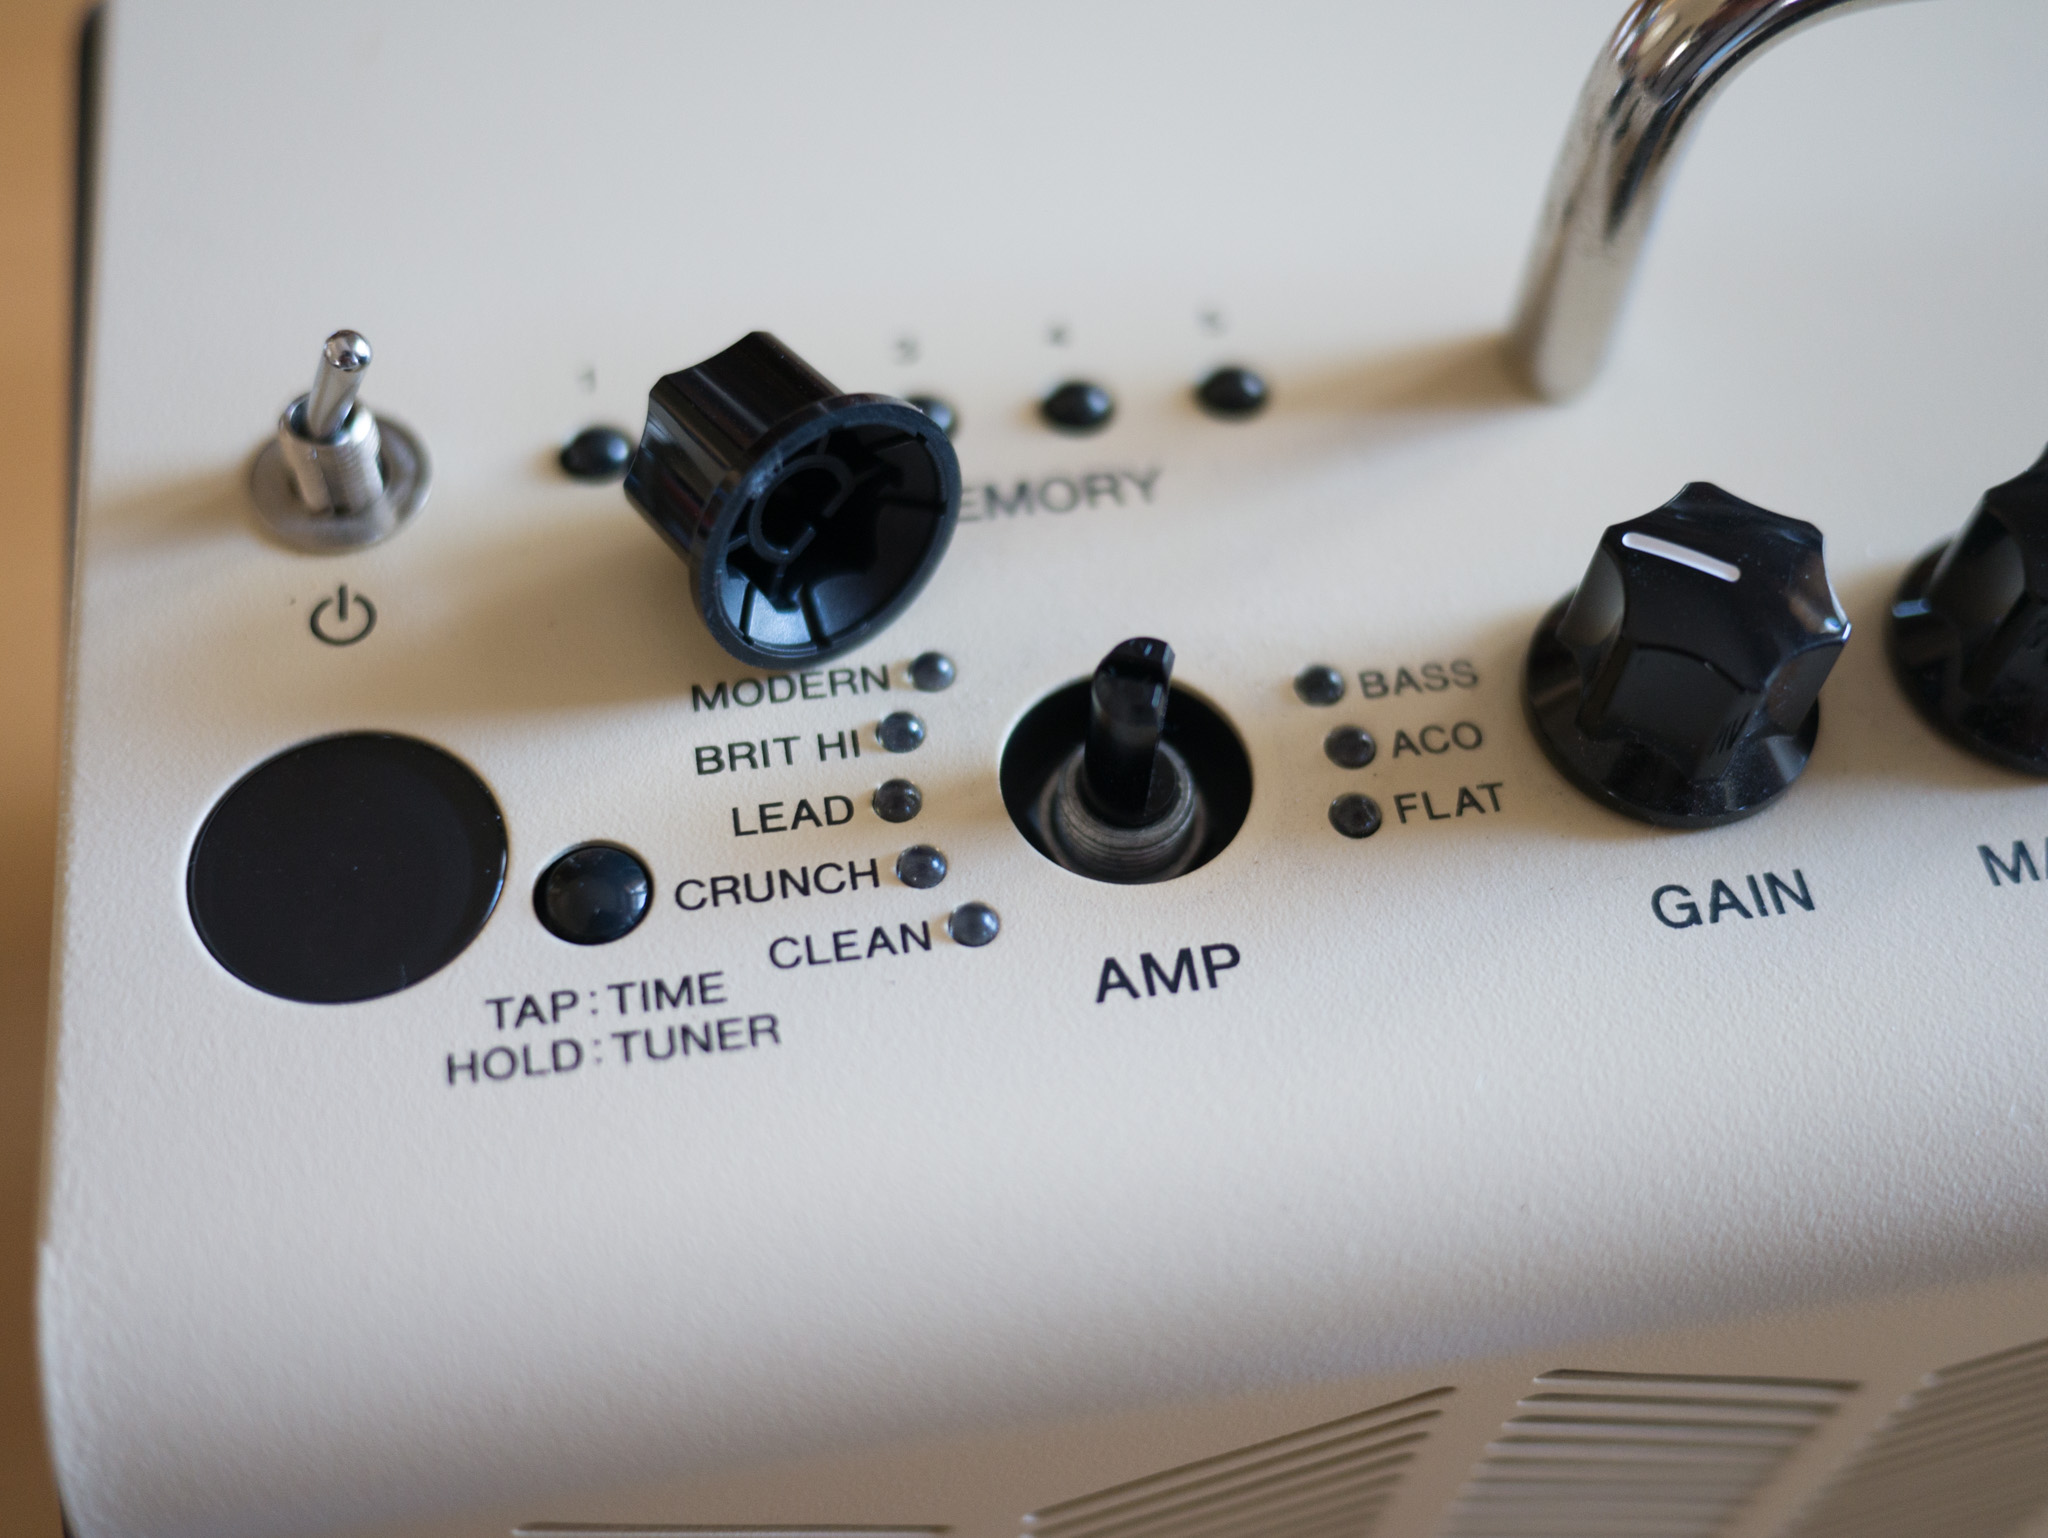
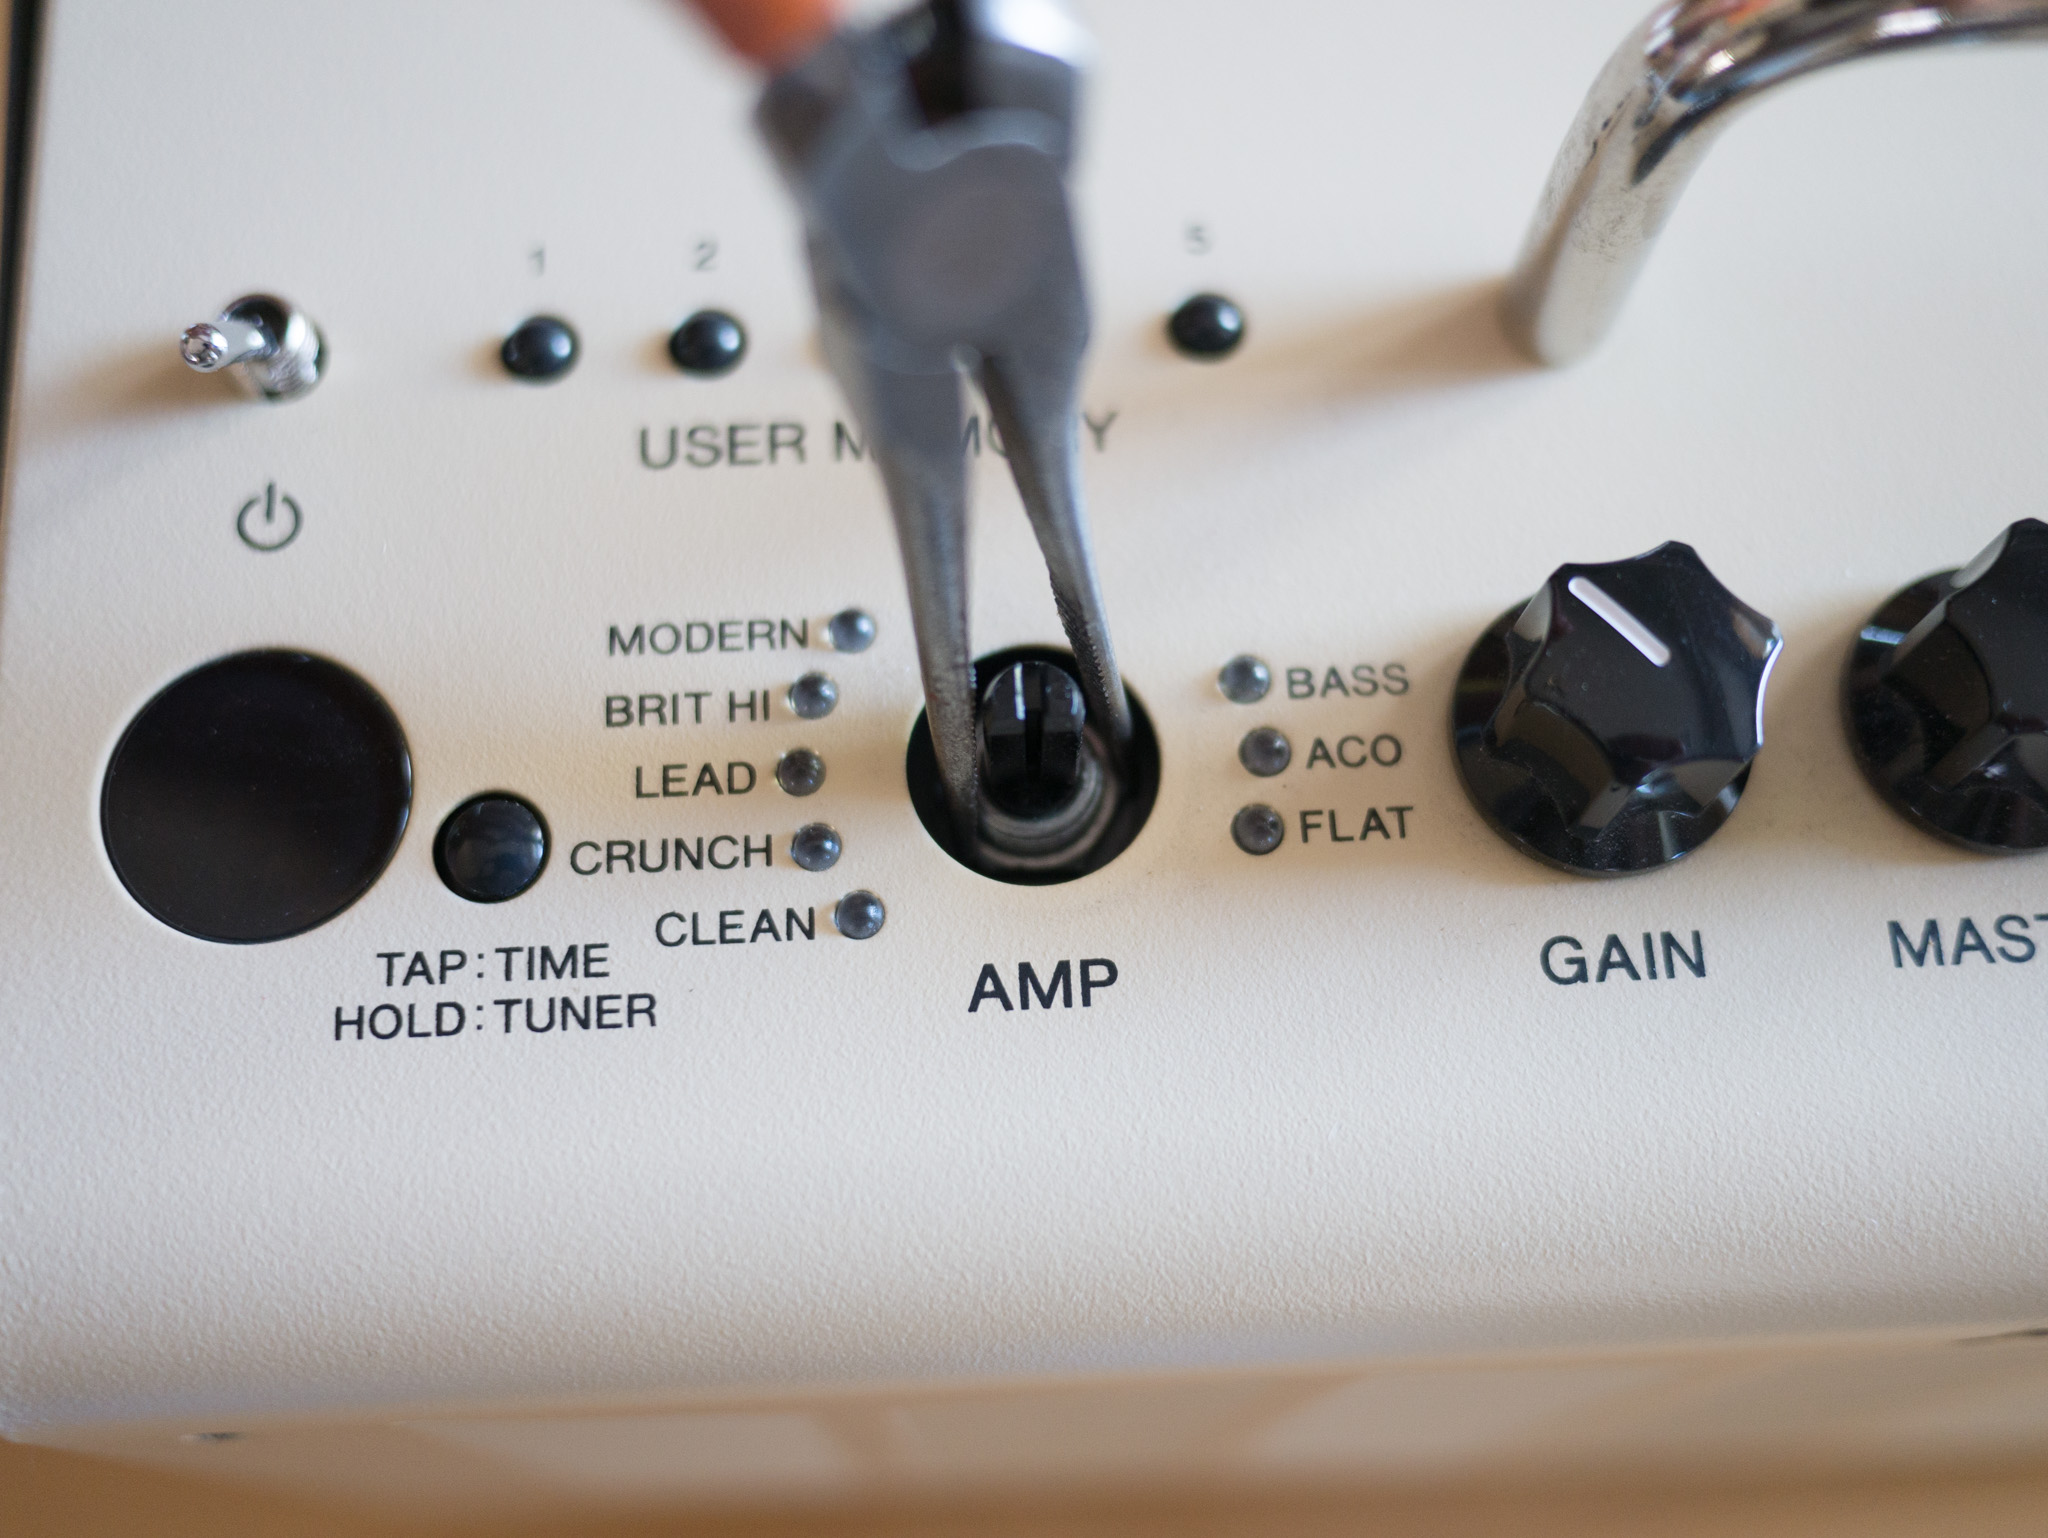
In order to release the circuit board containing the power switch, there are two nuts which must be removed from the panel. I removed the nut on the power switch easily with a crescent wrench. There’s also a nut hiding under the AMP knob which was tricker to remove. The knob pulls up relatively easily, but the nut is recessed beneath the panel, so I had to use a pair of needle nose pliers instead of a wrench to get it loose.
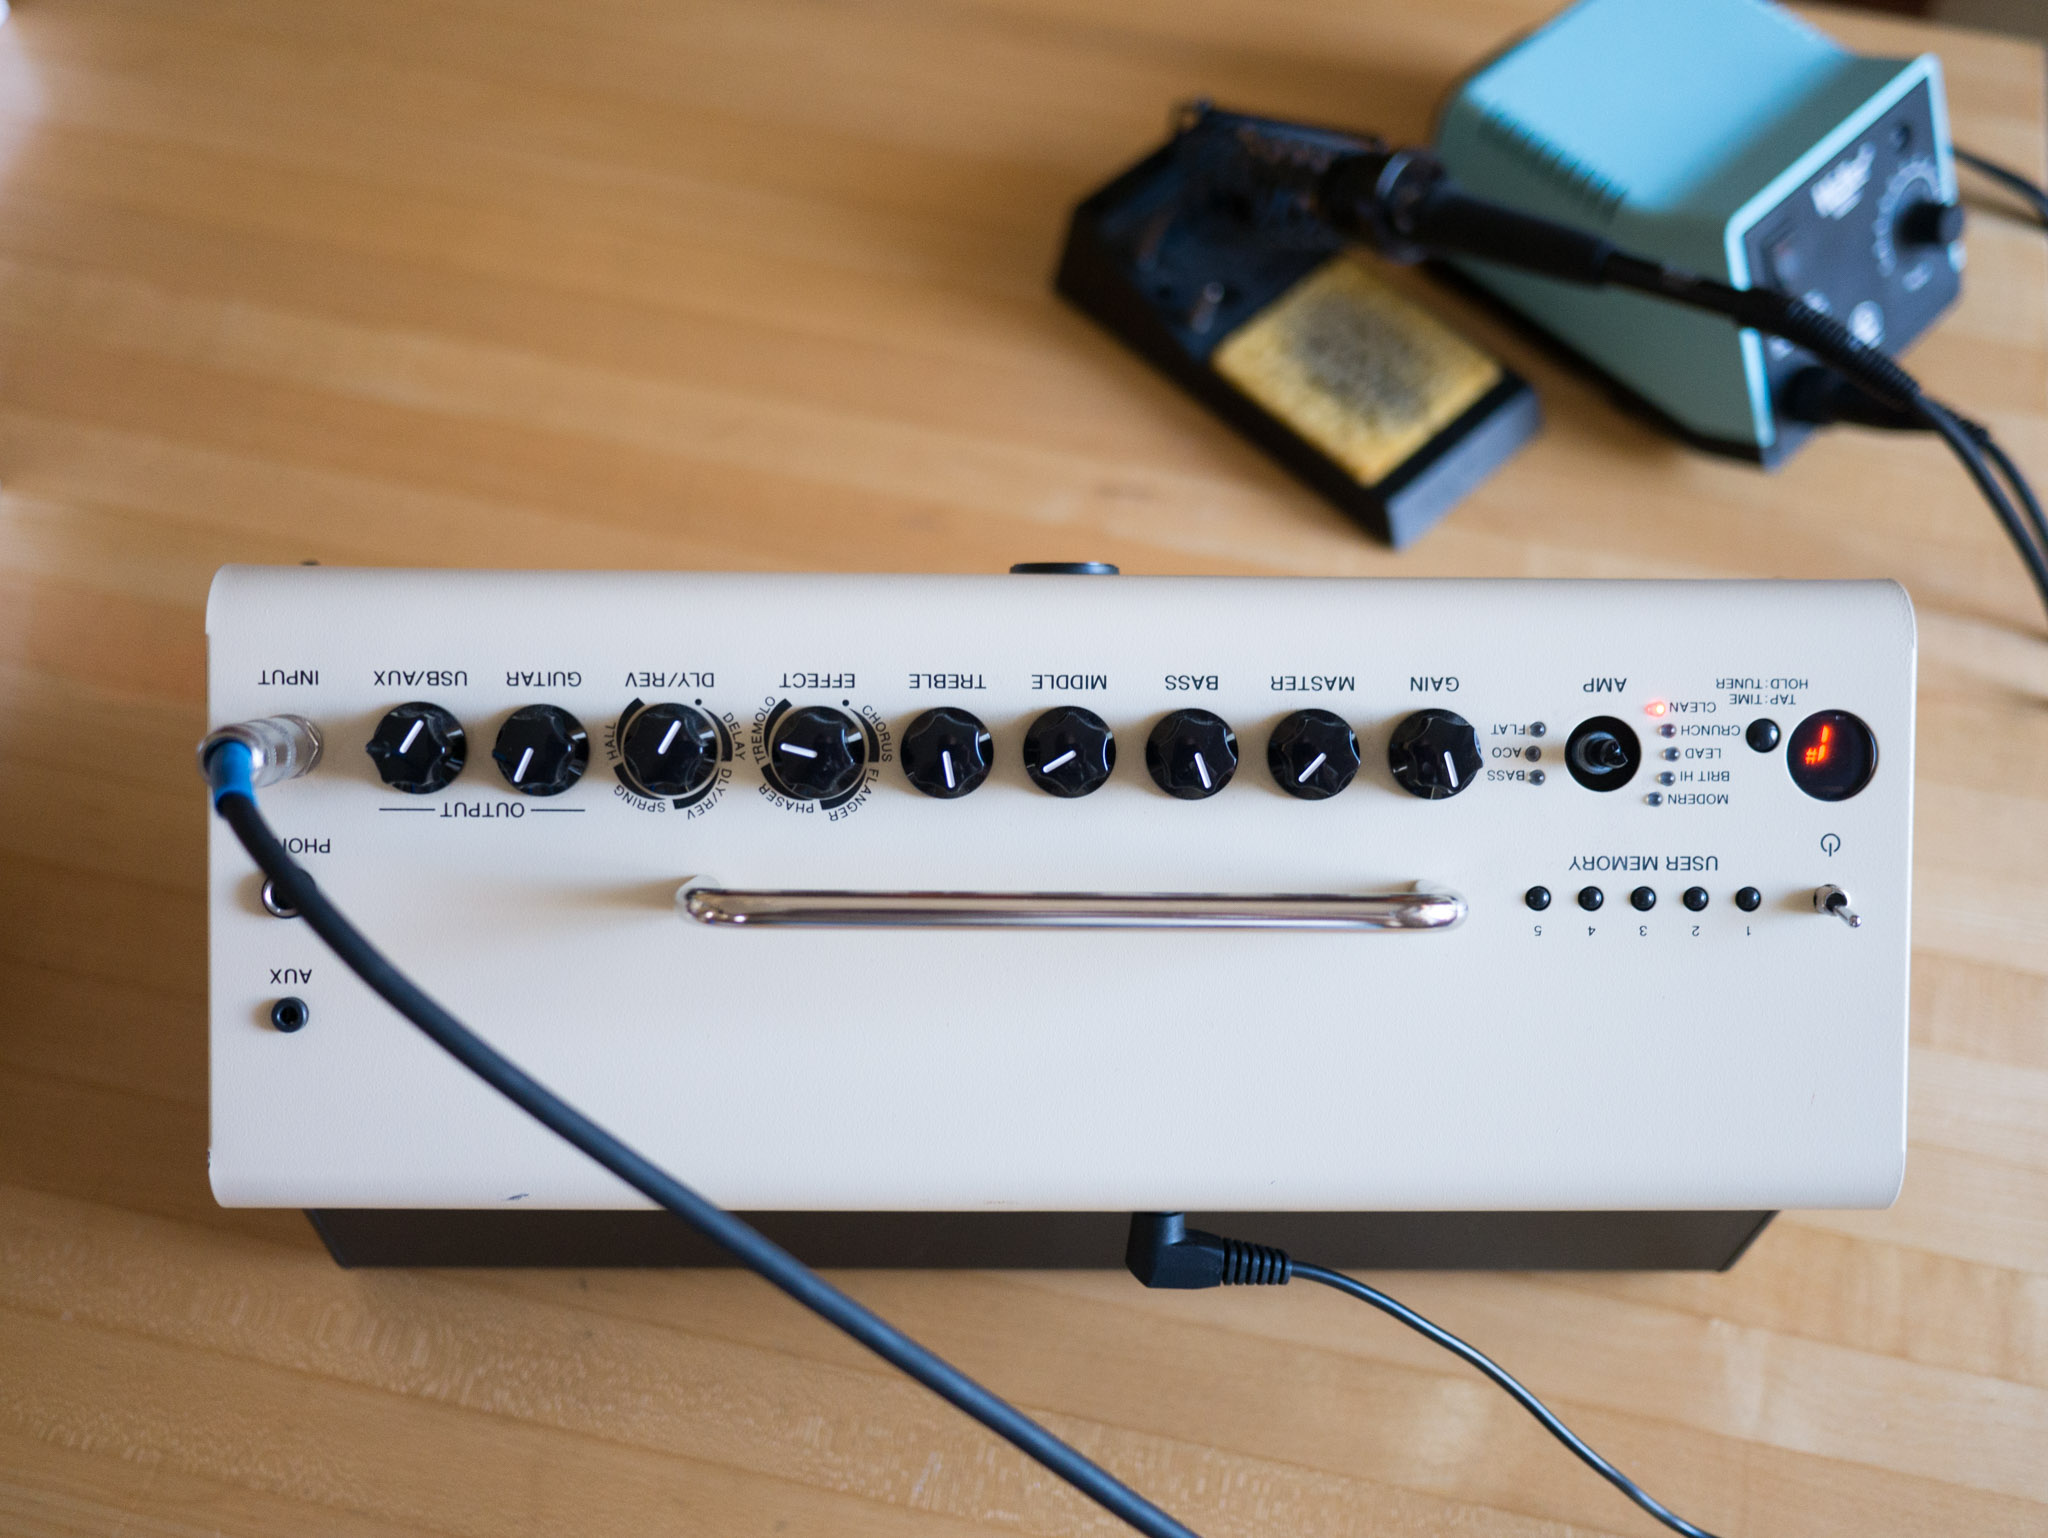
Next I removed the one screw holding the circuit board in place, and gently turned over the board to examine the switch.
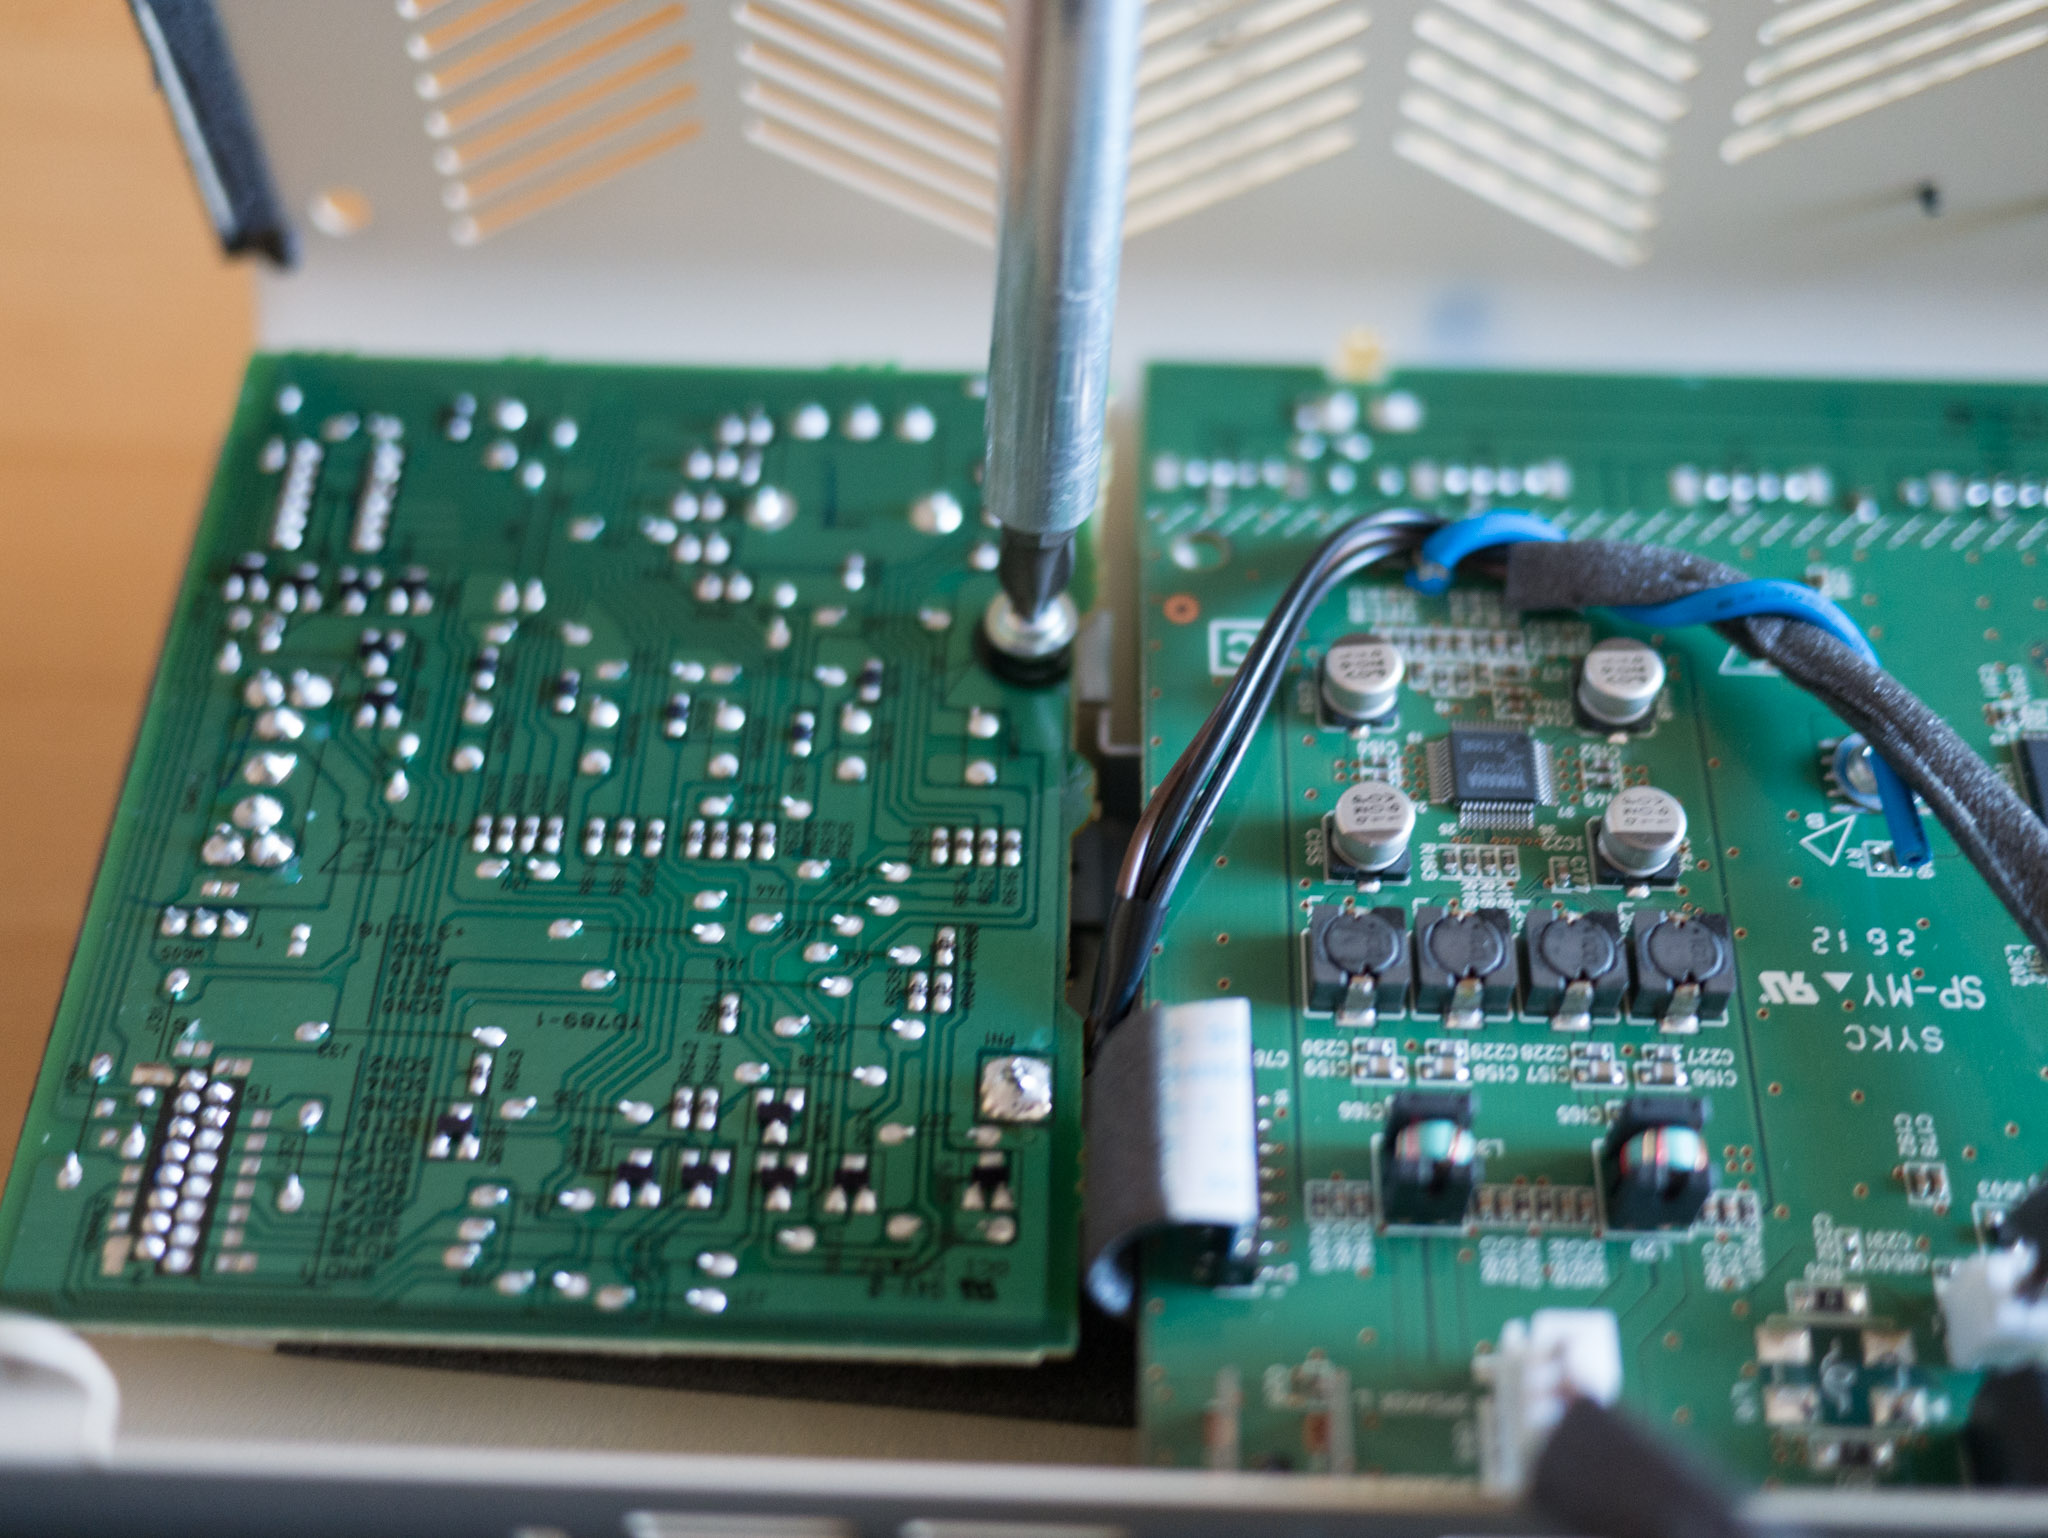
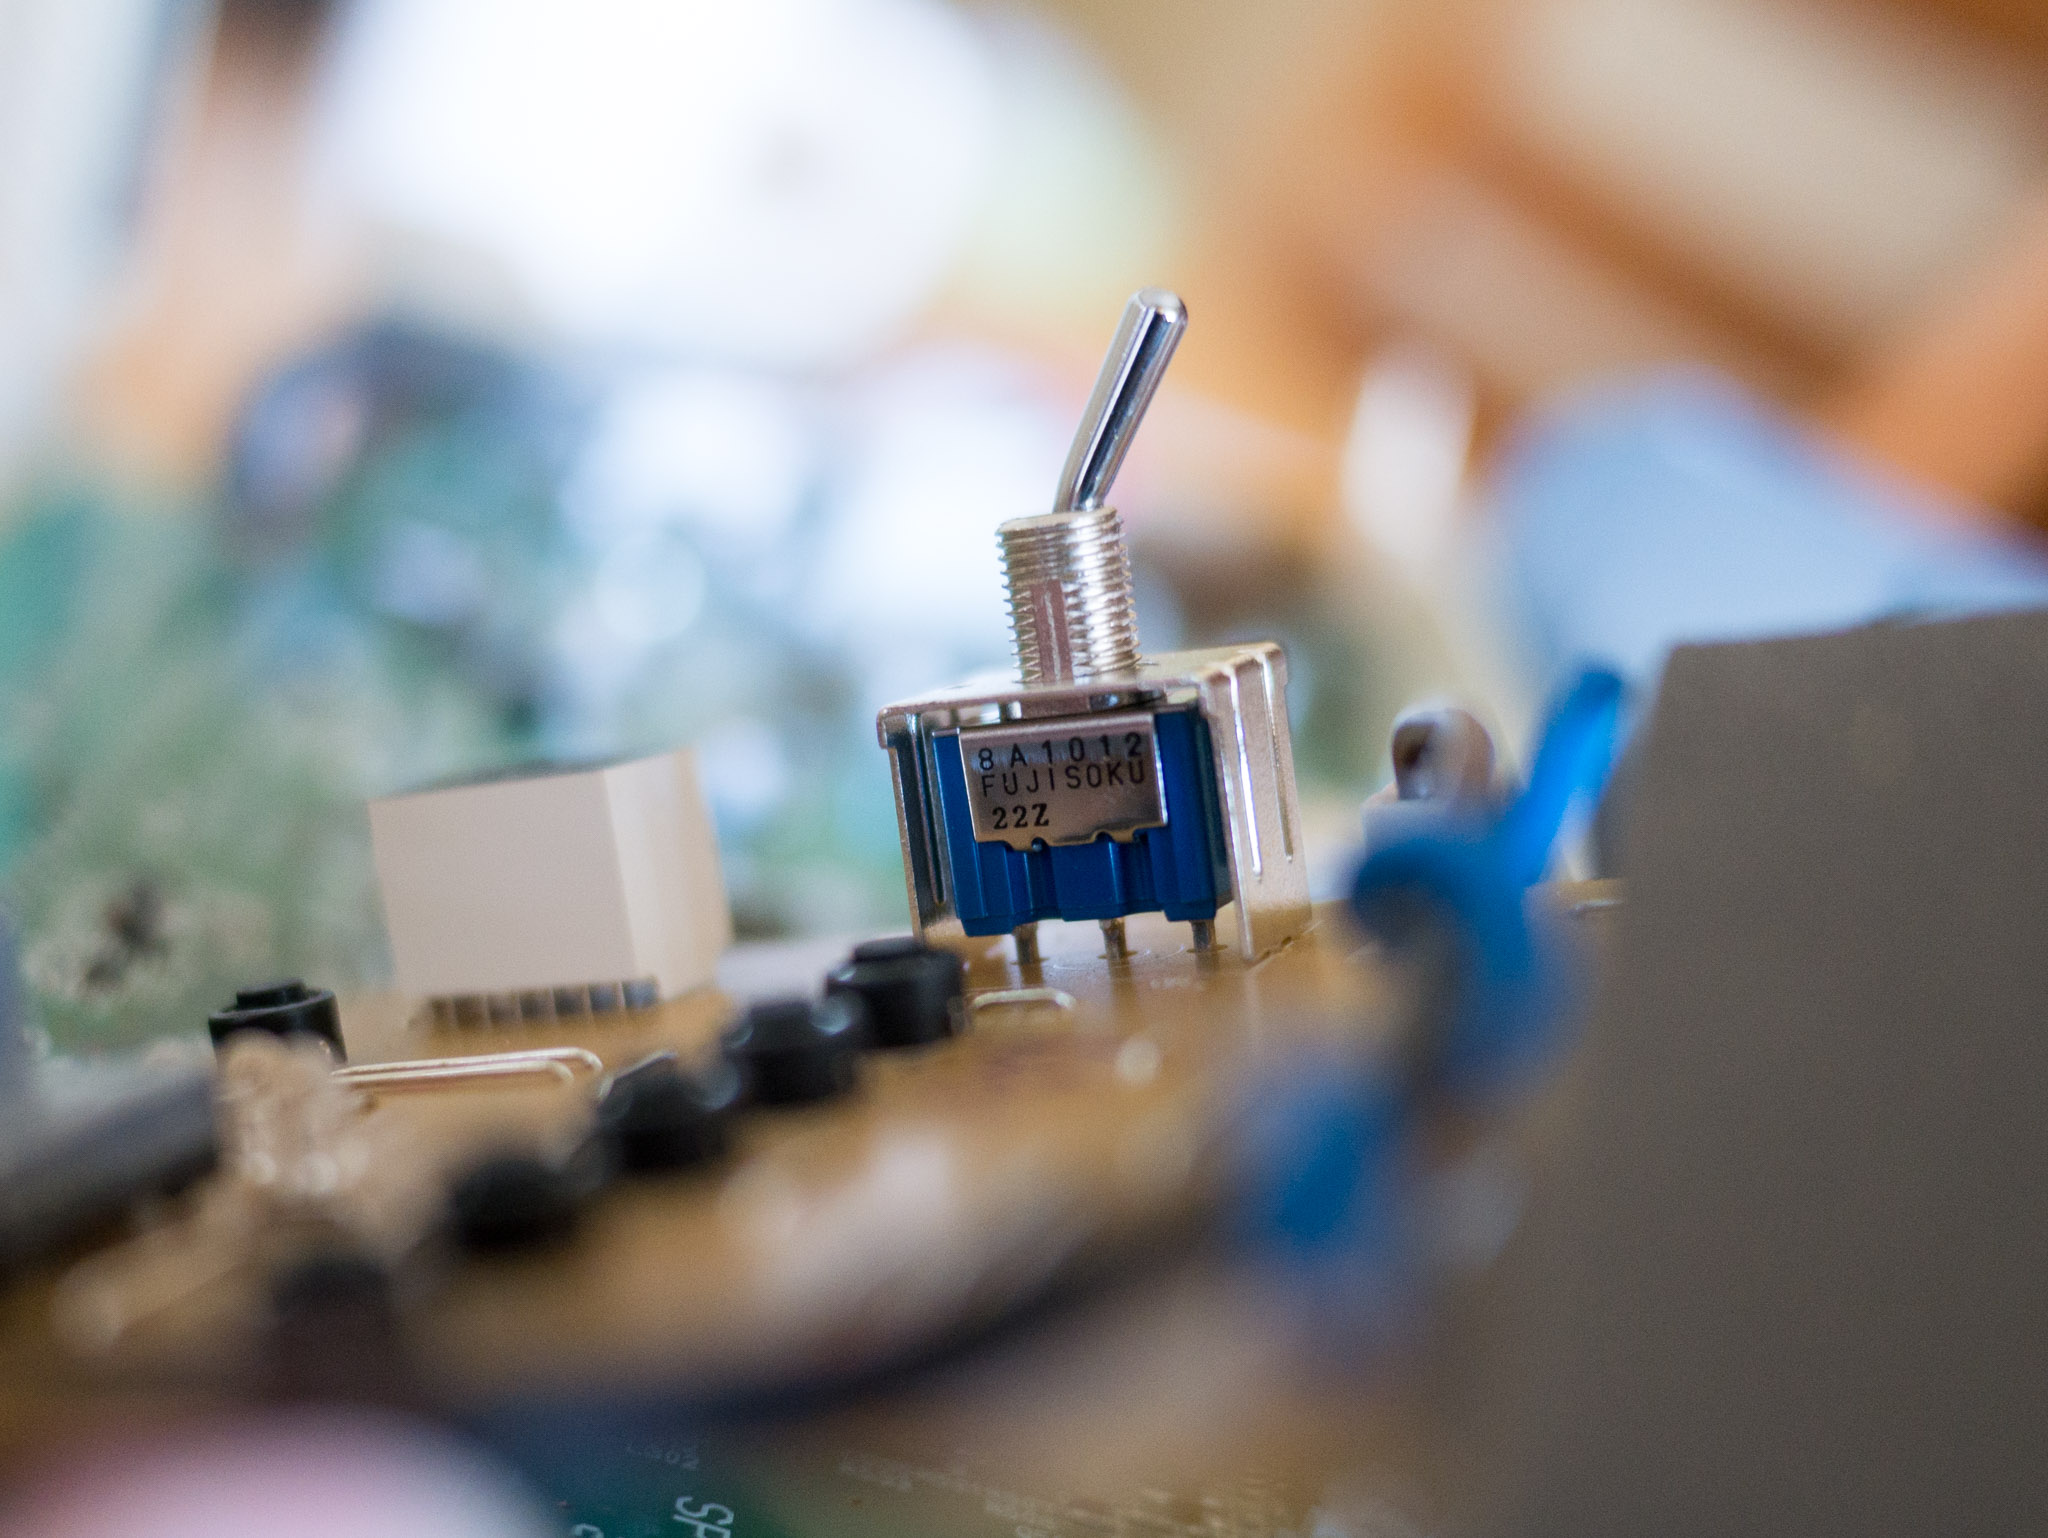

The switch is labelled as a Fujisoku 8a1012. I found the datasheet at Nidec Copal (archived here), and referenced the naming table on page 3 to determine that the 8a1012 is a 1-pole On-On standard toggle with PC Straight terminals, rated for 6A at 125V.
I found this exact part for $4.09 at Digikey (part #563-1629-ND). With shipping the total was $7.28, which is a bit spendy for such a simple switch. I wasted some time searching around for a comparable cheaper part, referencing the lug spacing and power ratings from the datasheet, but in the end just decided to play it safe and order the part from Digikey.
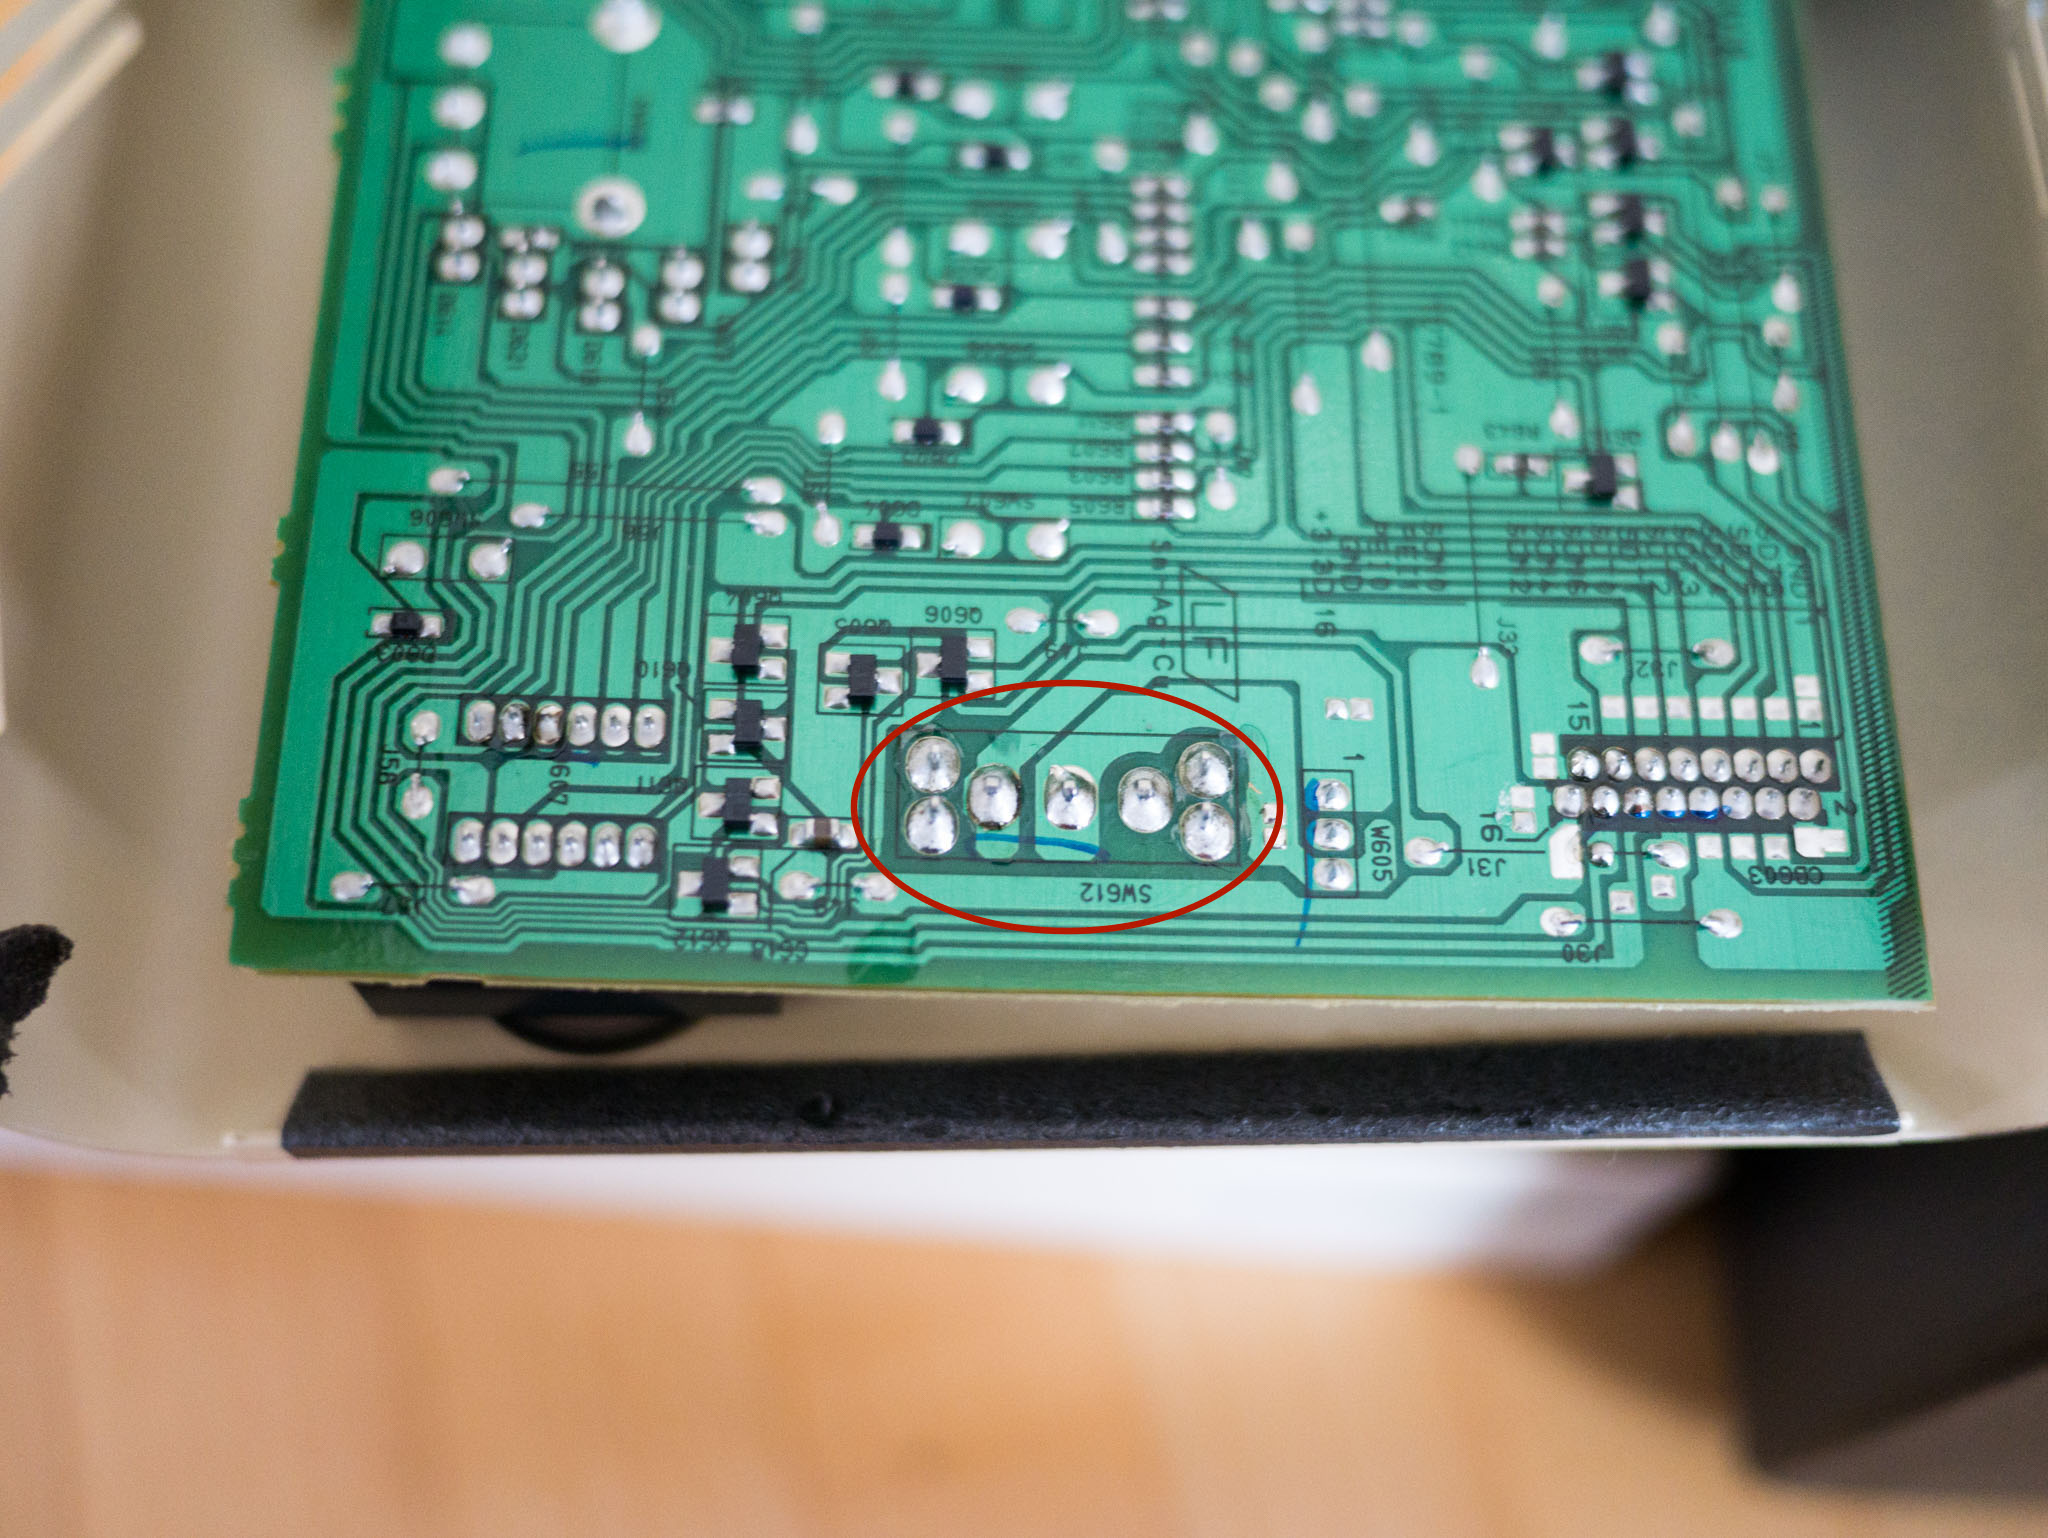
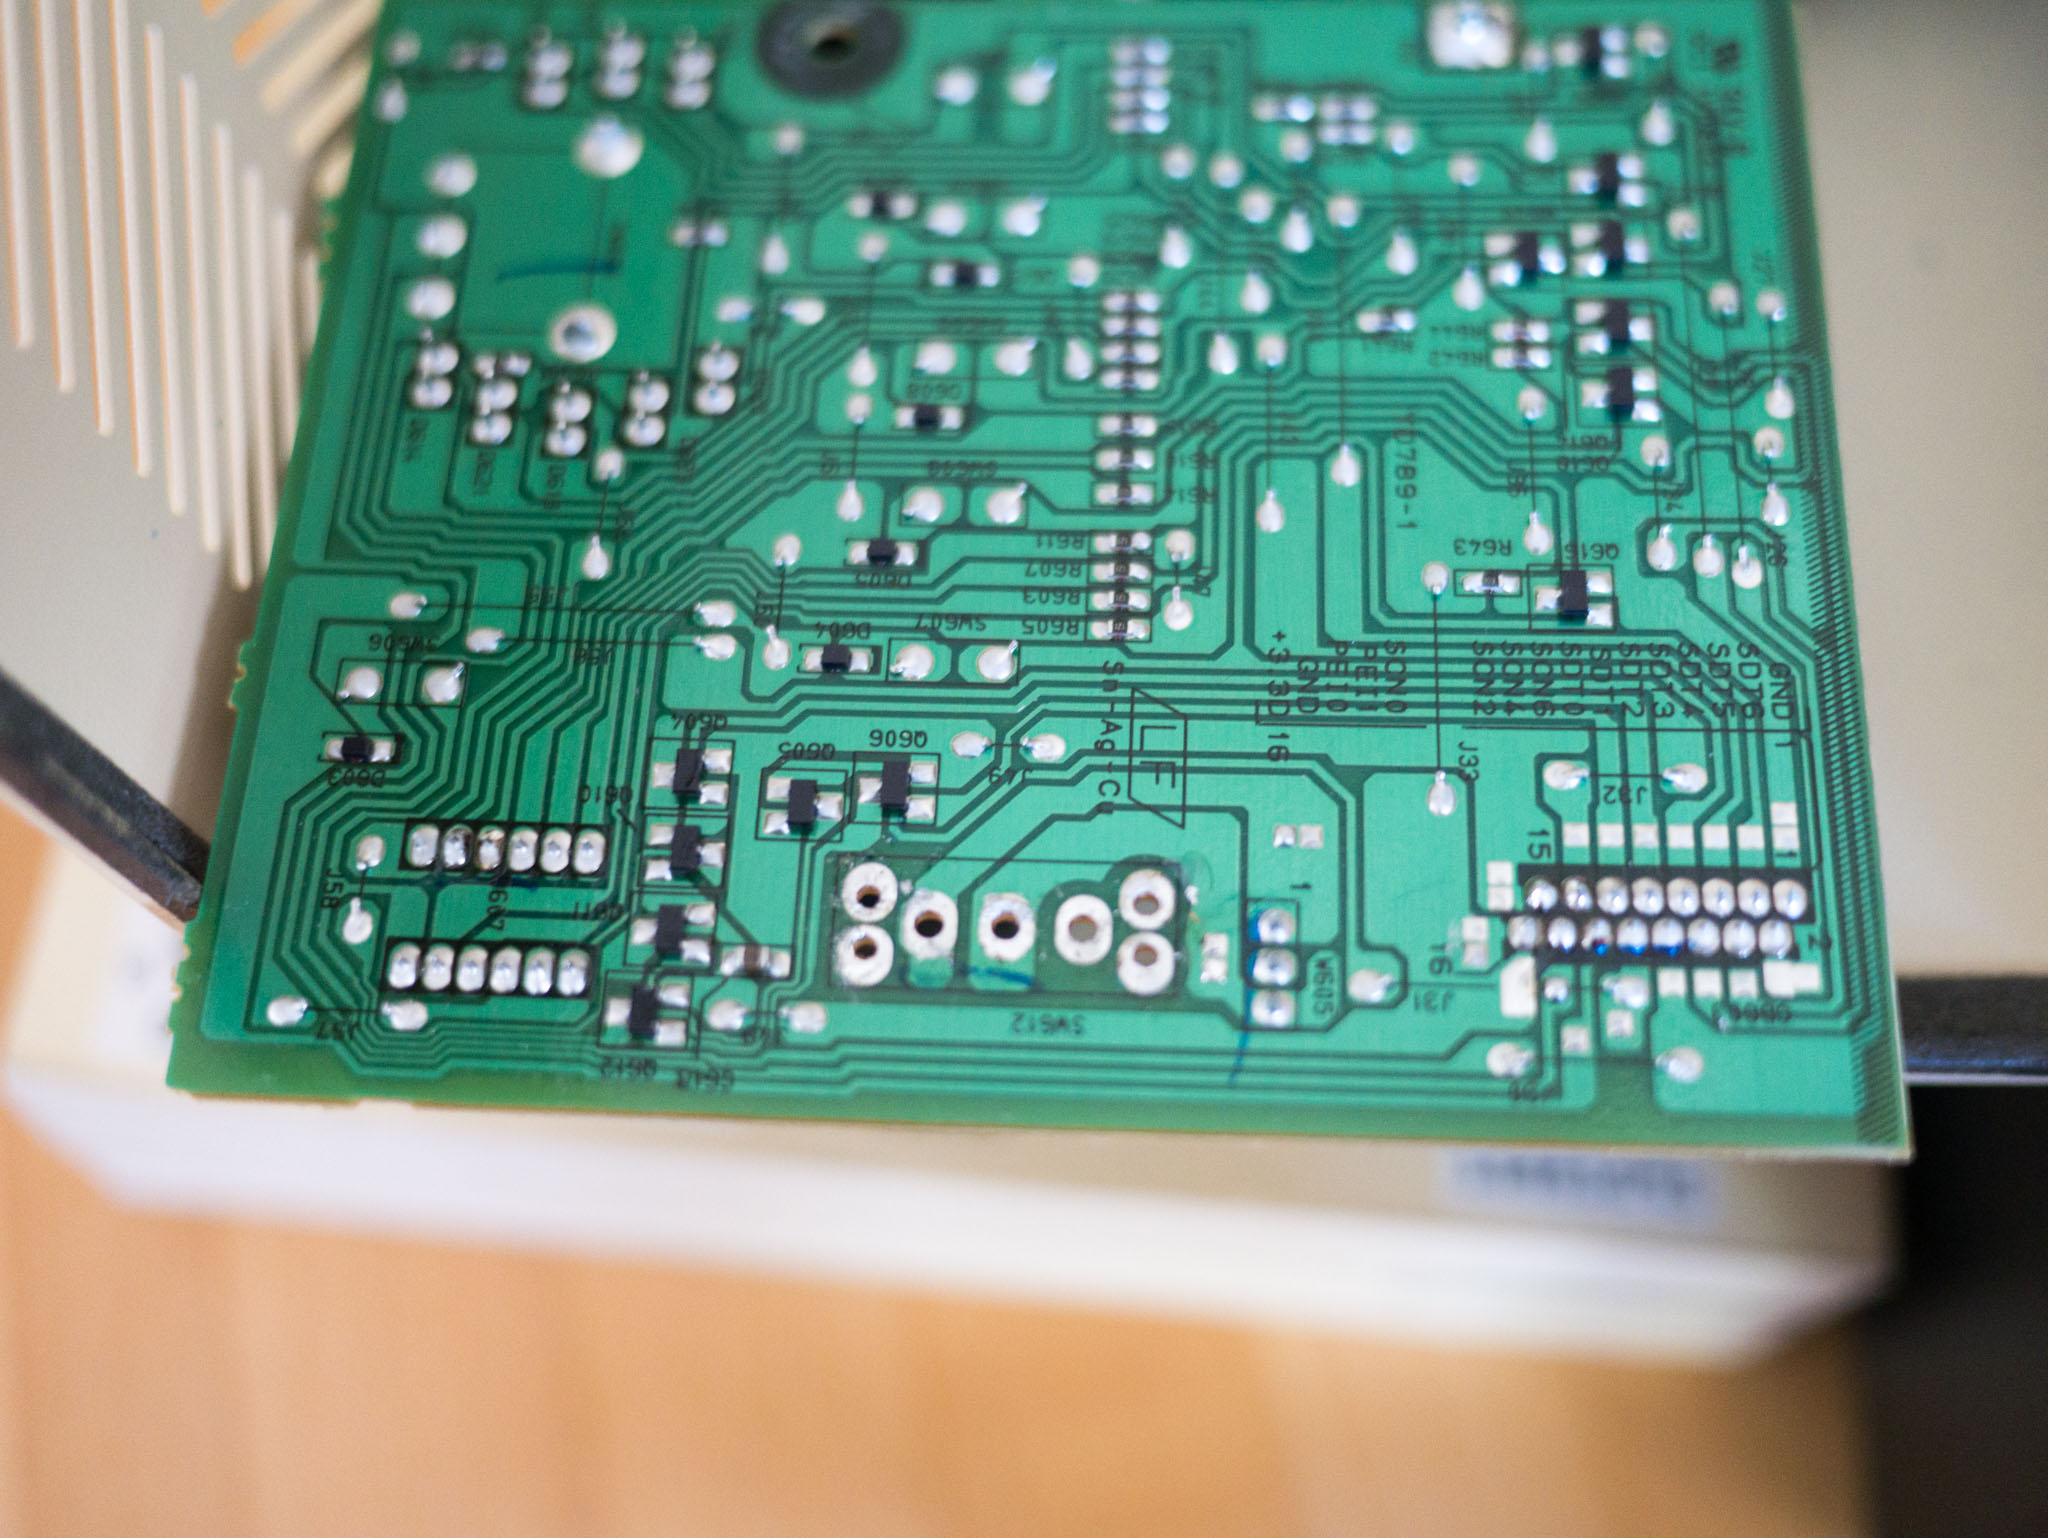
The switch is held in place by a retainer U-shaped clip which is soldered to the board. So there are six lugs that need to be desoldered, labeled SW612 on the PCB. I used my Weller WES51 soldering station, and a solder vacuum like this one.
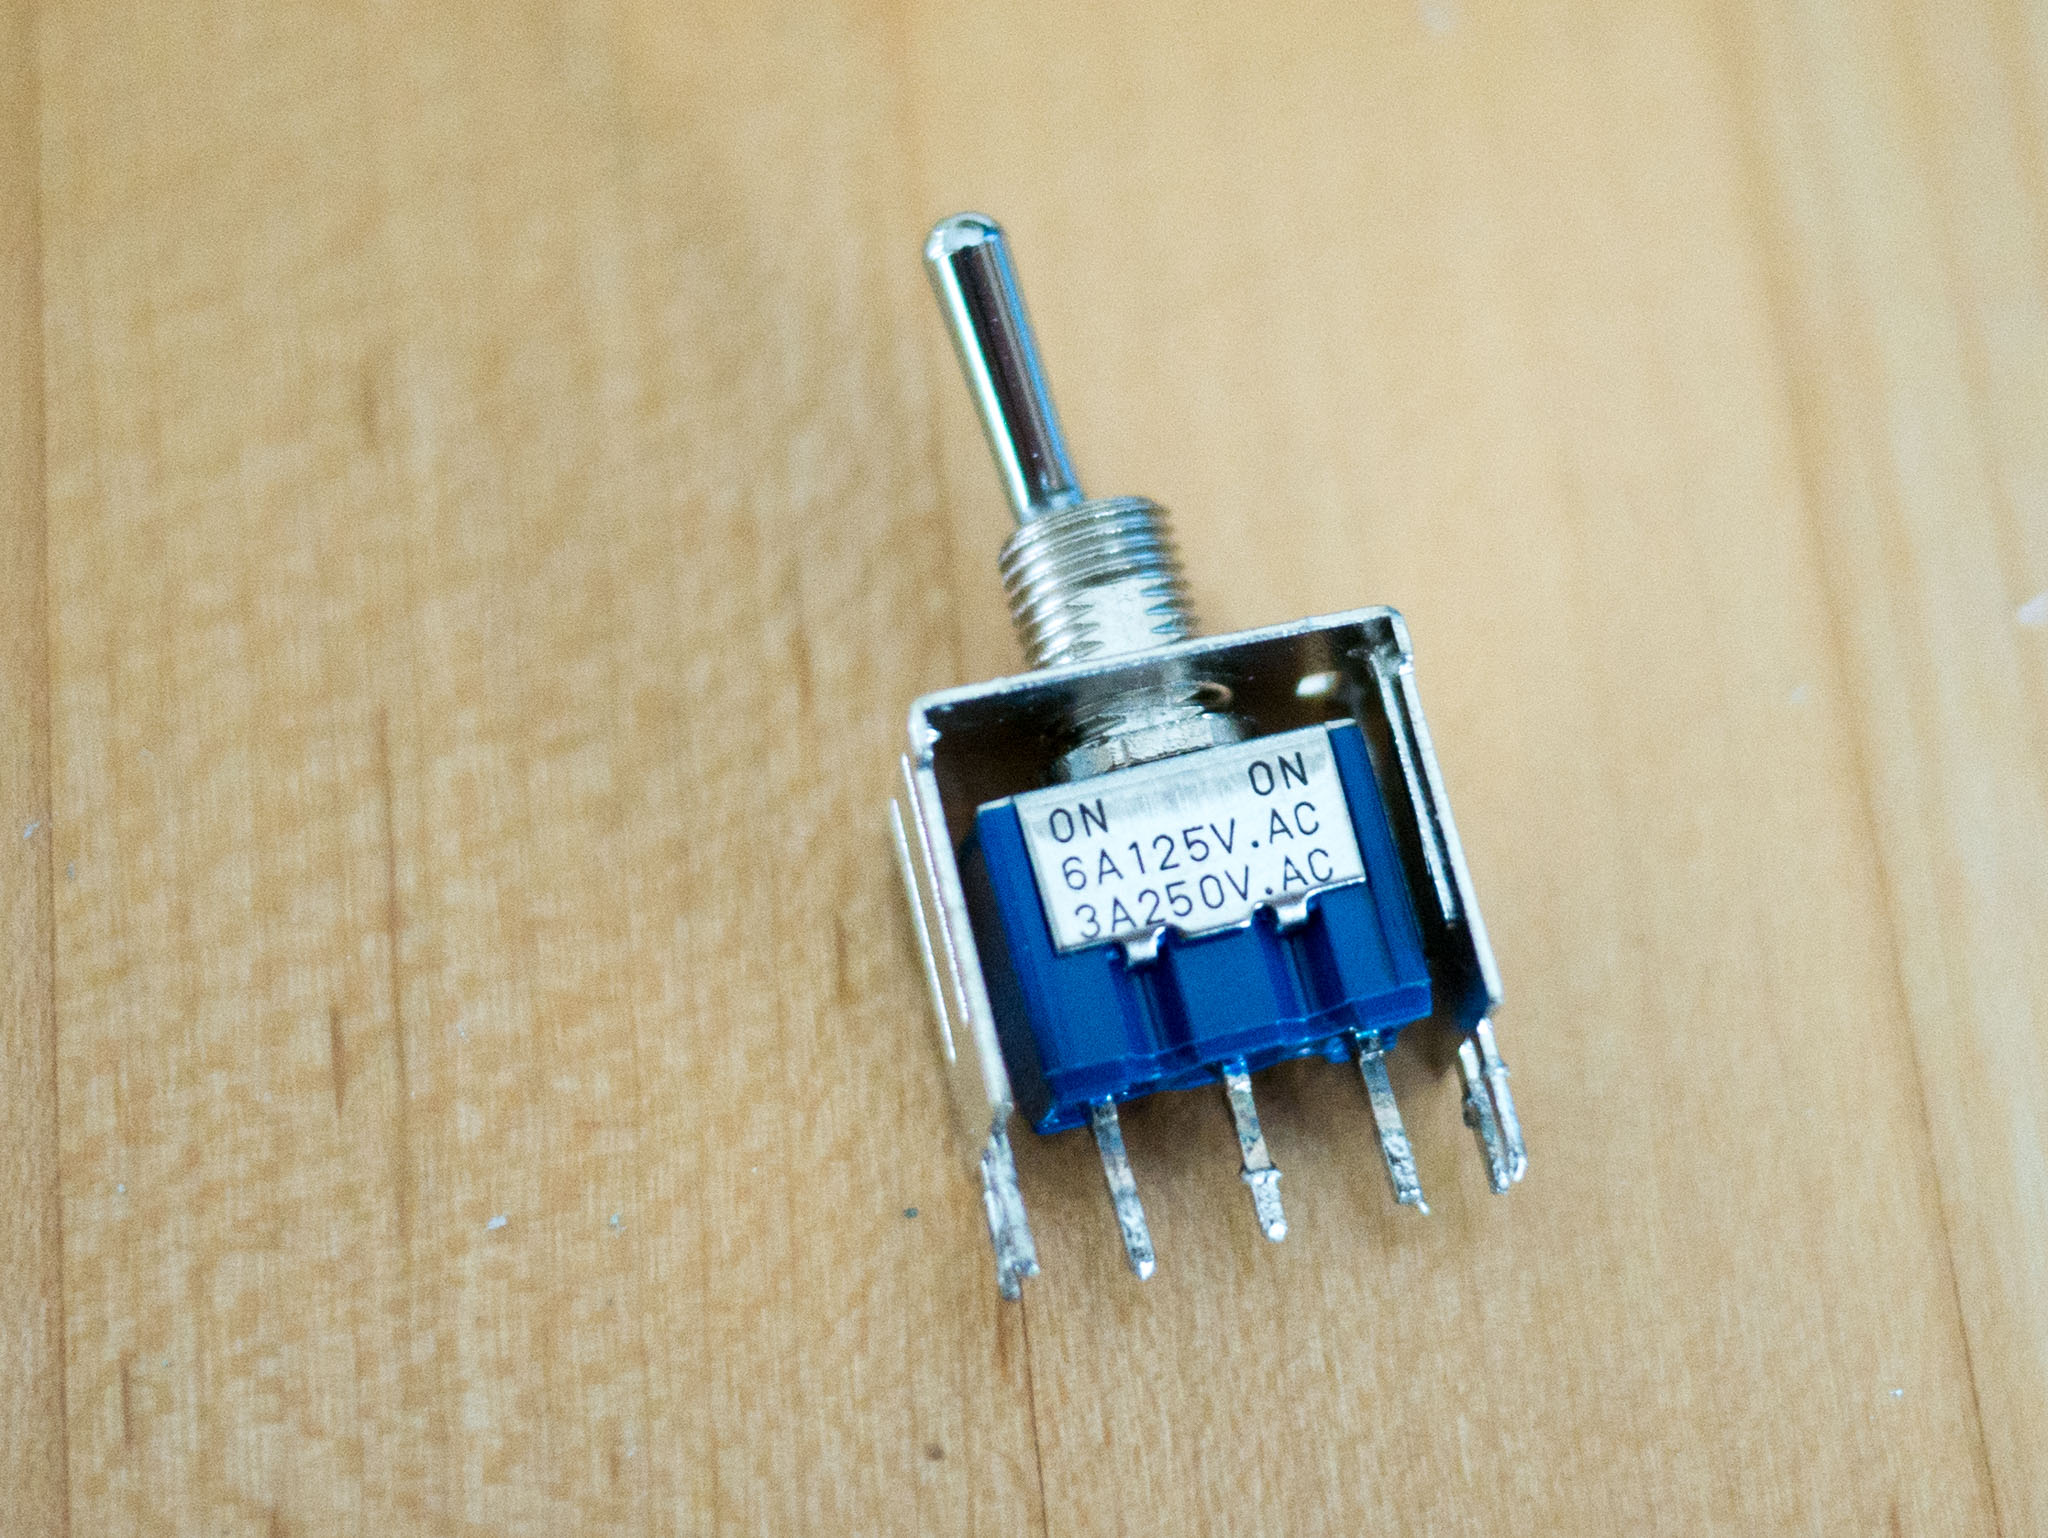
Fast forward a week, and the new switch had arrived from Digikey looking like a perfect match.

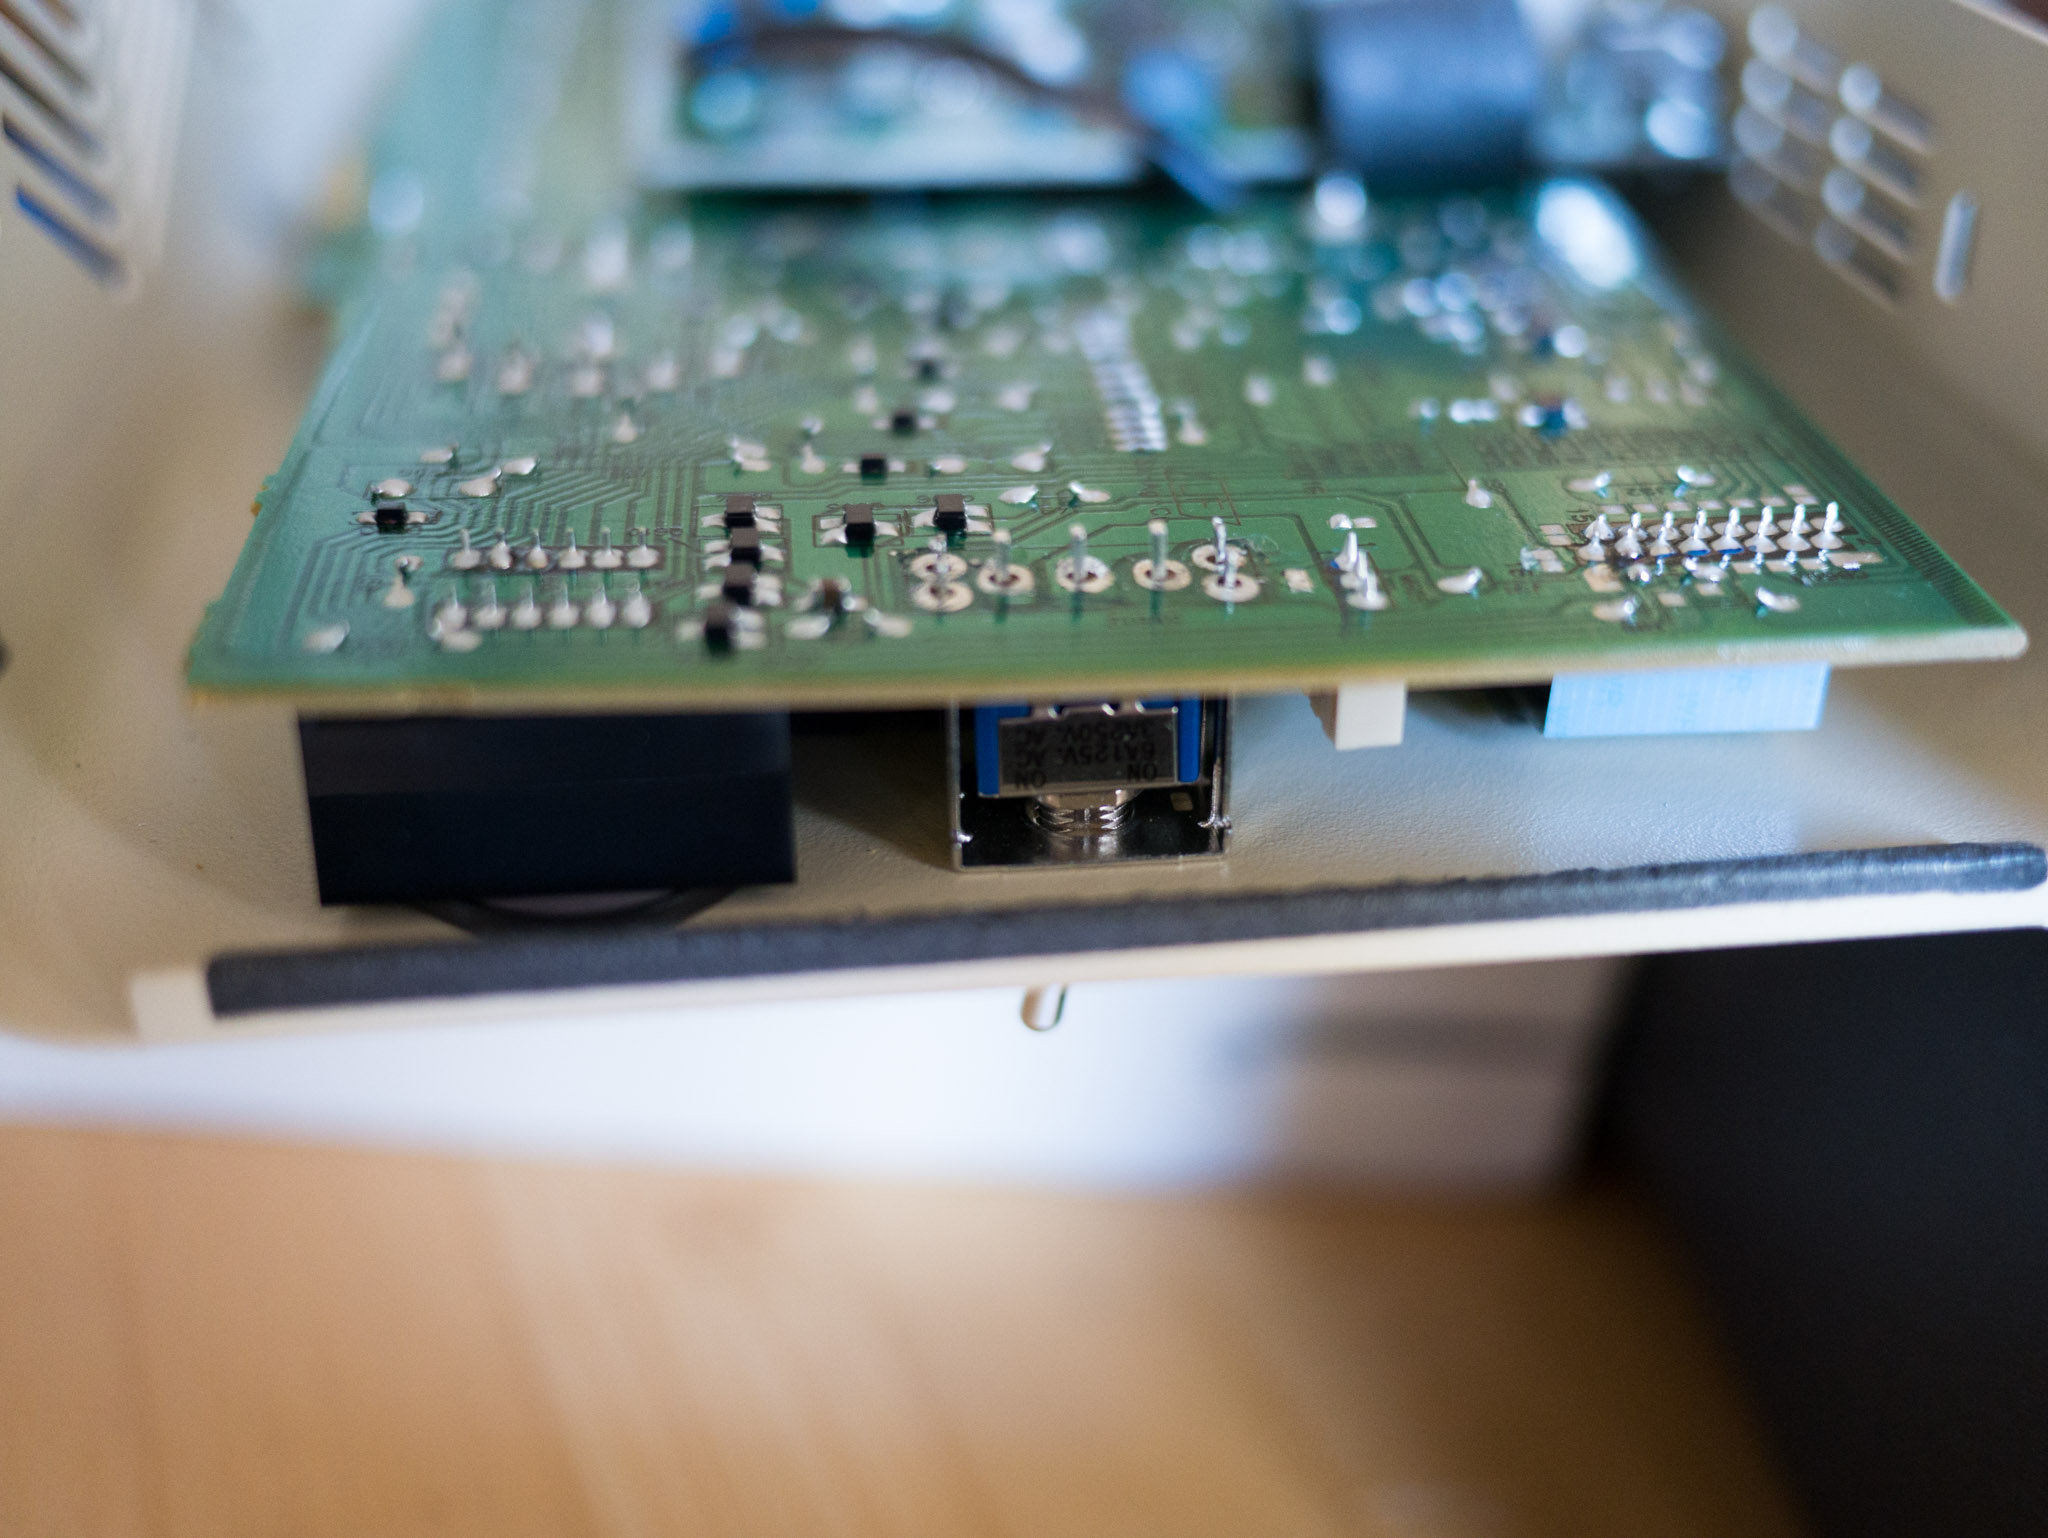
I referred back to my pictures from before I removed the switch, to ensure I was orienting the switch properly, and soldered it in.
With new switch soldered in place, I did a quick play-test to make sure it was all good, before reassembly. Check!
Time to put it all back together! I just reversed the original disassembly steps and referred back to my original pictures as necessary.
Mission accomplished!
Update 1/5/2022: here is the detailed THR10/THR5 parts list from Yamaha (thanks for sharing it, Paul!)
The Mysteriously Powerful Goof Off – Planet Z
November 3, 2017 @ 8:30 am
[…] my recent post, I repaired the power switch on my Yamaha THR10 practice amp after it took a spill from the back of […]
April 15, 2018 @ 3:16 pm
Thank you for the post! I just bought a used one that had a broken off power switch that was stuck in the “on” position. This was immensely useful in helping me fix it. Especially, being able to order the part before disassembling. Now I can finally update the firmware and run it on batteries. These little amps are awesome!
April 15, 2018 @ 4:10 pm
That’s great to hear, Tom. Enjoy that amp! -John
November 27, 2022 @ 11:03 am
Thank you for your Post! It saved me a bunch of time and frustration.
It amazed me product engineers never thought of protecting this switch.
I followed your instructions and additionally added some U-Shape Toggle Switch Guards.
November 29, 2022 @ 8:17 am
Smart idea to add switch guards!
September 13, 2018 @ 8:11 am
My son turned this thing over and broke it. I think I got to the part about getting the recessed nut out without your tutorial, but the rest helped me get past it all. I’ve never soldered before. Is this going to be a tough task to perform as a newbie to soldering? Thanks for the tips!
September 13, 2018 @ 9:44 am
This is not a super-difficult soldering job, but it may be tricky as your first time. I’d suggest watching some how-to videos, and experiment on something else first if possible.
-John
October 7, 2018 @ 11:23 pm
Great tutorial. Can I use another type of switch that is not so easy to break off?
October 8, 2018 @ 7:23 am
I don’t know what would be better. Your replacement would need to have the same size, switching polarity, pin spacing and A/C rating. Or it would need to be a bit smaller to leave you room to run wires from its pins to the PCB holes. Not sure it’s worth the trouble. Another option could be to make a mechanical cover for the switch- Something to protect it from a bump, like fit a short piece of clear plastic pipe or metal U bracket over the shaft (open at the top so you can still move the switch by reaching in), or superglue it on, or something like that. Good luck!
-John
December 30, 2022 @ 8:57 am
I bought a cheap 7-day rectangular plastic pill organizer at CVS, and cut the 1st compartment off with a utility knife, drilled a hole in the bottom of it, and then installed it under the switch retaining nut & washer. So the switch is now inside a little clear impact resistant plastic box with a pop up lid with an “S” for “switch” on top. Easy & just the right size: 7/8”wide x 1-1/4” long x 1” high.
December 30, 2022 @ 11:53 am
Nice hack with the Saturday/Sunday/Switch!
April 13, 2023 @ 6:53 pm
A sewing thimble / Finger protector for hand, works great as switch guard. You just flatten the curved tip and drill a hole in it and you have a nice and safe switch.
October 10, 2018 @ 3:00 am
Is this the same switch?
https://www.ebay.com/itm/5-Pcs-ON-OFF-ON-3-Terminals-Double-Pole-Dual-Throw-Toggle-Switch-6A-125V-AC-B5E1/253293990255?hash=item3af97f916f:g:6owAAOSwiONYN5Va
October 10, 2018 @ 8:39 am
No. Those are two-pole instead of one, on-off-on instead of on-on, and the lug spacing isn’t clear. See the spec for 8A1012 in the datasheet here: https://www.planetz.com/wp-content/uploads/2017/10/Fujisoku-8a.pdf
December 11, 2018 @ 5:27 am
Thanks! Helped me a ton.
I’m waiting for my 50 cent chinese duplicate switch which looked & measured exactly the same.
December 11, 2018 @ 7:49 am
Great! Hope the repair goes smoothly.
-John
December 12, 2018 @ 9:51 am
Can you @vuth post a link to your chinese duplicate?
December 14, 2019 @ 12:38 pm
Hi John, great guide, thank you!
I am trying to find a push button to replace that 8A1012-Z toggle switch with a stronger component (Yamaha actually did something similar with the new THR version: they replaced the toggle switch with a button). The problem is that it’s definitely HARD to find an item with the same specs. After a long research, these two buttons should be compatible:
* 8N1012-Z by Nidec Copal Electronics
* 8436A by Apem Inc.
Unfortunately, I wasn’t able to find them at an affordable price (best price: 8$ + 20 $ for shipping & handling to Italy; which is senseless to me), so eventually I haven’t tried them out.
To answer the question above by Reidar: it’s much easier to find a cheaper toggle switch, but pay attention to the specs. You can check out the M2012SS1A03 by NKK Switches or any other listed here: https://www.digikey.com/short/p1b3vj . In any case, I would buy the original switch, since it’s pretty cheap. It’s also possible to find similar switches on Aliexpress (or similar) with keywords like “3 Pin On-On SPDT Toggle Switch AC 125V/6A”, but I wouldn’t trust that specs that much…
Happy playing to everyone 😉
December 14, 2019 @ 1:08 pm
Thanks for the helpful feedback!
John
May 3, 2020 @ 8:49 am
My THR5A fell off an amp onto my Strat, breaking the switch and putting a nice ding in the guitar at the same time. Got the same replacement switch from digikey (about 10 bucks in total, received it quickly but they sent this dinky little switch in a really big box!) And now it’s working again. with the THR5 you have to remove the main board first to get access to the smaller board with the switch on it. Other than that your instructions are perfect for this amp also.
May 3, 2020 @ 12:47 pm
Sorry to hear about the dent in your Strat! But glad you fixed the amp. Thanks for the info on the differences for the THR5.
-John
May 4, 2020 @ 6:53 pm
Thank you. You helped me repair my desktop amp after a speaker fell on the switch. I ordered the same switch from DigiKey and it was only a few minutes to install. Very helpful post.
May 4, 2020 @ 8:47 pm
Great job Shawn! Thanks for the kind message.
-John
July 20, 2020 @ 1:30 pm
For me it was the tap tempo and tuner button that broke. I don’t even know why this happened and it is so useful.
July 20, 2020 @ 3:18 pm
Hey Erick- Hope you get it sorted out!
-John
July 28, 2020 @ 9:56 am
Actually yes, thank you. I just opened it and when I tested it being dissembled, it worked. Something was wrong maybe with the external button that connects with the actual button on the pbc board. I was prepared to desoldering and I’m glad I didn’t needed it. Thanks for encouraging us to solve this problems and to extend the use of this stuff. It’s a fun little amp.
July 28, 2020 @ 9:58 am
Great to hear! Thanks for following up, Erick.
December 22, 2020 @ 9:38 pm
Hi John. Thanks for the helpful column. My Yamaha THR Amp fell off the table with the AC Power cord plugged in and broke the 15v input jack. Do you know where I can get another jack? Or at least a fix to get it to work on batteries? Thanks! I’m at mkb4463@gmail.com.
December 23, 2020 @ 9:15 am
Hi Mike- I don’t know the specific part number. My approach would be first to search for a schematic or service manual online. And I’d disassemble the unit, and locate the part that needs replacing, and try to identify it by measuring, looking for a part number on it, etc. Then order a replacement from mouser, digikey or equivalent.
Good luck!
John
February 24, 2021 @ 10:20 am
Thank you thank you thank you This is a great tutorial. I followed your instructions and the little amp
is working again. Excellent job.
Paul
February 24, 2021 @ 10:38 am
Great to hear, Paul. Enjoy!
-John
July 6, 2021 @ 7:37 pm
Great content! I was actually searching for tact switch repair for my THR10C, I’m glad I came across your blog. Keep it up!
July 22, 2021 @ 3:56 am
I have a thr 10x the green distortion unit…and some how the electrical plug in came loose, and I used to just prop it up so it could get a connection, well me and a friend tore it apart thinking we could solder and repair it, which was a disaster, I still have the unit, and what like to repair it.
July 22, 2021 @ 9:07 am
Sorry to hear that! It’s a good idea to be slow and methodical during disassembly, taking pictures along the way, so you can get it back together when you’re done. I don’t know if my pics will help you with that, since I’ve never seen a thr10x. If you can get it back together, you might be able to send it into a Yamaha repair center?
December 28, 2021 @ 7:27 am
Are these switches of this size all interchangeable? Their lug spacing should be all the same shouldn’t they? Well anyway, I hope the short bat switch I got will fit.
December 28, 2021 @ 8:20 am
They are not all interchangeable. But, as long as you confirmed on the data sheet that the pin diameter, pin length, and pin spacing are the same, and the current and voltage rating match, you should be ok.
December 29, 2021 @ 11:02 am
Thanks so much for the useful article! On my Yamaha THR10 the “Amp” selector switch that lets you choose between “Clean,” “Crunch,” “Lead,” etc. has nearly stopped working. I have to spin the switch quite a few times to make the indicator light move. Do you have any idea what part number we might need to buy as a replacement?
December 29, 2021 @ 1:15 pm
Hi Paul-
I thankfully have not had to service the amp knob, so I don’t have that info for you. Your best bet is to open up the unit and expose that rotary encoder, and try to find a part number on it.
Good luck!
-John
January 4, 2022 @ 1:48 pm
Thanks for your quick response, John! No part number was visible, so I contacted Yamaha and they sent me a detailed parts list for the amp. The rotary encoder is part # WY111900, which has been discontinued and replaced by WY111901. They’ve offered to send me one for $6.02 CDN plus $20 shipping. I think I’ll go ahead and give it a try, since I don’t know of other ways to get this particular encoder. Your article gave us the confidence to attempt the repair, so thank you! Fingers crossed.
January 4, 2022 @ 5:46 pm
Hi Paul, Thanks for the update! Could you please forward me that parts list, and I’ll attach it to this post for anyone else who may find it useful.
Thanks again!
-John
January 5, 2022 @ 10:42 am
Sure — could you let me know where to send it? I don’t see a way to upload attachments here.
September 29, 2022 @ 9:00 am
Per errore ho aggiornato il mio THR5A con l’ultimo aggiornamento del firmware per THR5-THR10, solo dopo mi sono accorto dell’incompatibilità tra i due modelli. Ho cercato come ripristinare il THR5A ma non ho trovato nessuna informazione.
September 29, 2022 @ 9:25 am
I’m not sure how to reset it. Can you re-flash it with the THR5A firmware? I recommend you contact Yamaha technical support!
-John
October 1, 2022 @ 7:36 am
Grazie … ho provato a contattare Yamaha ma il firmware non è divulgabile; dovrei mandare il THR5A in assistenza ed il costo di ripristino, oltr le spese di spedizione, è di €50.
March 8, 2023 @ 12:01 pm
Really appreciate this site! I was about to ship it off to Yamaha
Any advice on a good site to purchase the power switch?
Also, are they they same for all models? I have the dark green one, the THR10X model
March 8, 2023 @ 12:33 pm
Hi Jake-
I bought the power switch at digikey part #563-1629-ND. I’m not sure if it’s the same on THR10X, but I expect so. Open it up and take a look before ordering.
Good luck with the repair!
-John
March 8, 2023 @ 1:22 pm
Thanks so much for your help John!! Let you know how it goes.
July 11, 2023 @ 1:19 pm
Well John, I think I fried the board that the powerswitch connects to. I was wondering if you could help me figure out the part number so I can order the board. It hasnt been easy to find.
July 13, 2023 @ 1:25 pm
uh oh! Unfortunately I don’t have that info. I guess you can further disassemble the unit until you can see a part number on the board- but I really have no idea if you’d be able to obtain a replacement. I guess you could try contacting Yamaha service.
Good luck!