How to organize and backup a Sony Vegas project
Updated 6/29/2011 with notes about the “Remove from Project and Delete Files” command
As I prepare and edit a video in Sony Vegas Pro, I tend to get a bit disorganized, bringing in source pictures, video and animations from various places on my hard disk. I’m especially bad about saving pictures temporarily on my desktop.
Sometimes, I do a bazillion takes of voiceover audio, and end up with countless unused wave files in the project.
So, in order to eliminate those unused takes, and to consolidate the files into a single location, ready to be backed up, here’s what I do.
First, Make a Copy of The Project
Before continuing, save a uniquely named copy of the project so that you can use it later in the final step for deleting all the mess. Choose Save As from the File menu, or just make a copy from Windows Explorer.
Removing Unused Media From Project
To remove audio and video clips which are referenced by the project but no longer used (e.g. discarded audio or video takes):
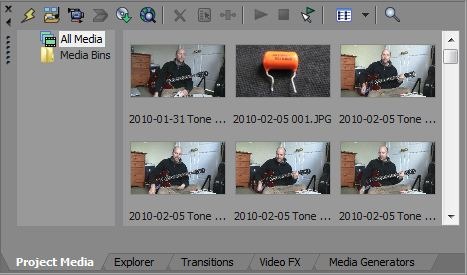
 Open the Project Media tab in the Sony Vegas project window.
- Click on the Lightning Bolt in the Tool Bar

- All unused media will be removed from the Project Media folder (but will not be removed from the hard disk)
Consolidating Source Files to a Single Folder

To consolidate all source files from wherever they may be on your hard disk to a single location, choose Save As from the File menu.
In the file dialog, create a new folder and type the name of the project to save. Then click on the checkbox Copy Media With Project.
This will cause all the files used by the project to be copied to the new folder location.
 When you click Save, you will be offered the option of trimming the source media to the actually used portions. This is useful is you’re trying to conserve disk space or fit onto a backup DVD, or if you’re 100% you’ll never want to edit this project again. If you’re not sure, it’s best to copy the full source media, just in case there’s some source material you might need later.
Purging Those Unused Files

First, really truly confirm that your project media was copied to the new location, and the new project works.
Now, go back to that project copy you saved as the first step. This is the original project with all the cruft in it. In the Project Media tab, select all the files using Control-A. Then right-click and choose Remove from Project and Delete Files. Careful, because this will delete all the original material, both the used and unused resources. This is OK of course, because you just consolidated all the used media into a new folder.
If there’s any other media associated with the project that is no longer needed (maybe you had previously hit that lightning bolt to remove unused media?), then you’ll have to remove them manually in Windows Explorer. Generally I accomplish this by simply deleting my original project folder (which is where all those voiceovers were sitting). Then I also have to go delete the junk I left on my desktop and anywhere else too.
Back It Up
Now to back up the project, you just need to copy the new consolidated folder onto a DVD (or wherever you want.)
help needed tidying up file structure - Video Editing Forums: Digital Director
May 24, 2010 @ 5:35 pm
[…] all the media used in the project (into a folder you specify) There's a good description here How to organize and backup a Sony Vegas project :planet z What's not quite described here is the first step is to save your project as […]
July 22, 2010 @ 12:00 pm
Hey Thanks so much for this useful tip 😀
December 18, 2010 @ 8:44 pm
Thanks mate , you saved my life 🙂
February 16, 2012 @ 8:12 am
Good ideas, thanks. I wonder if it would be easy to combine this into a macro or script. I end up with media files scattered all over the place as well (often because I forget to change the project properties so my recorded WAV files get saved in the folder of the previous project), I’m looking for a quick way to just move all the project’s files into the same folder as the VEG file. This works but is a little clunky. I think other software have Consolidate Files commands, hopefully Vegas will add this eventually.
February 16, 2012 @ 8:16 am
Hey Steve,
Nice idea- I would *love* a “Consolidate Files” command!
-John
September 9, 2014 @ 3:34 am
Hey This is very useful tips…. Thanks a lot!
August 11, 2015 @ 8:26 am
Thank you so much for taking the time to post this! The information is very helpful and much appreciated!
March 23, 2018 @ 4:04 pm
Why in vegas 15 does it save a new veg file from the same first one. Everytime i work on an existing project everytime i select save a new veg file thumbnail is created. Why?
March 23, 2018 @ 4:28 pm
Hi Howard. Sorry, I can’t help. I switched to Final Cut Pro X a few years ago. I saw that Magix bought Vegas from Sony- you might try contacting their customer support.
-John